Magento 2 Product Reviews Manual
Introduction
This user guide is designed to cover installation and configuration of the Product Reviews & Reminders extension for Magento 2.
The module allows the store admins to expand the default Magento 2 product review functionality by introducing new blocks and brings the possibility to automatically collect customer feedback with the help of popup and email reminders.
This user guide is the primary documentation for the extension. Following the release of new features, this guide is continually updated with new topics, changes to the existing content, and improvements in the way the material is presented.
We strive to provide the highest quality documentation and welcome your feedback. If you have any comments or suggestions about this guide, please email us at marketingteam@mageworx.com.
The email address provided is for the documentation feedback only. If you have a technical question, please contact the support team.
Requirements and Installation
Product Reviews supports Open source (Community), Commerce (Enterprise) editions and Commerce cloud. The current version of the Magento installed on your website can be found in the lower right corner of any backend page.
Advanced Product Options has 3 separate ways of installation:
1) Copy the code (ready-to-paste package);
2) Use MageWorx Repository;
3) Use local Composer.
Note
The extension uses the free 3rd party library to enable certain features:
1) Maxmind GeoIP to determine a country of your visitors/customers, who submit the reviews and display the country near their reviews.
2) In order to enable feature feature to detect a type of visitor's device (mobile, tablet or desktop) to correctly target the reviews reminders campaigns., the free 3rd party library should be installed via the composer:
composer require matomo/device-detector
GeoIP Database
The GeoIP extension is used to determine a country of your visitors/customers, who submit the reviews and display the country near their reviews. This module uses free MaxMind GeoIP database.

Due to new MaxMind policy, you should register an account at MaxMinde site and generate a new license key for GeoLite2 database and enter it in the "MaxMind License Key" field.
Note
You should use the following option, when generating the licence key: "Generate a license key and config file for use with geoipupdate versions older than 3.1.1. This key will be stored in an unhashed format."
Note
You should save the configuration after adding a license key first. If you click the Update Database button before saving the configuration, it will update the database of the previous type with the previous license key.
Change review settings
To adjust review settings, you can specify them regarding different products. It allows you to display a customer location for the reviews, to enable different options, to add a reward message, and to let your customers add their images to the reviews.
Before you begin
Log in to your admin panel
Procedure
- In the left pane, on the STORES tab, click Configuration.
- UnderMAGEWORX, select Extended Review
- To adjust image settings, under Review Settings do the following:
- In the Display Images field, select No if you do not want to display images.
- In the Allow Images Uploading field, select No if you do not want to allow the customers to add their images to the reviews.
- In the Image Size, px field, set the width size of the thumbnails related to the review images.
- To define location settings, do the following:
- In the Display Location field, select Nob> if you do not want to display a customer location for the reviews.
- In the Location Template field, define how the location is shown on the front-end.
- To enable or disable different features, do the following:
- In the Enable “Helpful” field, select No if you do not want to add the helpful option for each review.
- In the Enable Recommend Option field, select No if you do not want to enable “I recommend this product” features for the reviews.
- In the Enable Pros & Cons field, select No if you do not want to enable the functionality to highlight the main product advantages and disadvantages.
- In the Enable “Verified customer” field, select No if you do not want to enable the functionality to add the verified customer label to the reviews.
- In the Add privacy check-box field, select No if you do not want to add the required consent check box to add a new review flow.
- To define message settings, do the following:
- In the Message field, specify a text, which should appear near the consent check box.
- In the Add points message field, select No if you do not want to add a reward message.
- In the Reward Message field, specify a text, which should appear near the Add review button.
- In the upper-right corner, click Save Config.
Change filter settings
To adapt toolbar settings, you can choose the available filters and sorting for your customers.
Before you begin
Log in to your admin panel
Procedure
- In the left pane, on the STORES tab, click Configuration.
- Under MAGEWORX, select Extended Review.
- Under Toolbar Settings, in the Filter Options field, select the available filters for your customers.
- In the Sorting Options field, select the available sorting for your customers.
- In the Default Sort Byfield, specify the default sort.
- In the Default Sort Direction field, specify sort direction. By default, it is set to Sort Ascending.
- In the Reviews per Page field, enter the number of reviews that will be displayed per page.
- In the upper-right corner, click Save Config.
Manage reviews
To control the content of your reviews, you can edit reviews blocks that the extension ads
Before you begin
Log in to your admin panel
Procedure
- In the left pane, on the MARKETING tab, click All Reviews.
- In the Reviews grid, next to the review you wish to edit, click Edit.
- Edit the selected review blocks as required.
Create an email reminder
To automatically send emails with a request to review an offering, set up email reminders. You can configure email templates and adjust creatives as you wish.
Before you begin
- Log in to your admin panel
- Design an email template *(default Magento 2 settings)*
Procedure
- In the left pane, on the **MARKETING** tab, click **Manage Reminders**.
- In the upper-right corner of the **Reminders** grid, click the **New Email Reminder** button to create a new email reminder. The **Reminders** grid is empty during the initial setup.
- Under **Reminder Information**, do the following:
- In the **Name** field, enter the email reminder name. It is visible in the backend only.
- In the **Store Views** box, specify one or more store views to send email reminders to. You can press and hold the ctrl key to select multiple options. Select **All Store Views** to enable the functionality for all store views.
- In the **Customer Groups** box, specify one or more customers to send the email reminder to. You can press and hold the ctrl key to select multiple options.
- In the **Sent In, days** field, specify the number of days after the order completion when the email reminder should be sent.
- In the **Personal Email Template** box, click the Use config arrow to select a specific popup email reminder template. By default, the **We want to hear YOU!** template is selected.
- In the **Priority** field, specify email reminders priority. If several email reminders match the same condition, the one with higher priority gets sent.
- In the **Status** box, click the Disable arrow to enable or disable the popup reminder. By default, it is set to Disable.
- In the upper-right corner, click the **Save Reminder** button.
Manage email reminder settings
If you want to make any changes in email reminders, you can make it by adjusting settings. It allows you to specify email senders and to set an email template.
Before you begin
Log in to your admin panel
Procedure
- In the left pane, on the **STORES** tab, click **Configuration**.
- Under **MAGEWORX**, select **Review Reminder**.
- Under **Email Reminder Settings**, in the **Enable** field, select **No** if you want to disable email reminder.
- In the **Email Sender** field, select the email sender from the list.
- In the **Review Reminder Email Template** field, choose the email template. By default, it is set to “We want to hear YOU!”.
- In the upper-right corner, click **Save Config**.
Create and design a popup reminder
To collect customer feedback on the storefront, set up popup reminders. You can adjust popup creatives as you wish. You can select one of the pre-defined templates or create a design of your choice.
Before you begin
Log in to your admin panel
Procedure
- In the left pane, on the **MARKETING** tab, click **Manage Reminders**.
- In the upper-right corner of the **Reminders** grid, click the **New Popup Reminder** button to create a new popup reminder. The **Reminders** grid is empty during the initial setup.
- Under **Reminder Information**, do the following:
- In the **Name** field, enter the popup reminder name. It is visible in the backend only.
- In the **Store Views** box, specify one or more store views to display the popup in. You can press and hold the ctrl key to select multiple options. Select **All Store Views** to display popup reminders in all store views.
- In the **Customer Groups** box, specify one or more customers to display the popup to. You can press and hold the ctrl key to select multiple options.
- In the **Display After, days** field, specify the number of days after the order completion when the popup reminder should be displayed.
- In the **Display On Mobile** field, use the toggle to enable popup reminders on mobile devices.
- In the **Priority** field, specify display priority of popup reminders. If several popup reminders match the same condition, the one with higher priority gets displayed.
- In the **Status** box, click the Disable arrow to enable or disable the popup reminder.
- Under **Design**, do one of the following:
- In the **Content** box, click the **Show / Hide Editor** button, and then insert the HTML code of your own popup reminder design.
- On the right, click the **Templates** button to select one of the pre-built templates, and then proceed to step 5.
- Do the following:
- Click the option button of your choice, and then click the **Load Template** button to edit the template. You can click **Cancel** to return to the **Design** settings.
- In the **Content** box, edit the content of the popup reminder as you wish. You can use the standard editor or click the **Show / Hide Editor** button to edit the HTML tags.
- In the upper-right corner, click the **Save Reminder** button.
Manage popup reminder settings
If you want to make any changes in popup reminders, you can make it by adjusting settings. It allows you to set products count for a popup.
Before you begin
Log in to your admin panel
Procedure
- In the left pane, on the **STORES** tab, click **Configuration**.
- Under **MAGEWORX**, select **Review Reminder**.
- Under **Popup Reminder** Settings, in the **Enable** field, select **No** if you want to disable popup reminder.
- In the **Max Products Count for Popup** field, define the number of products count for a popup.
- In the upper-right corner, click **Save Config**.
Set UTM parameters
To track customers’ engagement, you can add UTM parameters to links and change them.
Before you begin
Log in to your admin panel
Procedure
- In the left pane, on the **STORES** tab, click **Configuration**.
- Under **MAGEWORX**, select **Review Reminder**.
- Under **UTM Params**, in the **Add UTM Params** field, click **Yes** if you want to add UTM parameters.
- Fill in the **UTM Source**, **UTM Medium**, **UTM Campaign**, **UTM Term**, and **UTM Content** fields.
- In the upper-right corner, click **Save Config**.
Edit or delete a review reminder
To adjust the settings of one or more previously created popup and email reminders, make corrections as required.
You can delete or mass delete review reminders, apply filters to find a required review reminder, or drag-and-drop the columns to better organize the Reminders grid.
Before you begin
Log in to your admin panel
Procedure
- In the left pane, on the **MARKETING** tab, under **Review Reminders**, click **Manage Reminders**.
- In the **Reminders** grid, do one of the following:
- To mass edit review reminders, proceed to step 3.
- To edit the content and settings of a specific review reminder, proceed to step 4.
- To delete one review reminder, proceed to step 5.
- To mass delete review reminders, proceed to step 6.
- Do the following:
- Next to the reminders you wish to mass edit, select the check boxes, and then click the **Actions** arrow under the grid with the list of reminders. Click **Edit**.
- Do one of the following:
- To mass edit review reminders names, in the **Name** column, enter the new variable, and then click **Apply**.
- To mass edit the number of days after which the review reminders should be displayed/sent, in the **Period** column, enter the new number, and then click **Apply**.
- To mass edit the priority of the review reminders, in the **Priority** column, enter the new number, and then click **Apply**.
- To mass edit the priority of the review reminders, in the **Priority** column, enter the new number, and then click **Apply**.
- To mass disable or enable review reminders, in the **Status** column, click the **All** in Column arrow, and then select **Enabled** or **Disabled**. Click **Apply**.
- Do the following:
- Next to the reminder you wish to edit, in the **Action** column, click the Select arrow to see more options. Click **Edit**.
- Adjust the selected reminder as you wish.
- In the upper-right corner, click the **Save Reminder** button.
- Do the following:
- Next to the reminder you wish to delete, in the **Action** column, click the Select arrow to see more options. Click **Delete**.
- On the popup, do one of the following:
- Click **OK** to delete the reminder.
- Click **Cancel** or close the popup to return.
- Do the following:
- Next to the review reminders you wish to mass delete, select the check boxes, and then click the **Actions** arrow under the grid. Click **Delete**.
- On the popup, do one of the following:
- Click **OK** to delete the reminder.
- Click **Cancel** or close the popup to return.
Manage unsubscribed customers
To track customers who opt to unsubscribe from review reminders, overview the unsubscribed customers list. You can manually add customers to the list when required or following a request.
Before you begin
Log in to your admin panel
Procedure
- In the left pane, on the **MARKETING** tab, under **Review Reminders**, click **Unsubscribed Clients**.
- In the **Reminders** grid, do one of the following:
- To manually unsubscribe a customer, proceed to step 3.
- To delete one unsubscribed customer, proceed to step 4.
- To mass delete unsubscribed customers, proceed to step 5.
- Do the following:
- In the upper-right corner of the **Unsubscribed Clients** grid, click the **New Unsubscribed** button.
- In the **Email** field, enter the customer email you wish to unsubscribe, and then click the **Save Unsubscribed** button.
- Do the following:
- Click Delete in the **Action** column next to the selected email address.
- On the popup, do one of the following:
- Click **OK** to delete the reminder.
- Click **Cancel** or close the popup to return.
- Do the following:
- Next to the emails you wish to mass delete, select the check boxes, and then click the **Actions** arrow under the grid with the list of email addresses. Click **Delete**.
- On the popup, do one of the following:
- Click **OK** to delete the reminder.
- Click **Cancel** or close the popup to return.
Manage action logs
To overview any interactions of the customers with email and/or popup reminders, use the Log grid. It allows you to apply filters and quickly overview time-stamped information about all the set reminders, i.e., actions, customer emails, back-end reminders names, email templates used, and more.
Before you begin
Log in to your admin panel
Procedure
- In the left pane, on the **MARKETING** tab, under **Review Reminders**, click Logs.
- In the **Log** grid, do one of the following:
- To overview a specific log entry, proceed to step 3.
- To mass delete log entries, proceed to step 4.
- To delete all the log history that is older than 60 days, proceed to step 5.
- To overview a specific log entry in more detail, click the corresponding field.
- Do the following:
- Next to the log entries you wish to mass delete, select the required check boxes, and then click the **Actions** arrow under the grid. Click **Delete**.
- On the popup, do one of the following:
- Click **OK** to delete the reminder.
- Click **Cancel** or close the popup to return.
- Do the following:
- In the upper-right corner of the **Log** grid, click the **Run Cleanup** text
- On the popup, do one of the following:
- Click **OK** to delete the reminder.
- Click **Cancel** or close the popup to return.
Configuration
On the Configuration page, you can manage review and reminder settings. To have access to all these options, you have to sign in.
Extended review
Under extended review, you can adapt review and toolbar settings, set them to your needs and preferences. Otherwise, you can set them by default.
Review reminder
Here you can adjust email and popup reminder settings, enable and disable them at any time. It also allows you to add the following UTM parameters and track the performance of review reminders:
- **UTM Source** is the variable that allows you to track where the traffic originated from.
- **UTM Medium** is the variable for tracking the type of traffic the visitor originated from.
- **UTM Campaign** is the variable that allows you to track the performance of a specific campaign.
- **UTM Term** is the variable for tracking which keyword term a website visitor came from.
- **UTM Content** is the variable that helps you track which link was clicked if you have multiple links pointing to the same URL.
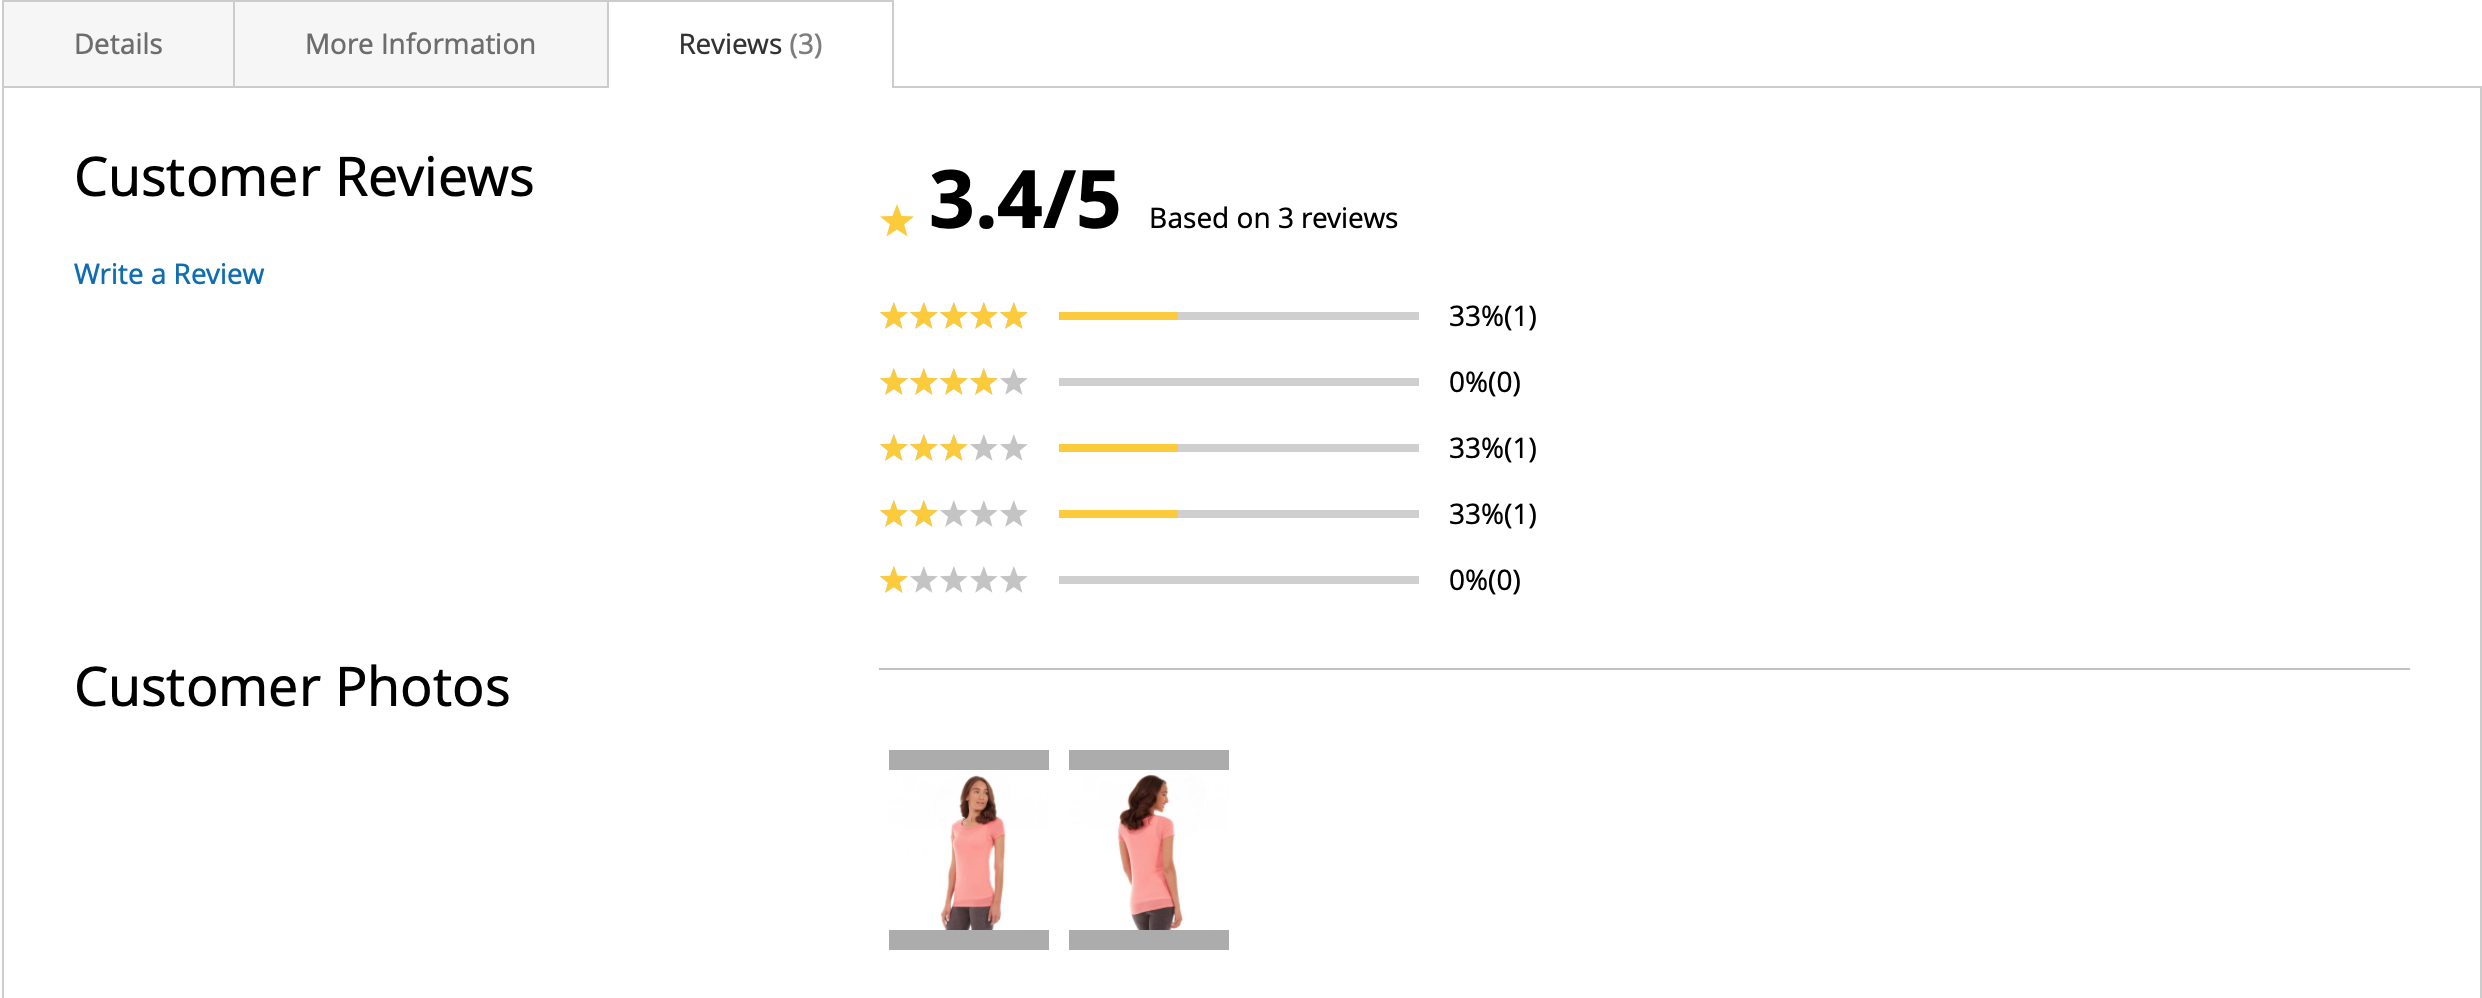
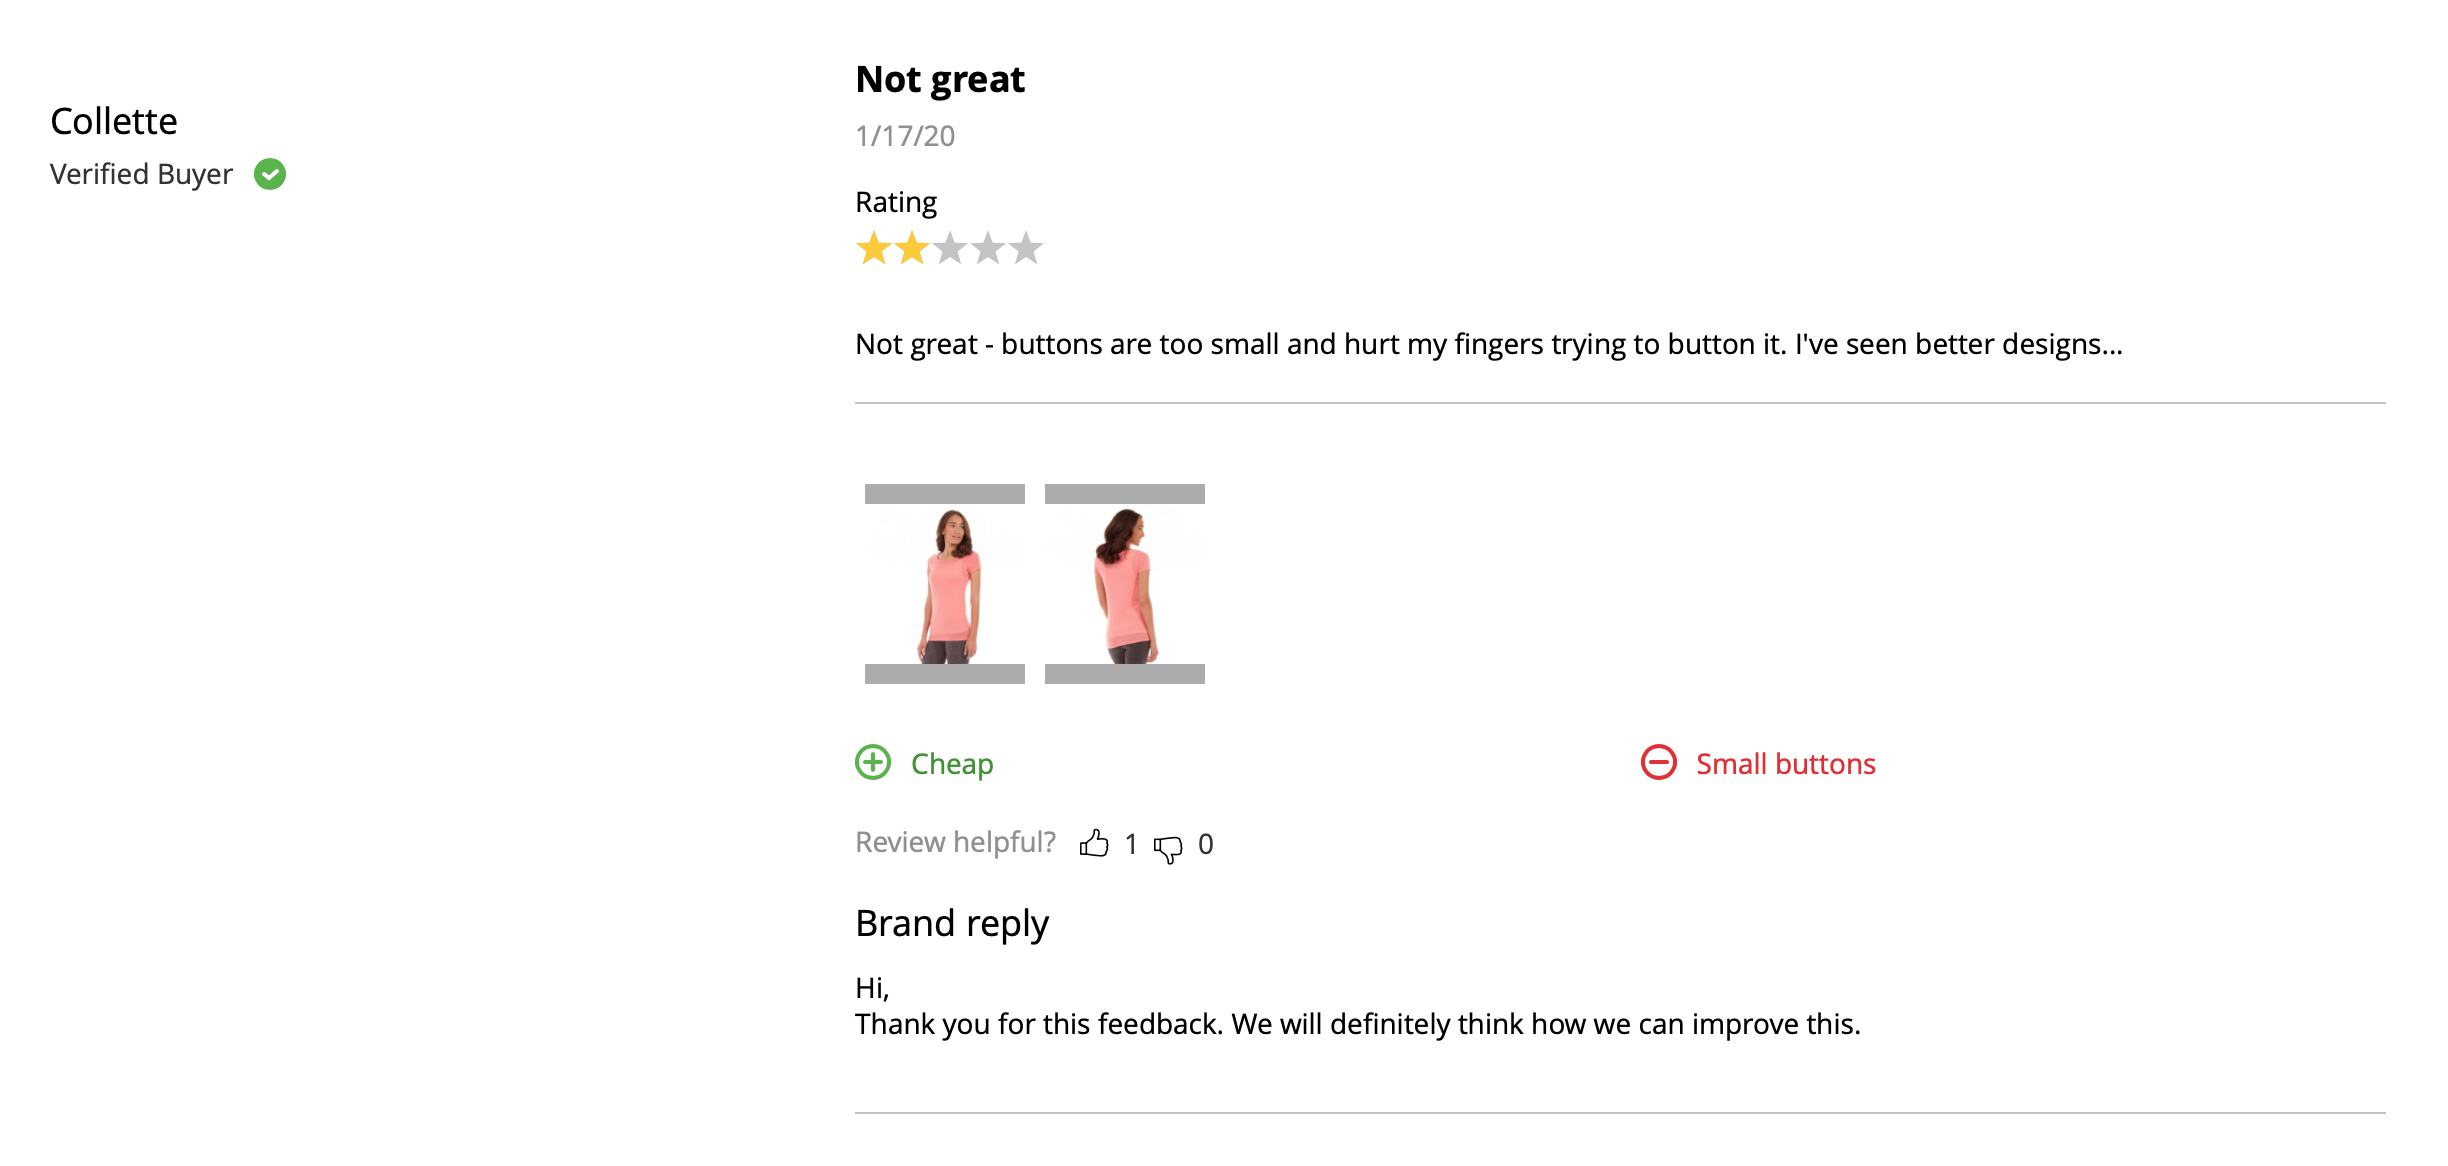
Front-end
See examples from the front-end.
Reviews
Reviews summary
Review
Pop-up reminder

Hyvä theme
The extension out of the box has the integrations with Hyvä theme:
Note
The free compatibility addon must be installed. See this link for more details.
Got Questions?
Need help with the extensions? Feel free submit a ticket from https://www.mageworx.com/support/
Mageworx offers outstanding services developing custom-tailored solutions for Magento platform to attain your eCommerce objectives. Our professional impassioned team provides profound and custom oriented development of your project in a short timeframe.