Magento 2 SEO Suite Ultimate Manual

Introduction
SEO Suite Ultimate extension is designed to increase site visibility of a Magento-based websites in the search and reduce search engine optimization workload. With this SEO toolkit, the merchants can create quickly optimize large amounts of meta data with advanced SEO templates for product/category pages; easily generate HTML and XML sitemaps, implement hreflang tags, build well-planned internal linking structure and do a lot more essential SEO activities.
Requirements and Installation
SEO Suite Ultimate supports Open source (Community), Commerce (Enterprise) editions and Commerce cloud. The current version of the Magento installed on your website can be found in the lower right corner of any backend page.
SEO Suite Ultimate has 3 separate ways of installation:
1) Copy the code (ready-to-paste package);
2) Use MageWorx Repository;
3) Use local Composer.
Configuration
Log into the Magento Admin panel and go to STORES ⟶ Configuration ⟶ MAGEWORX ⟶ SEO
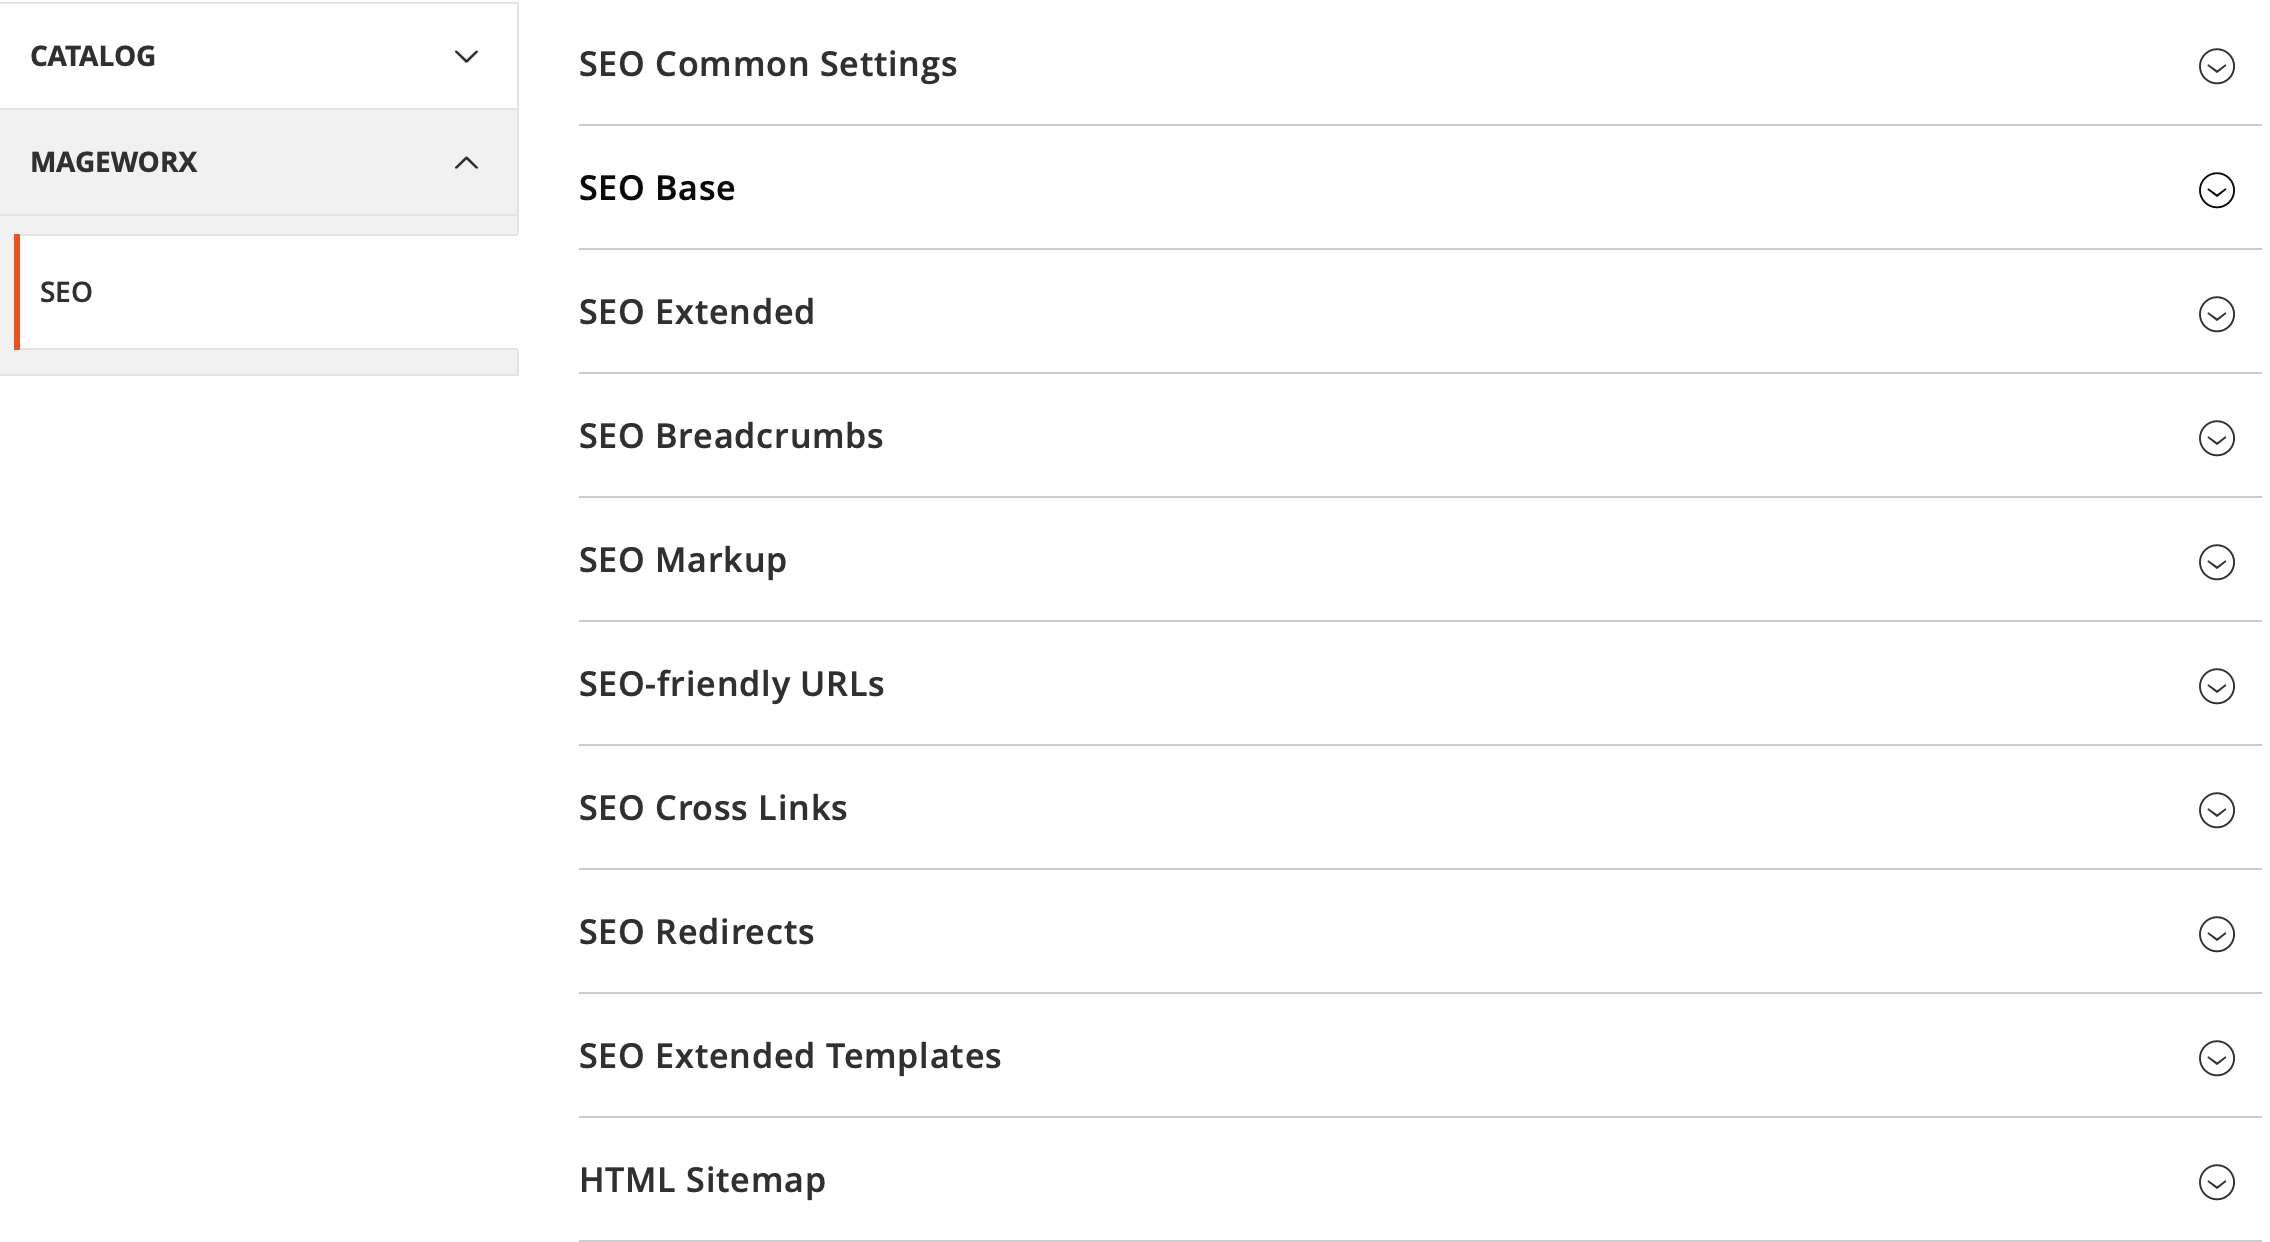
From here, the store owners can manage all the main extension settings. The extension consists of several separate submodules that will be described in the corresponding sections of this guide. For your convenience, you can select the module you need to configure from the right navigation menu and set it up according to your requirements.
SEO Common Settings
The settings in this section allow you to set the max length for
- Meta title
- Meta description
- Meta keywords
- H1 tag
- URL path
If specified, these values will be used by our SEO Suite to limit the max length of these properties for our SEO reports.
Note
These settings do not limit these properties physically on the front-end.
SEO Base
Log into the Magento Admin panel and go to STORES ⟶ Configuration ⟶ MAGEWORX ⟶ SEO. Select the first SEO Base tab.
Meta Robots Settings

- NOINDEX, FOLLOW Robots Meta Header for Pages Without Content - this setting allows you to set NOINDEX,FOLLOW meta robots tag to selected pages. It helps to hide the pages without valuable content from being indexed by the search engine bots.
- NOINDEX, FOLLOW Robots Meta Header for Additional Pages - this setting allows you to set NOINDEX,FOLLOW meta robots tag to any custom pages not mentioned in the setting above. You can either use the URL parts or action names to add the pages here.
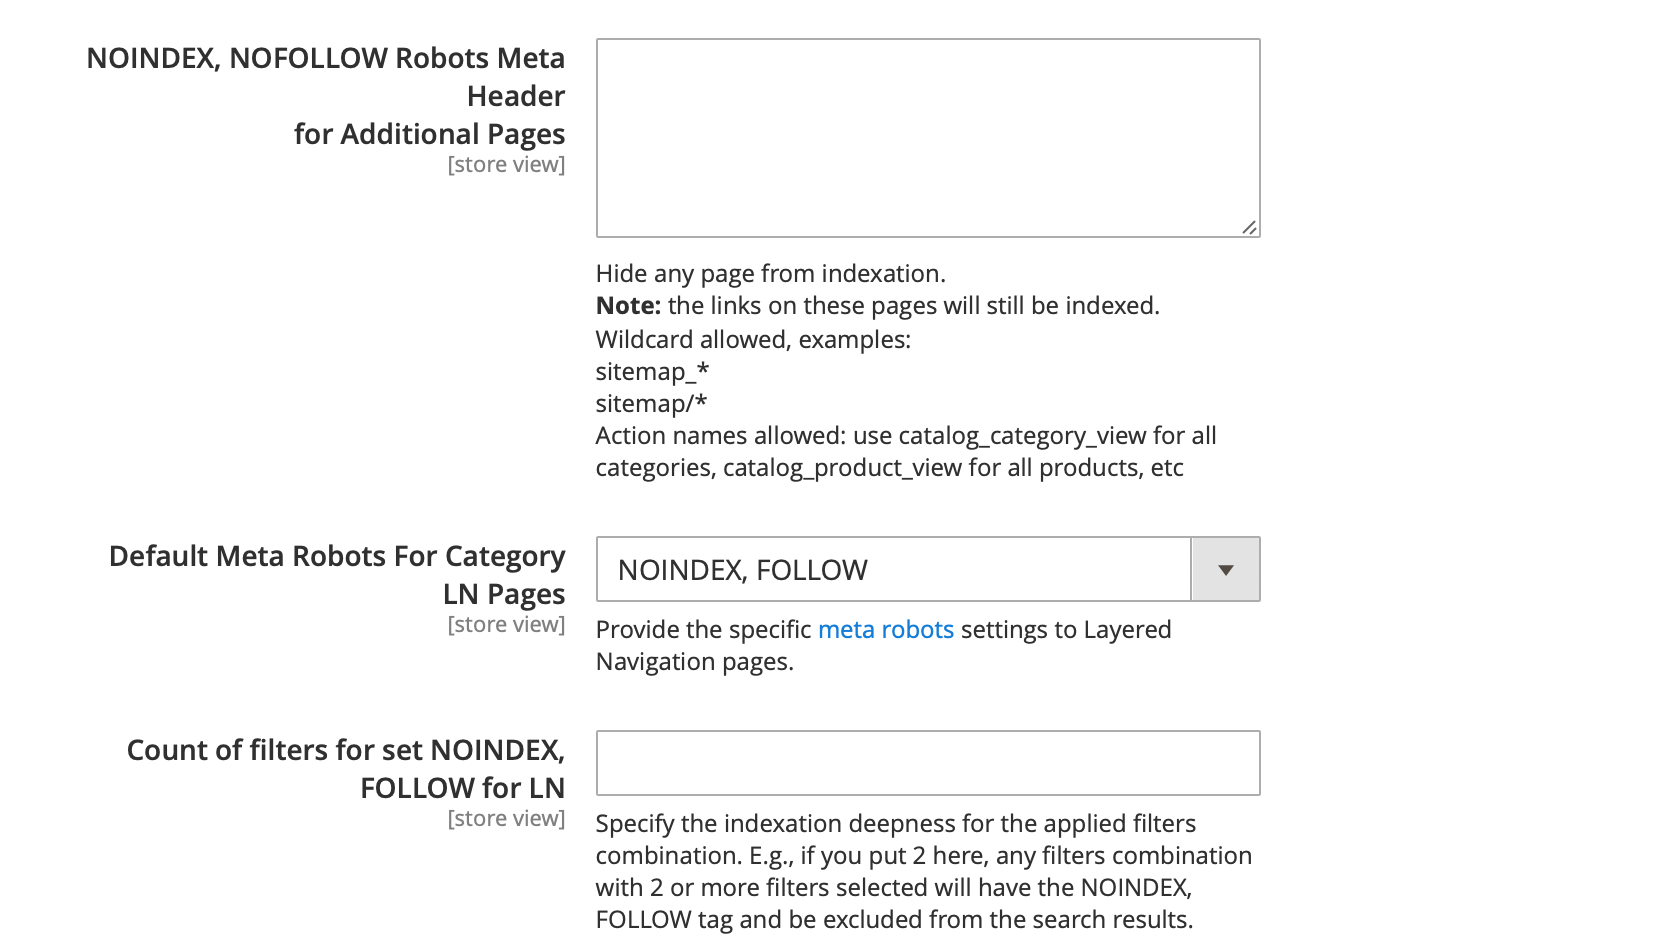
- NOINDEX, NOFOLLOW Robots Meta Header for Additional Pages - this setting allows you to set NOINDEX,NOFOLLOW meta robots tag to any custom pages not mentioned in the setting above. You can either use the URL parts or action names to add the pages here.
- Default Meta Robots For Category LN Pages - this setting lets you to set the default meta robots tag for the layered navigation pages. It might be helpful if you need to set NOINDEX,FOLLOW tag globally for all LN links at once.
- Count of filters for set NOINDEX, FOLLOW for LN - this setting defines a number of applied filters in the layered navigation to set specific meta robots tag. Example: if you set 2 here, all LN URLs with 2 and more applied filters will have NOINDEX,FOLLOW tag automatically.
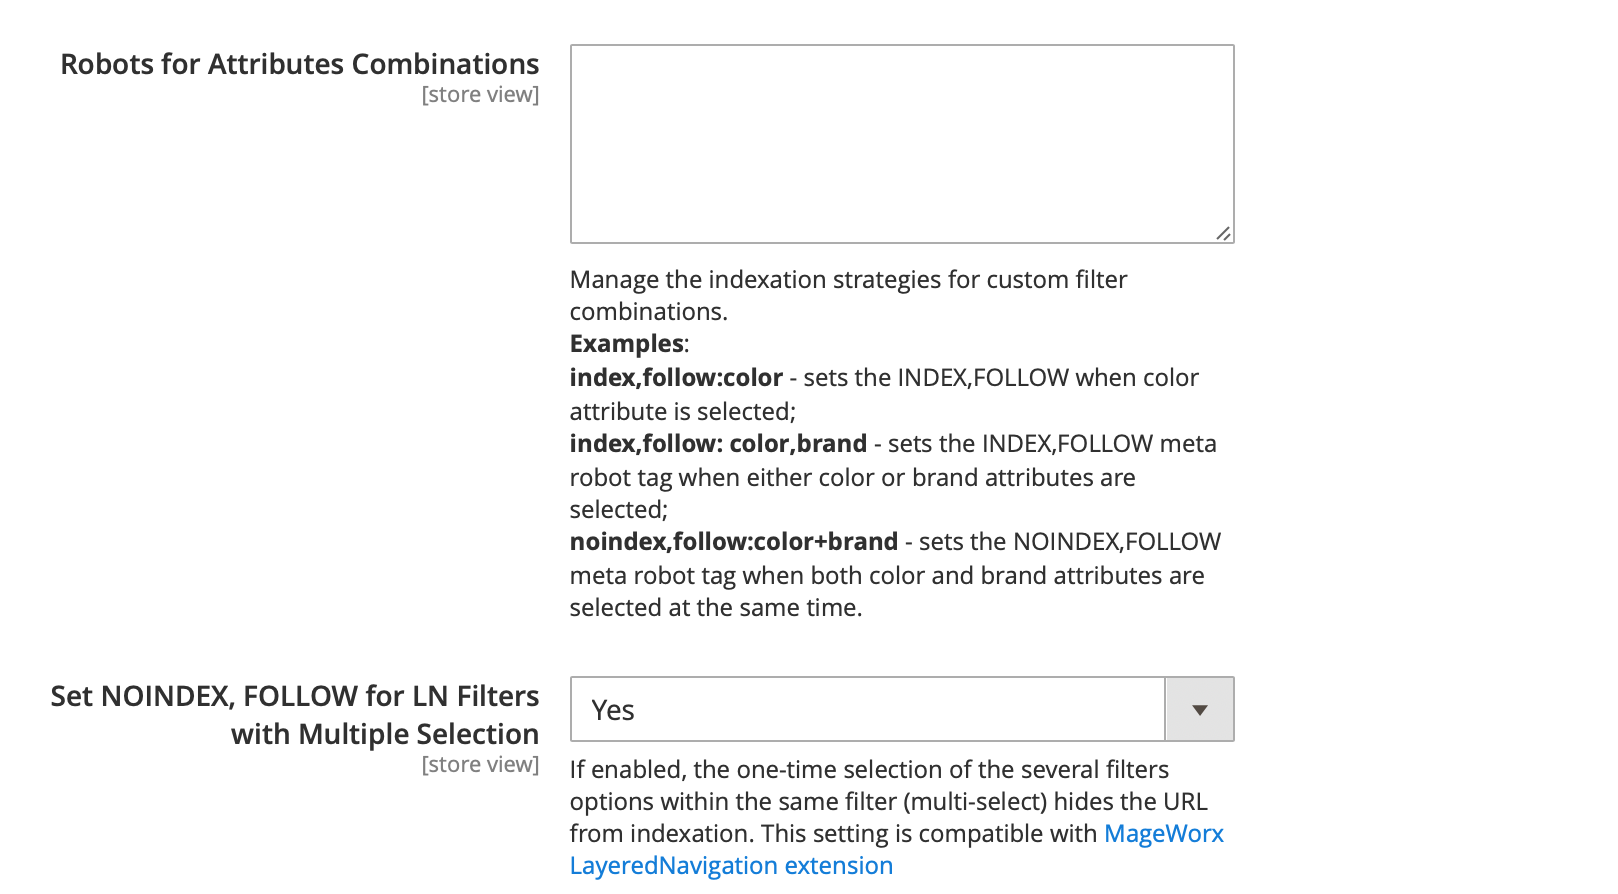
- Robots for Attributes Combinations - this setting provides you with the advanced functionality to manage the meta robots tag for LN filters. It allows you to set the necessary meta robots values if a specific filter is applied, a combination of specific filters is applied or one of the certain filters are applied.
Examples
index,follow:color - sets the INDEX,FOLLOW when color attribute is selected;
index,follow: color,brand - sets the INDEX,FOLLOW meta robot tag when either color or brand attributes are selected;
noindex,follow:color+brand - sets the NOINDEX,FOLLOW meta robot tag when both color and brand attributes are selected at the same time
- Set NOINDEX, FOLLOW for LN Filters with Multiple Selection - this setting allows you to set NOINDEX,FOLLOW meta robots tag if multiple values of the same filter are applied. I.e. if you have the filter "Color", which allows your customers to choose several colors at once, this setting will add NOINDEX,FOLLOW tag to the URLs if the customers select several colors in the layered navigation.
Note
This setting requires MageWorx Layered Navigation extension to be installed.
Use Cases
Click here to see the practical Use Cases of this functionality.
Canonical URLs Settings
First of all, please make sure the standard Magento canonical functionality is disabled. Go to STORES ⟶ Configuration ⟶ CATALOG ⟶ Catalog ⟶ Search Engine Optimization
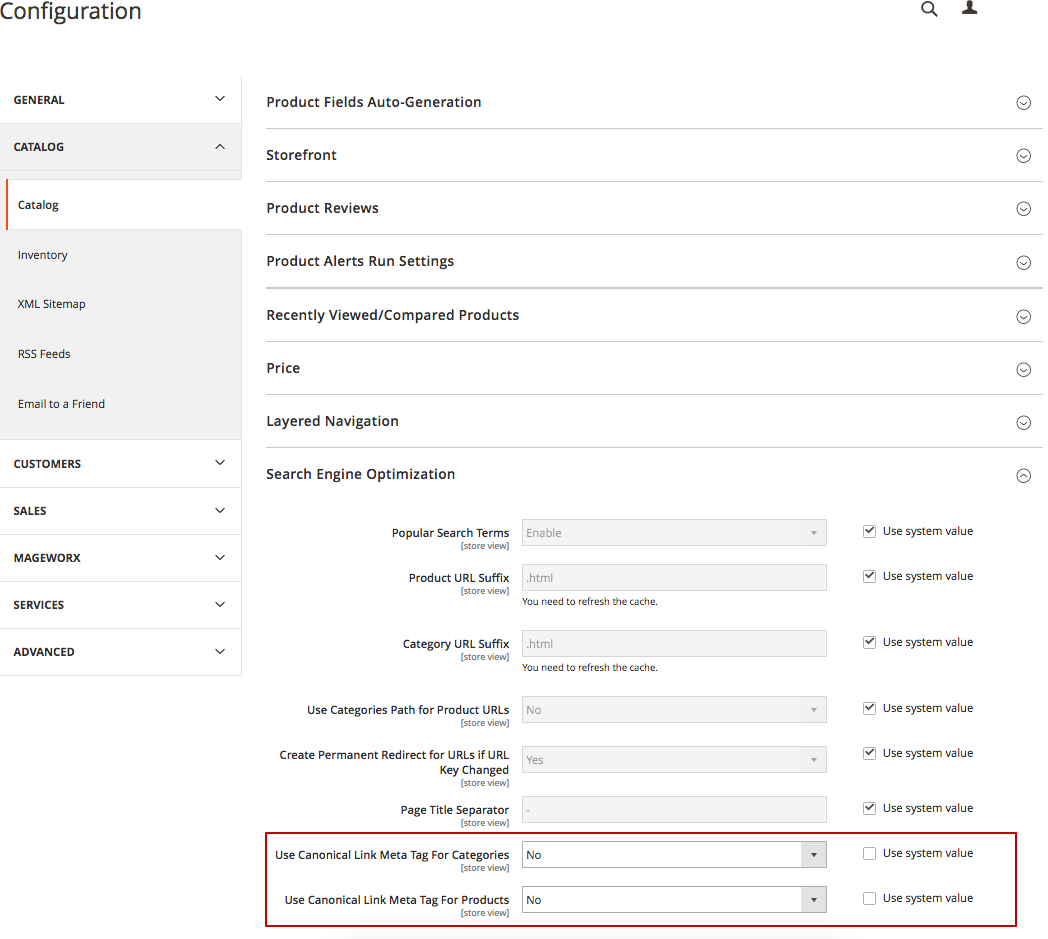
After that, the changes made in STORES ⟶ Configuration ⟶ MAGEWORX ⟶ SEO ⟶ Canonical URLs Settings will be taken into account.
Our extension adds rel=canonical tag in the <head> section of a given page. This tag is designed to inform the search bots which URL is the most reliable (canonical) version of the page being displayed. It helps to prevent any duplicate content issues.
- Add Canonical URL Meta Header - this setting enables/disables MageWorx canonical tag functionality.
- Disable Canonical URL for Pages with NOINDEX robots - this setting allows you to disable the canonical tag on the pages with NOINDEX meta robots tag.
- Canonical URL won't be added for these pages - this setting allows you to add the pages to disable the canonical tag on. You should add the full action names of the pages here.
- Cross Domain Canonical - if you have several store views or websites with the same or similar content, this setting helps you to set up the same canonical tag for all these websites/domains to avoid the duplicated content problem for these stores. If you need to specify a custom cross-domain canonical tag, you can choose the "Custom URL" and specify any custom URL even outside your Magento store.
- Product Canonical URL Type - this setting defines how the product canonical tag should be formed. By default the product canonical tag is set to "Product root" without the categories. The possible values for the product canonical URL are as follows:
--- Product root (without categories) - this option will use the product root URL as the canonical tag. The product root URL is the URL path without categories, i.e. yourstore/product.html.
If you use the categories in the product URLs (the setting "Use Categories Path for Product URLs" is enabled) and need to have the categories in the canonical tag, the extension gives you the option to define how the canonical URL will be formed to avoid the problems, when the same products are assigned to different categories:
--- Shortest by URL path - this option will select a product path, which will be the shortest by a number of characters in the URL path.
--- Longest by URL path - this option will select a product path, which will be the longest by a number of characters in the URL path.
Example
Let's assume a product is assigned to 2 different categories:
1) example.com/category/product.html
2) example.com//new-category/product.html
If the canonical type setting is set to Use Shortest by URL path, the canonical tag will be example.com/category/product.html, because this mode calculates a number of characters in the URL path and choose the shortest URL.
If the canonical type setting is set to Use Longest by URL path, the canonical tag will be example.com//new-category/product.html, because this URL path has more characters than the 1st variant.
--- Shortest by categories counter - this option will select a product path, which will be the shortest by a number of categories in the URL path.
--- Longest by categories counter - this option will select a product path, which will be the longest by a number of categories in the URL path.
Example
Let's assume a product is assigned to 2 different categories:
1) example.com/category1/sub-category2/product.html
2) example.com/category1/sub-category2/sub-category3/product.html
If the canonical type setting is set to Use Shortest by categories counter, the canonical tag will be example.com/category1/sub-category2/product.html, because this mode calculates a number of categories in the URL path and choose URL path, which has less categories than other URLs.
If the canonical type setting is set to Use Longest by categories counter, the canonical tag will be example.com/category1/sub-category2/sub-category3/product.html, because this URL path has more categories than the 1st variant.
- Canonical Tag For Associated Product - this setting allow you to choose the product type(s), the associated items of which will have the canonical tag pointed to the main product. It helps to avoid the duplicates between the main and child products.
Example
If you select the "configurable products" here, the associated items of all configurable products in your store will have the canonical tag pointed to the main configurable product. It might be useful if the associated items (child products) are visible on your store's front-end.
- Trailing Slash For Home Page Canonical URL - this setting allows you to either add or crop the trailing slash in the canonical tag for your store's home page. The homepage can be indexed as both
https://www.site.comandhttps://www.site.com/. The canonical can either have this trailing slash (add) or not (crop). The trailing slash can be added to the pages without suffix .html or .htm. - Trailing Slash For Canonical URLs - this setting allows you to either add or crop the trailing slash in the canonical tags for the pages of your store. The web pages can be indexed as both
https://www.site.com/pageandhttps://www.site.com/page/. The canonical can either have this trailing slash (add) or not (crop). The trailing slash can be added to the pages without suffix .html or .htm. - Use Pager For Category Canonical URL - this setting allows you to either add or remove the pager parameter (example: ?p=2) to the canonical tag of your categories.
- Canonical Tag for Category Layered Navigation - this setting defines the canonical tag on the layered navigation pages with applied filters. 3 possible options are available:
--- Disable - this option disable the canonical tag on the filtered pages. It might be useful if you use a 3rd party solution for the layered navigation and need to disable our canonical tag functionality on these pages.
--- Current Category - this option sets the canonical tag on the filtered pages pointed to the current category page, where a customer applies the filters. Recommended option if you want to hide all filtered pages from the indexation and avoid the duplicated content issues.
--- Filtered page - this option sets the canonical tag on the filtered pages pointed to the filtered page itself. It might be useful if need to index the filtered pages.
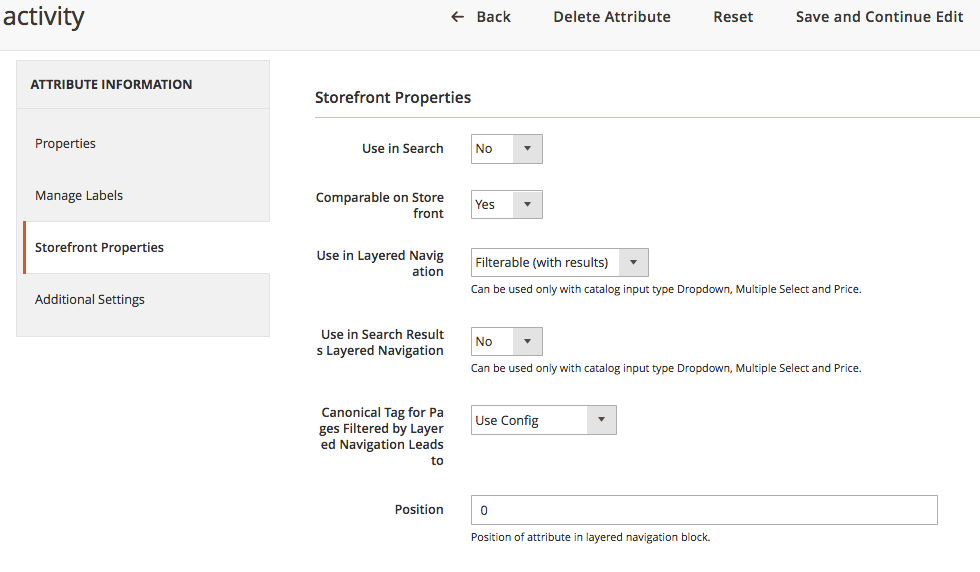
You can also set this setting for any particular product attribute separately. Go to Attributes Grid ⟶ select an attribute ⟶ Storefront Properties and change the 'Canonical Tag for Pages Filtered by Layered Navigation Leads to' setting.
The value of this setting on an attribute level will have a higher priority and it will be exectuted on the front-end. The ability to overwrite this global setting with the attribute's options give you the flexible functionality to allow indexing specific filters or not. It might be useful if you need to point all filters pages to the current categories but keep the filtered pages by brands indexing as separate pages. For this, you should just set the global setting to the Current Category and the brands attribute's setting to the Filtered page.
Example
The current category page: https://seo-suite-m2-ext.mageworx.com/gear/bags.html
The filtered page: https://seo-suite-m2-ext.mageworx.com/gear/bags/l/color:black.html
- The Disable option will remove the canonical tag from the filtered page.
- The Current Category will set the canonical tag on the filtered page pointed to the current category.
- The Filtered page will set the canonical tag on the filtered page pointed to the filtered page itself.
- Canonical Tag if any LN Filter Use Multiple Selection - this setting allows you to set canonical tag for the pages if multiple values of the same filter are applied. I.e. if you have the filter "Color", which allows your customers to choose several colors at once, this setting will be triggered if the customers select several colors in the layered navigation. You can set the canonical tag for such pages either to the filtered pages or to the current category.
Note
This setting requires MageWorx Layered Navigation extension to be installed.
Hreflang URL Settings
The hreflang tag helps the Web crawler understand which version of your website should be shown for a certain location. Thus, the search engine will deliver the correct language version of the site to the targeted foreign audience. Also, the crawler won’t treat these localized pages as duplicates.
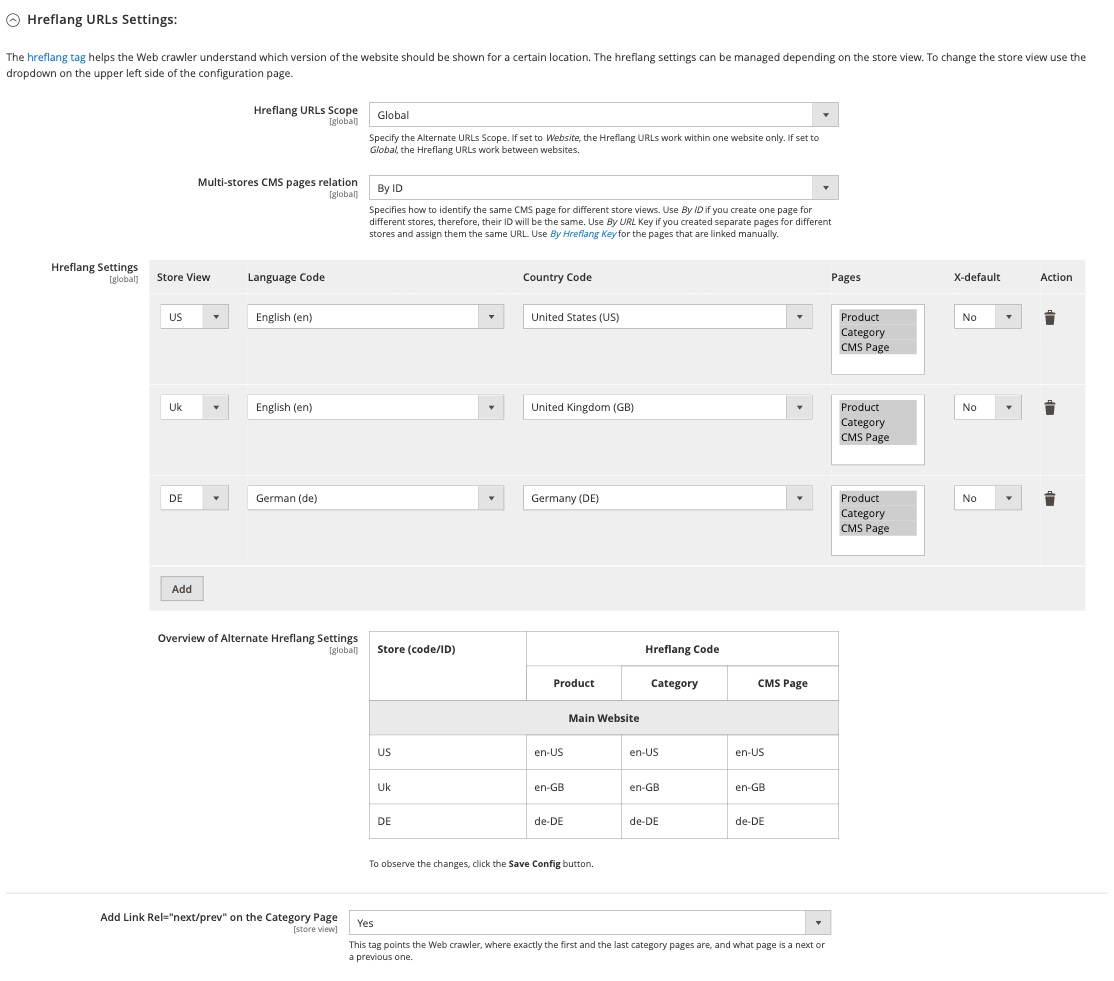
- Hreflang URL Scope alows the store owner to specify the Alternate URLs Scope. It can be set as Website or as Global. If Website is selected, the Alternate URLs work within one website only, if Global — the Alternate URLs work between websites.
- Multi-stores CMS pages relation - this setting sets how to identify the same CMS page for different store views. Use By ID if you create one page for different stores, therefore, their ID will be the same. Use By URL Key if you created separate pages for different stores and assign them the same URL. Use By Hreflang Key for the pages that are linked manually.
In the Hreflang settings table you can add the hreflang for each store view separately. For this just click on "Add" button. For each store view you can set:
- *Langage code*
- *Country code*
- *Pages, where you need to add the hreflang URLs to*
- *X-default*
Language сode - this setting allows you to set a different language for the hreflang tags of a particular store view. If 'Use config' is set, the default locale for certain store view will be used STORES ⟶ Configuration ⟶ GENERAL ⟶ General ⟶ Locale Options.
Explanation
Magento 2 allows you to assign the locales to all your store views or to set different language locale for each store view. You can find this in STORES ⟶ Configuration ⟶ GENERAL ⟶ General ⟶ Locale Options. If you need to specify a language in the hreglanf tags, which is different from a language locale assigned to the necessary store view, you can just select the necessary language..
Сountry code - this setting allows you to add a country code to the hreflang tags.
Explanation
In case the store owner has, for instance, one page for English speakers in Canada and the other page for the audience in the States, it’s necessary to add a country code for the alternate URLs. Add Country Code setting enables this feature. If the store owners need different country code from the one that is set up in the Magento configuration, they can select the desired country code in the Country Code option.
X-default - this setting provides the special x-default attribute. This attribute informs the Web crawler that such pages do not target any specific country or language and can be displayed to site visitors when no other page corresponds to their localized queries.
HTML
<link rel="alternate" href="http://example.com/en-us" hreflang="en-us" /> //this is for english-speaking (en) visitors from the United States (us)
<link rel="alternate" href="http://example.com/es-mx" hreflang="es-mx" /> //this one is for spanish-speaking (es) visitors from Mexico (mx)
<link rel="alternate" href="http://example.com/" hreflang="x-default" /> //that is the x-default version of the page
The table below (Overview of Alternate Hreflang Settings) provides the possibility to quickly check all the settings that have been made.
rel="next/prev" tag was used to better index paginated categories. This tag points the Web crawler, where exactly the first and the last pages are, and what page is a next or a previous one.
Note
The rel=next/prev feature is outdated.
SEO Extended
Log into the Magento Admin panel and go to STORES ⟶ Configuration ⟶ MAGEWORX ⟶ SEO. Select the second SEO Extended tab.
Meta Information
These settings provide you with the ability to adjust the meta title and meta description of different page entities. If you need more advanced functionality to change the meta tags, use the SEO templates or SEO Category Filter Templates.
-
Add Pager Number to Meta Title - this setting allows the store owner to add a page number to the meta title of a paginated page. Such number can be added at the end
Apparel | Page 3or at the beginningPage 3 | Apparel. You can also disable the output of the pager in the meta title. -
Add Pager Number to Meta Description - it provides the possibility to add the page number to the meta description. The number can be either at the end or at the beginning of the meta description. You can also disable the output of the pager in the meta description.
-
Add Pager Number to Meta Keywords - it provides the possibility to add the page number to the meta keywords. The number can be either at the end or at the beginning of the meta keywords. You can also disable the output of the pager in the meta keywords.
-
Remove Default Title Prefix/Suffix - this setting allows you to remove Magento 2 default title prefix/suffix (CONTENT ⟶ Design Configuration ⟶ your current theme ⟶ HTML Head). If you enable this setting, the Pages block where the store owner can provide the list of the pages where the default suffix/prefix should be omitted. You can use
catalog_category_viewaction name for all categories andcatalog_product_viewfor all products. The wildcards are supported. -
Enable Extended Meta Title On Category LN Pages - this setting allows you to change the meta title of the category page dynamically, when your customers choose the attribute filters in the layered navigation. The selected attributes will be added to the end of the meta title.
-
Enable Extended Meta Description On Category LN Pages - this setting allows you to change the meta description of the category page dynamically, when your customers choose the attribute filters in the layered navigation. The selected attributes will be added to the end of the meta description.
-
Enable Extended Meta Keywords On Category LN Pages - this setting allows you to change the meta keywords of the category page dynamically, when your customers choose the attribute filters in the layered navigation. The selected attributes will be added to the end of the meta keywords.
Example
Category meta title: Men’s jackets
Category meta descriptio*: Check out hot summer deals on men’s jackets! Available throughout July-August.
Applied filters: $100.00 - $500.00, Color - Silver.
Extended Meta Title: Men’s jackets | Price: $100.00 - $500.00, Color:Silver.
Extended Meta Description: Check out hot summer deals on men’s jackets! Available throughout July-August | Price: $100.00 - $500.00, Color:Silver.
Category Filters
This functionality allows you to create SEO templates for category description, H1 and meta tags, when specific attribute or attribute's value is chosen in the layered navigation. It creates the powerful functionality to optimize the layered navigation pages and build the SEO-friendly landing pages.
You can create these templates for any combination of category + attribute + value, where you can generate the templates for all categories or certain categories, all attribute's values or specific value.
Example
Let's assume you have the category "Mobile phones" with the filter by brands.
The "SEO category filter templates" allow you to generate a different description, category H1 and meta tags if a certain brand is chosen.
-
Enable SEO for Category Filters Functionality - this setting enables the possibility to populate the category description, H1 or meta tags, generated by MageWorx SEO filter templates. More details on this can be found here.
-
SEO Filters for Multiple Filter Selection - this setting determines the extension behavior if multiple filters with SEO parameters, generated by SEO filter templates, are selected. If this setting is enabled, the extension will choose the product attribute with the highest priority and will show the SEO parameters of this filter.
The priority is based on the position of the product attribute. To check the position of the product attribute, go to STORES ⟶ Attributes ⟶ Product, select the desired attribute and click the Storefront Properties tab. The lower the number here, the higher the priority.
SEO Breadcrumbs
-
Enable SEO Breadcrumbs - this setting enables the advanced breadcrumbs generated by means of our extension and disables the default ones.
-
Use Category Priority - if enabled, the system will use the priority of the categories to choose the breadcrumbs
- Breadcrumbs type - this setting handles the situation, when some products are assigned to several categories.
• Default — to use the default Magento breadcrumbs.
• Use Shortest — to utilize the shorten version of breadcrumbs (e.g. Store > Category > Product).
• Use Longest — to utilize the full path of breadcrumbs (e.g. Store > Category > Subcategory 1 > Subcategory 2 > Product)
SEO Markup
This module comes as a part of SEO Suite Ultimate, as well as a separate extension. For the detailed configuration instructions, check the full Magento 2 Extended Rich Snippets extension manual.
SEO-friendly URLs
See more details here.
SEO Cross Links
This module comes as a part of SEO Suite Ultimate, as well as a separate extension. For the detailed configuration instructions, check the full Magento 2 Cross Links extension manual.
SEO Redirect
See more details here.
SEO Extended Templates
This module comes as a part of SEO Suite Ultimate, as well as a separate extension. For the detailed configuration instructions, check the full Magento 2 SEO Meta Templates extension manual.
HTML Sitemap
This module comes as a part of SEO Suite Ultimate, as well as a separate extension. For the detailed configuration instructions, check the full Magento 2 Sitemap Suite extension manual.
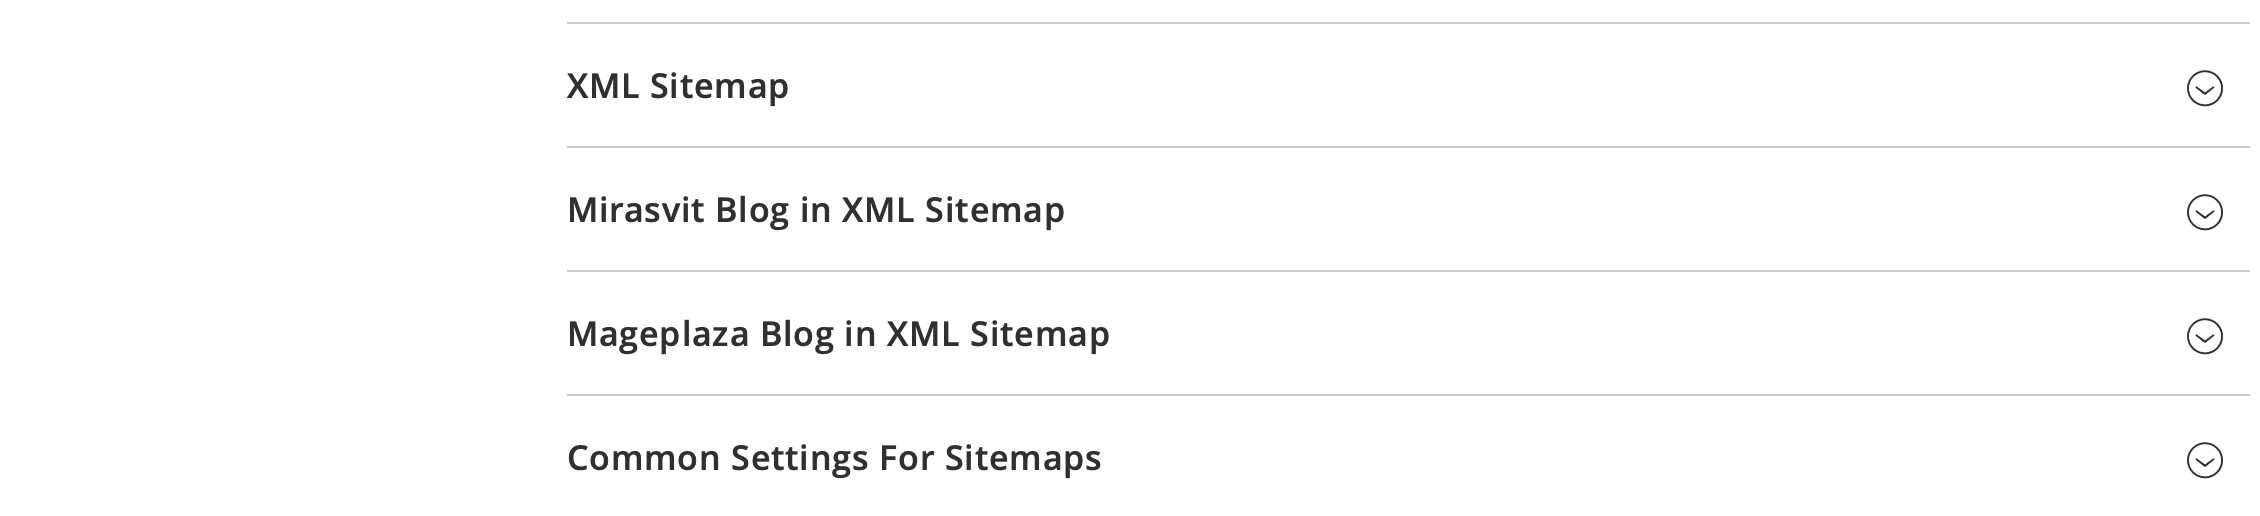
XML Sitemap
This module comes as a part of SEO Suite Ultimate, as well as a separate extension. For the detailed configuration instructions, check the full Magento 2 Sitemap Suite extension manual.
Individual Settings
Additionally, the store owner can tweak SEO parameters for each product, category and CMS page individually.
Categories
For the categories settings, go to PRODUCTS ⟶ Inventory ⟶ Categories, select the desired Category and open the Search Engine Optimization tab.
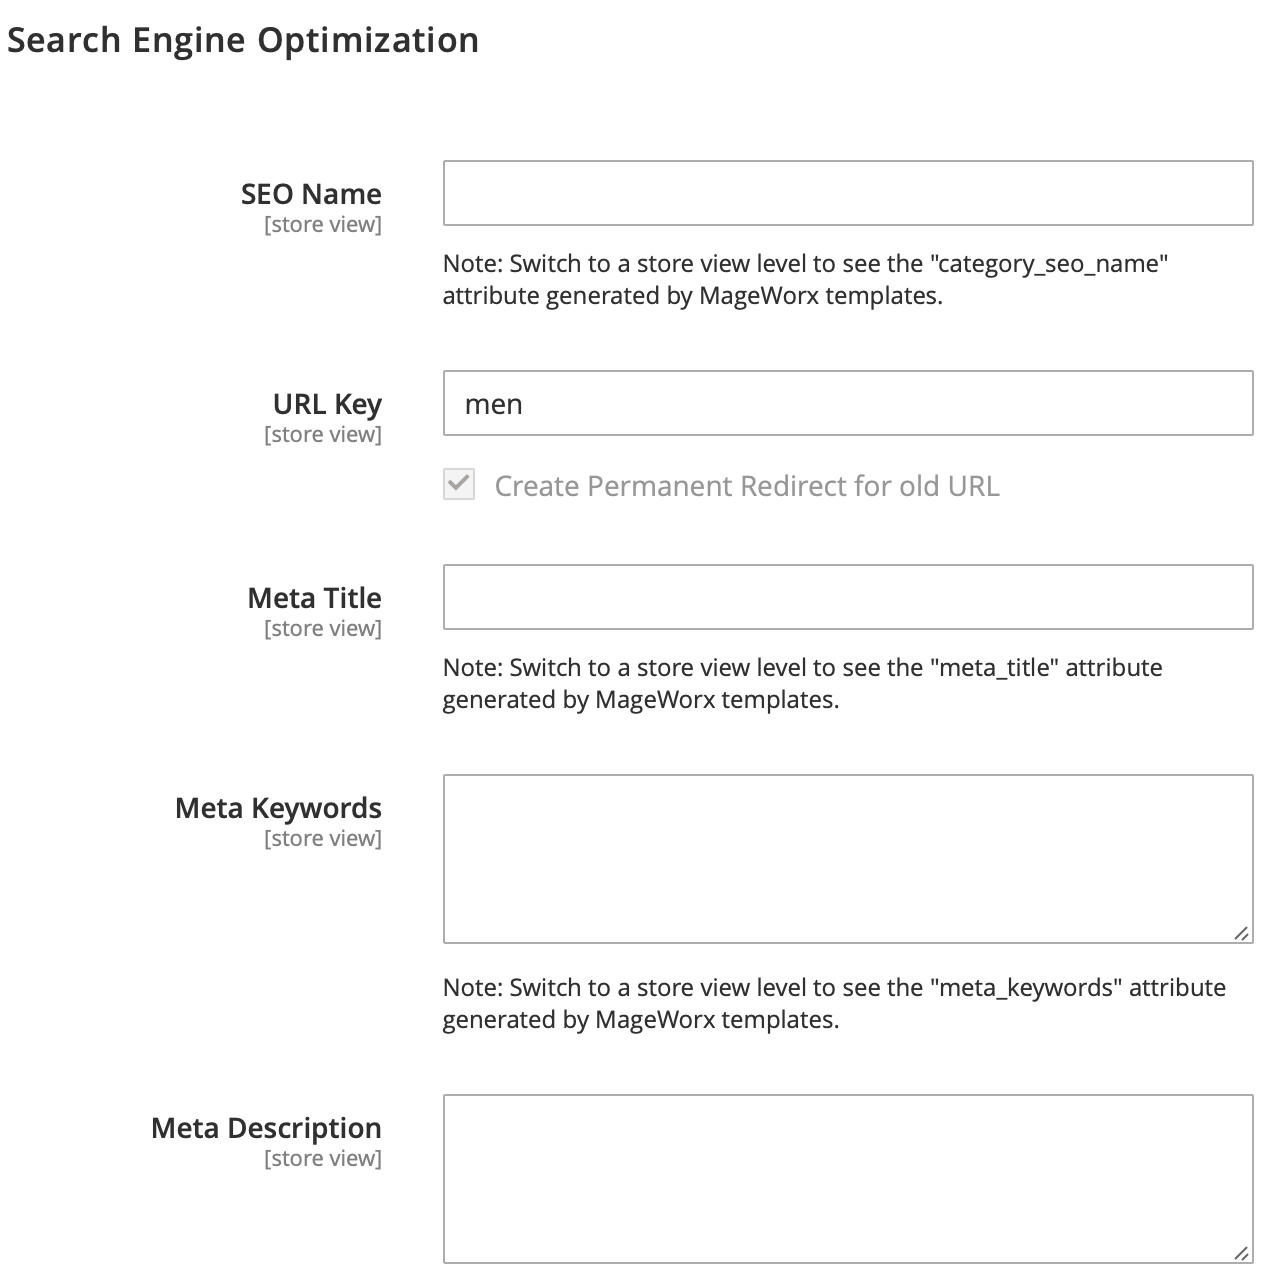
- SEO Name - the value field is shown in H1 tag on a category page on the front-end.
- URL Key - the URL key of a category page. The selected "Create Permanent Redirect for old URL" option will create 301 redirects each time you change the URL key.
- Meta title - the title of a category page, shown in search engine results.
- Meta description - the meta description of a category page, shown in search engine results.
- Meta keywords - the meta keywords of a category page.
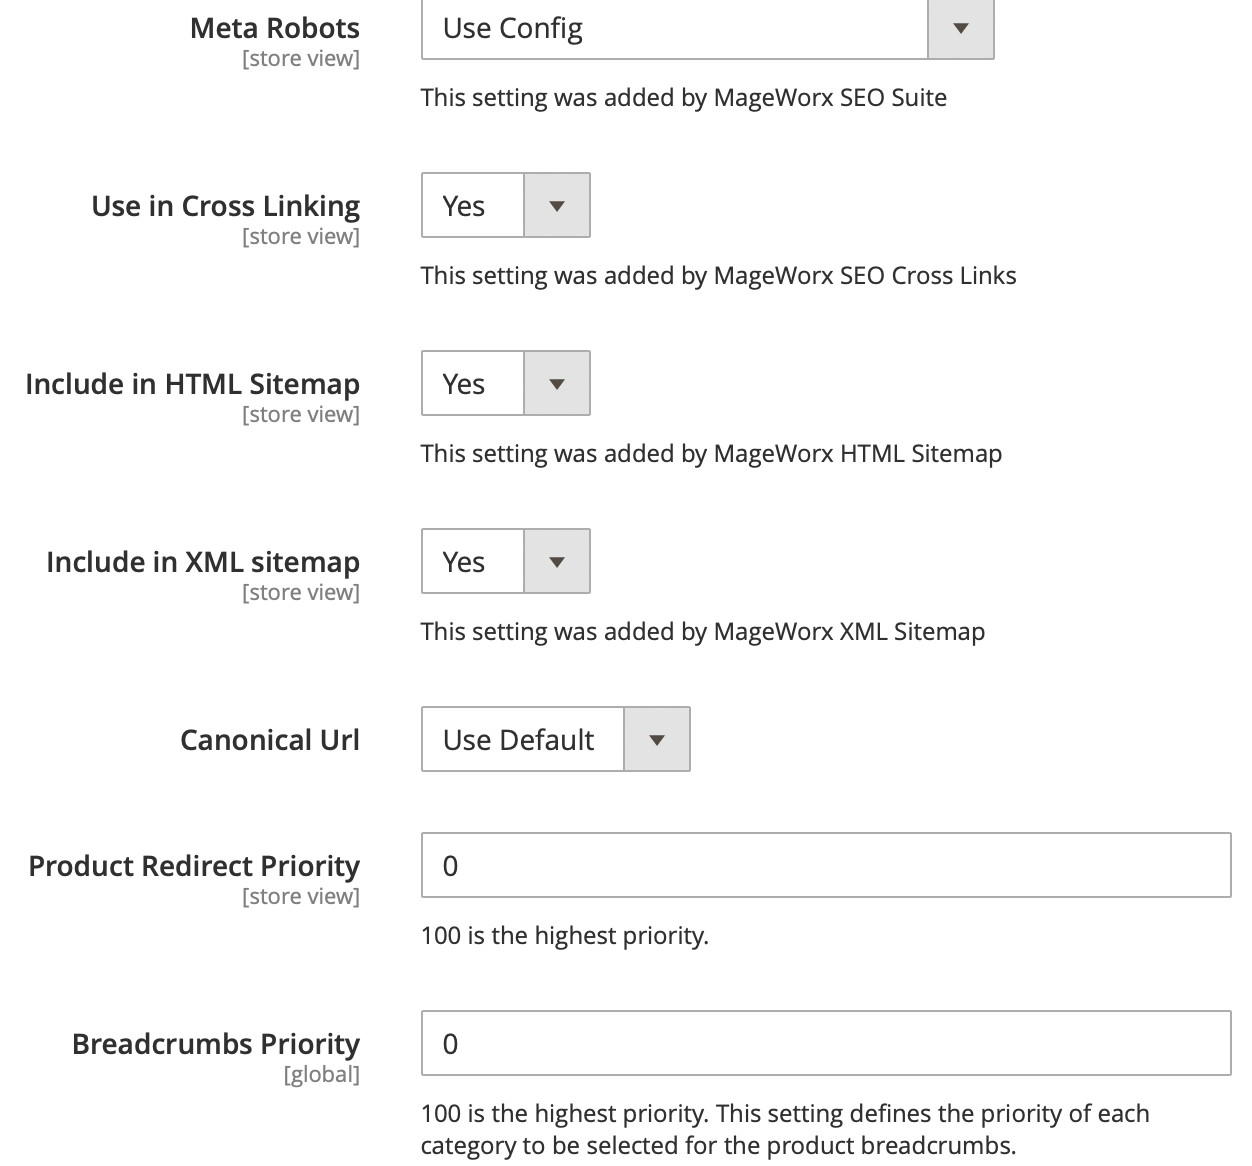
- Meta robots - this setting allows you to set the meta robots for a certain category.
- Use in cross linking - this setting allows you to either use a category in the cross linking scheme or not. If disabled, the found keywords on the category page won't be replaced with the links, added in our Cross Links part.
- Include in HTML sitemap - this setting allows you to either display or hide a certain category in HTML sitemap by MageWorx.
- Include in XML sitemap - this setting allows you to either add or hide a certain category in XML sitemap by MageWorx.
- Canonical URL - this setting allows you to use the canonical tag for a certain category, generated by SEO Suite extension or set a custom canonical tag.
- Product Redirect Priority - this setting specifies a category's priority, which is used for creating redirects for deleted products if the setting "Default Redirect To" (Configuration ⟶ MAGEWORX ⟶ SEO ⟶ SEO Redirects) is set to "Product Priority".
- Breadcrumbs Priority - this setting specifies a category's priority, which is used to create a correct SEO breadcrumbs if the setting "Use Category Priority" (Configuration ⟶ MAGEWORX ⟶ SEO ⟶ SEO Breadcrumbs) is set to "Yes".
Products
For the products settings, go to PRODUCTS ⟶ Inventory ⟶ Catalog, select the desired Product and open the Search Engine Optimization tab.
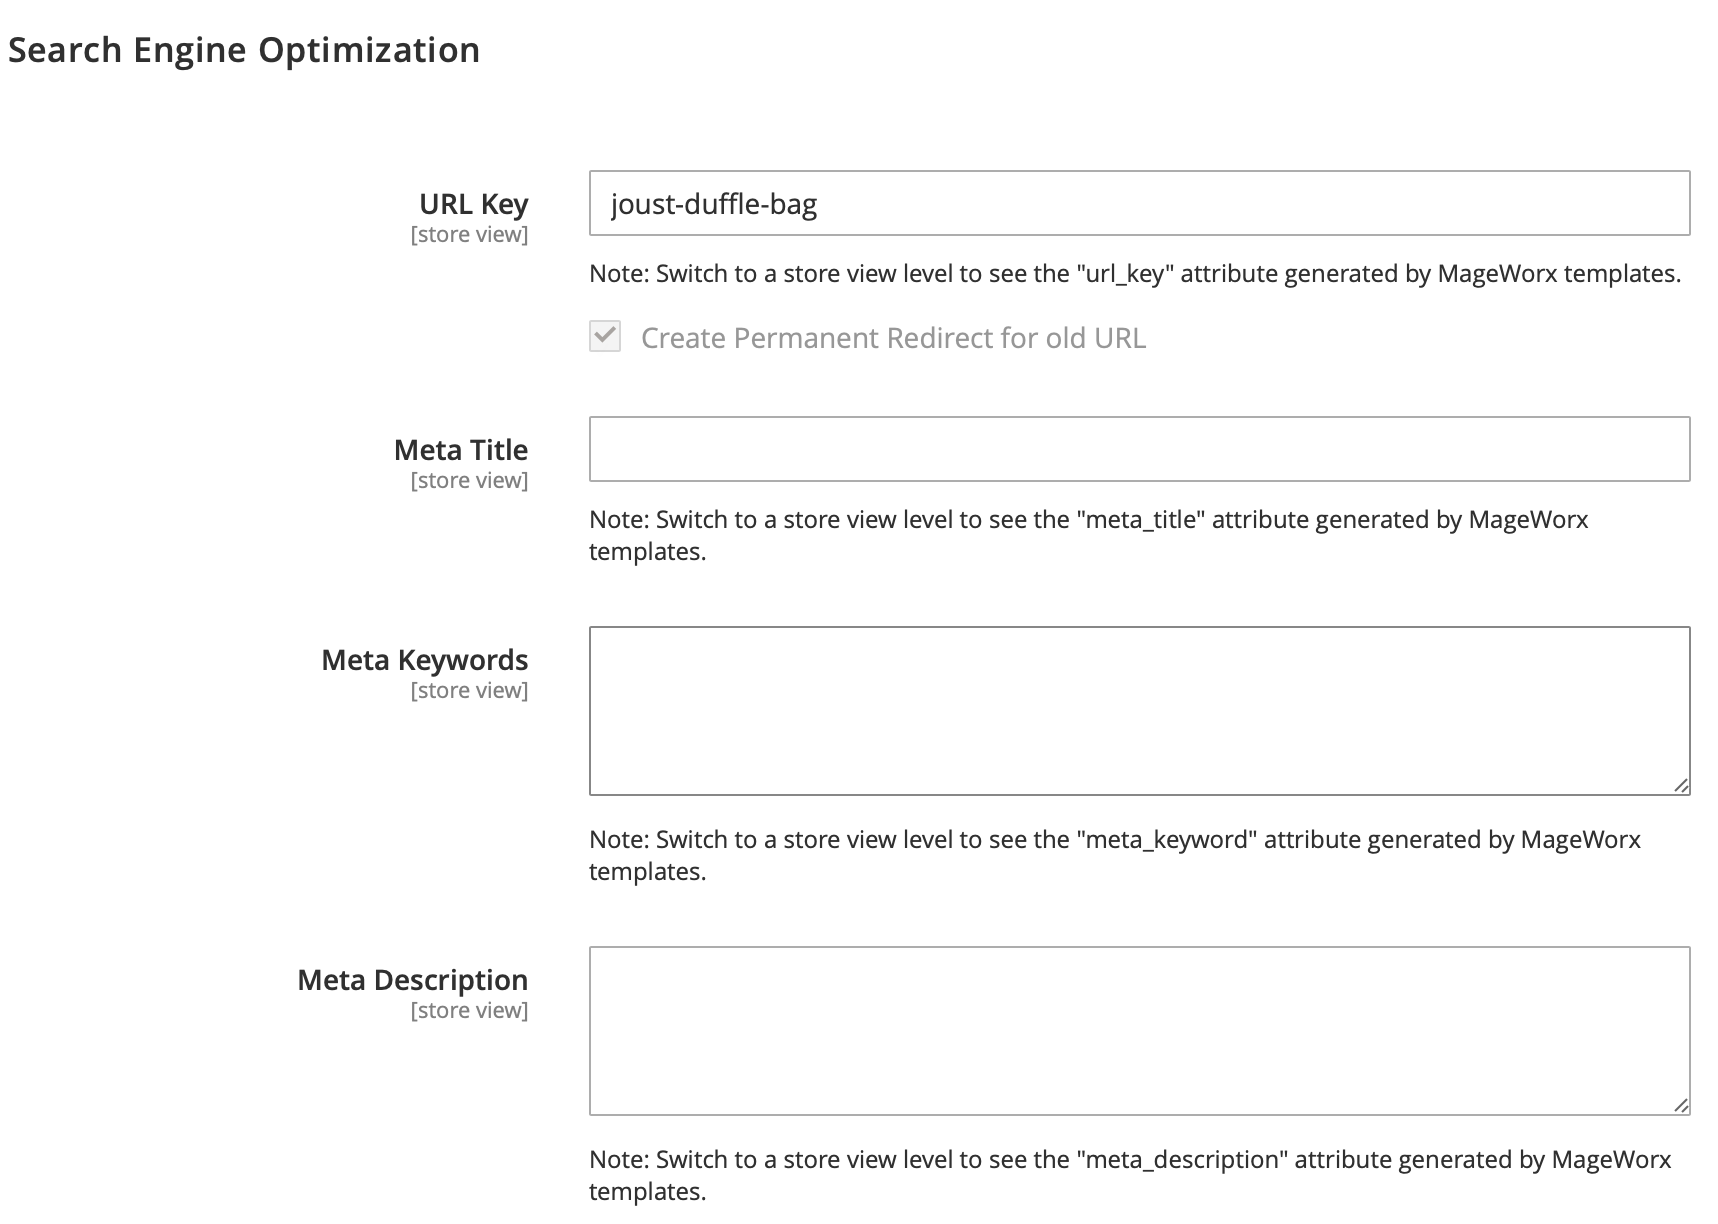

- URL Key - the URL key of a product page. The selected "Create Permanent Redirect for old URL" option will create 301 redirects each time you change the URL key.
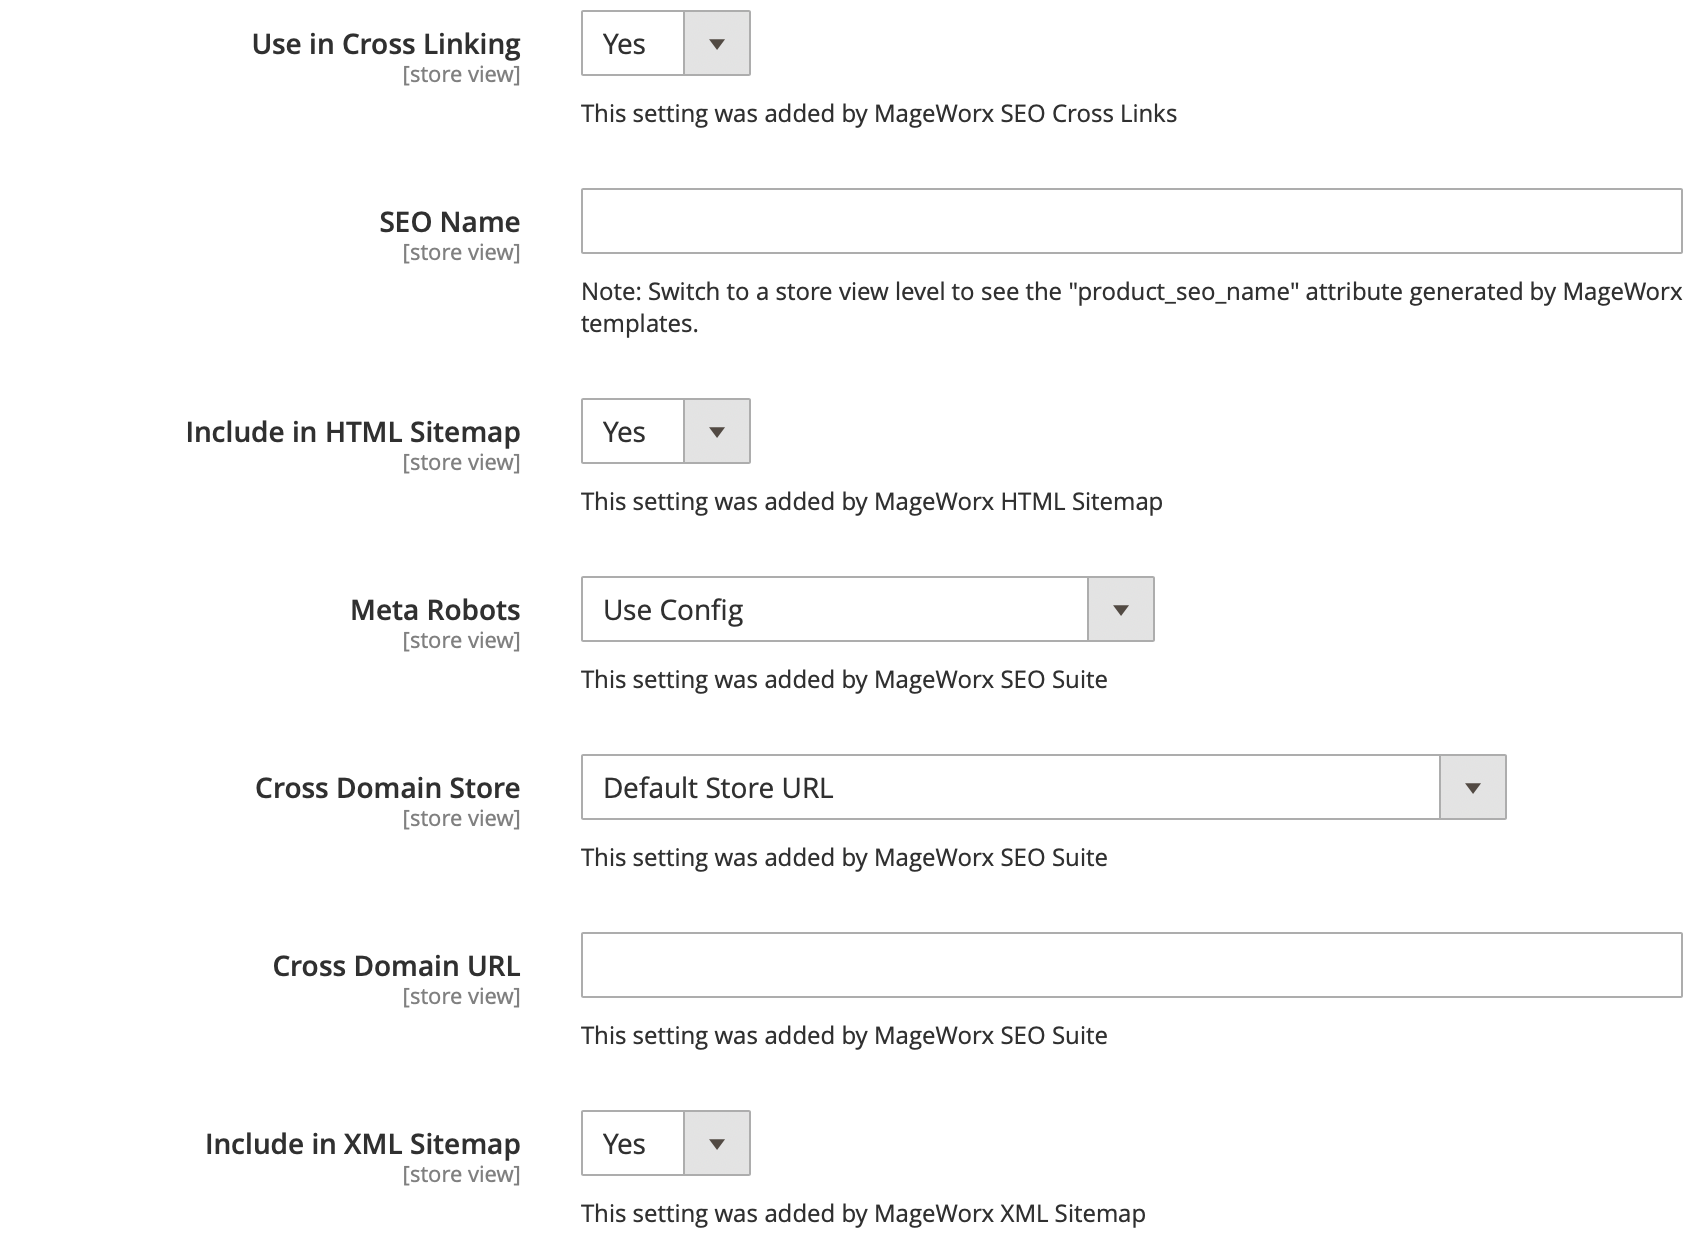
- SEO Name - the value field is shown in H1 tag on a product page on the front-end.
- Meta title - the title of a product page, shown in search engine results.
- Meta description - the meta description of a product page, shown in search engine results.
- Meta keywords - the meta keywords of a product page.
- Meta robots - this setting allows you to set the meta robots for a certain product.
- Use in cross linking - this setting allows you to either use a product in the cross linking scheme or not. If disabled, the found keywords on the product page won't be replaced with the links, added in our Cross Links part.
- Include in HTML sitemap - this setting allows you to either display or hide a certain product in HTML sitemap by MageWorx.
- Include in XML sitemap - this setting allows you to either add or hide a certain product in XML sitemap by MageWorx.
- Canonical URL - this setting allows you to use the canonical tag for a product, generated by SEO Suite extension or set a custom canonical tag.
The Cross Domain Store and Cross Domain URL are added to define the main website using a Cross Domain Canonical Tag. It can be either selected from the dropdown that contains the list of the Store URLs or by adding the custom URL. If you select e.g. domain1, the canonical tags for other websites will be domain1/product.html.
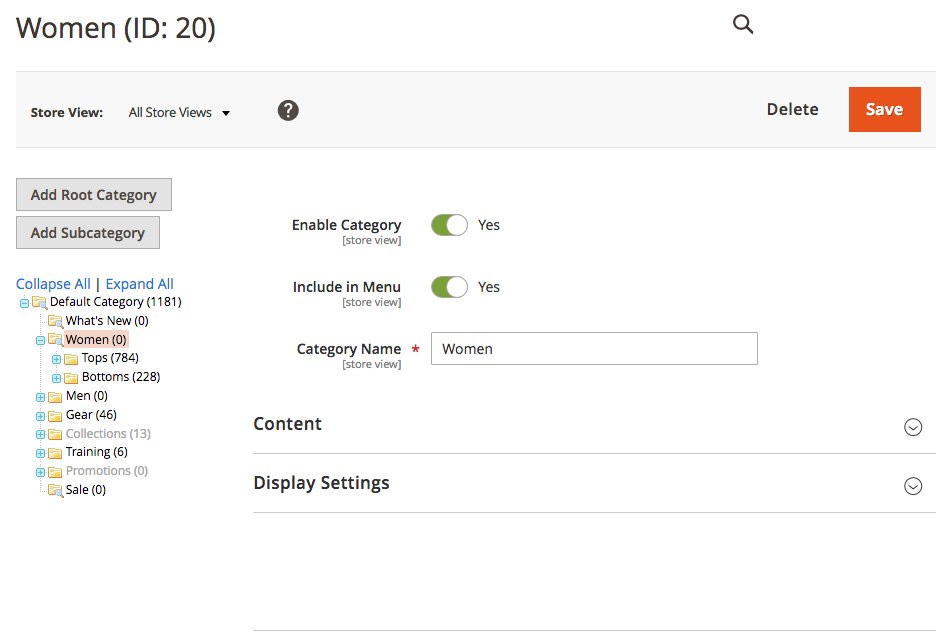
CMS Pages
For the CMS pages settings, go to CONTENT ⟶ Elemets ⟶ Pages, select the desired CMS page and open the Search Engine Optimization tab.
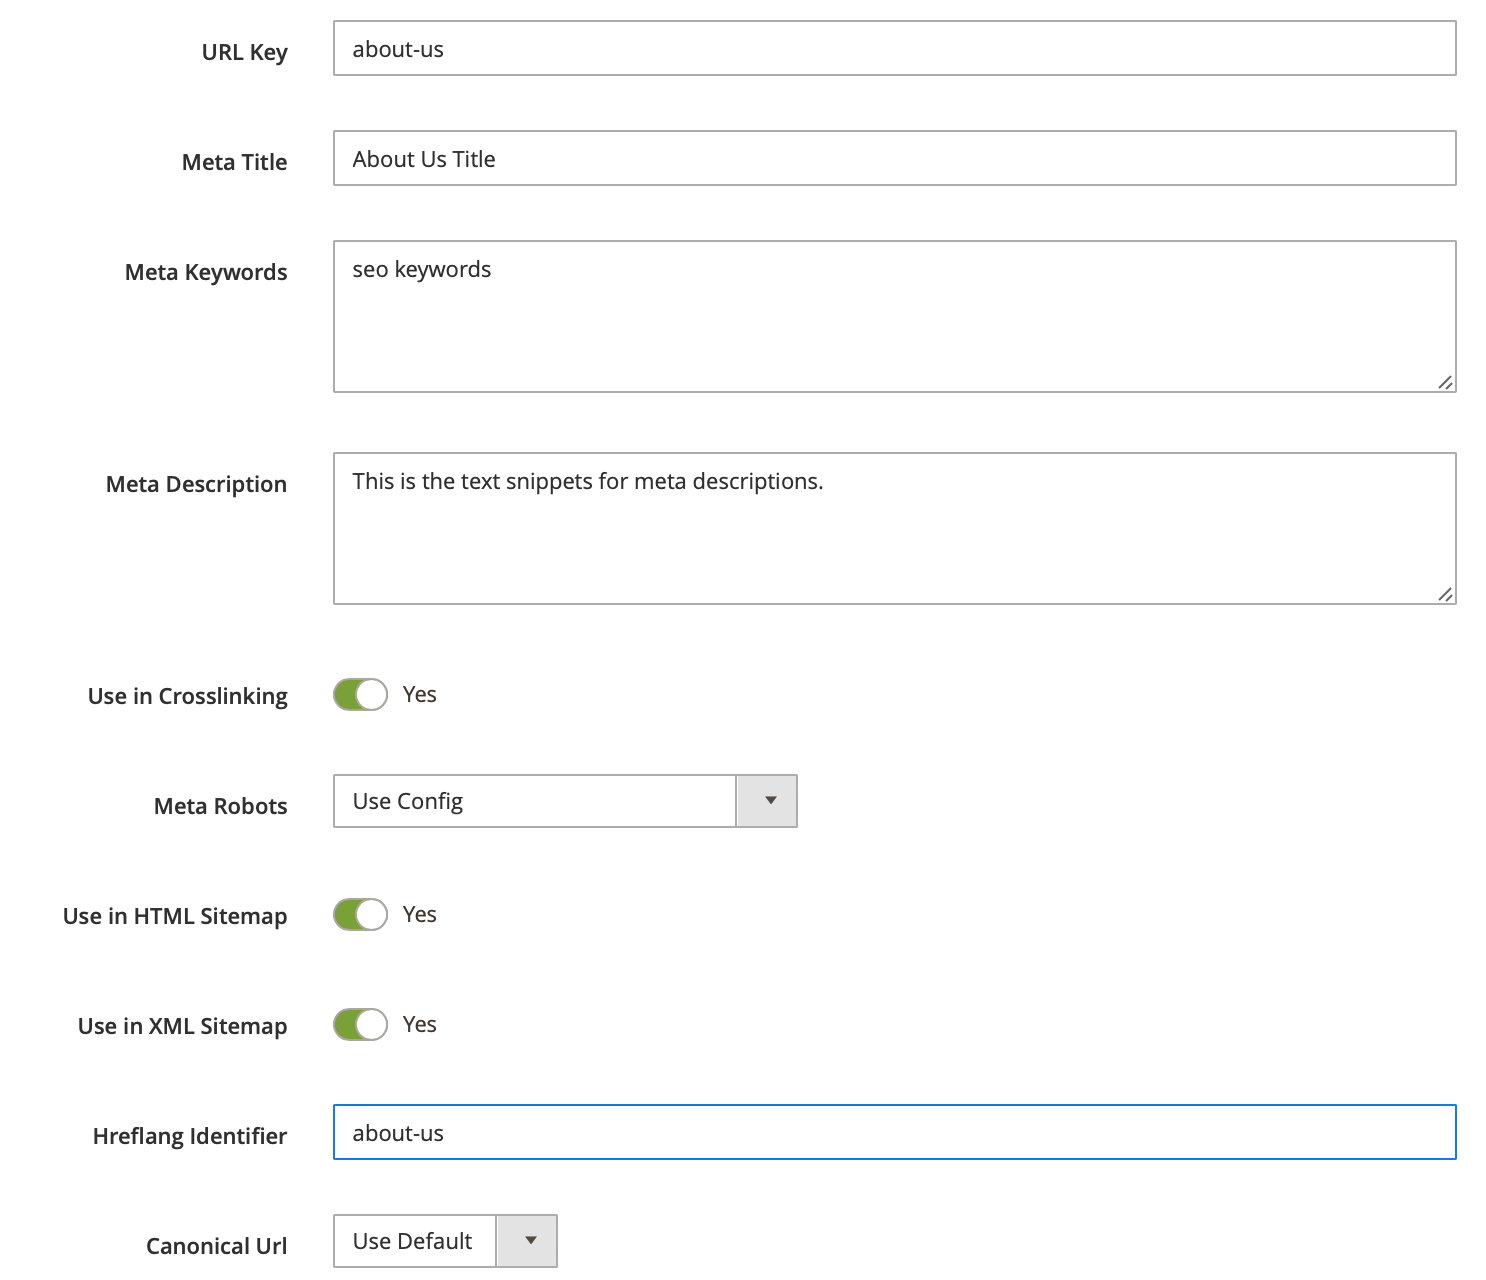
- URL Key - the URL key of a CMS page.
- Meta title - the title of a CMS page, shown in search engine results.
- Meta description - the meta description of a CMS page, shown in search engine results.
- Meta keywords - the meta keywords of a CMS page.
- Meta robots - this setting allows you to set the meta robots for a certain CMS page.
- Use in cross linking - this setting allows you to either use a CMS page in the cross linking scheme or not. If disabled, the found keywords on the CMS page won't be replaced with the links, added in our Cross Links part.
- Include in HTML sitemap - this setting allows you to either display or hide a certain CMS page in HTML sitemap by MageWorx.
- Include in XML sitemap - this setting allows you to either add or hide a certain CMS page in XML sitemap by MageWorx.
- Canonical URL - this setting allows you to use the canonical tag for a CMS page, generated by SEO Suite extension or set a custom canonical tag.
The Hreflang Identifier is used if the setting Multi-stores CMS pages relation (Configuration ⟶ MAGEWORX ⟶ SEO ⟶ SEO Base ⟶ Hreflang URLs Settings) is set to "By Hreflang Identifier". The pages with identical hreflang identifiers will be used as the alternate URLs for each other.
Custom Canonical URLs
To observe, edit and add the custom canonical URLs, go to MARKETING ⟶ MageWorx Canonical URLs ⟶ Custom Canonical URLs.

Please note that during the initial setup this grid will be empty.
This grid shows all the canonicals that have been created here or individually for products, categories or CMS pages.
To create a new canonical, click the Add New Custom Canonical URL button.
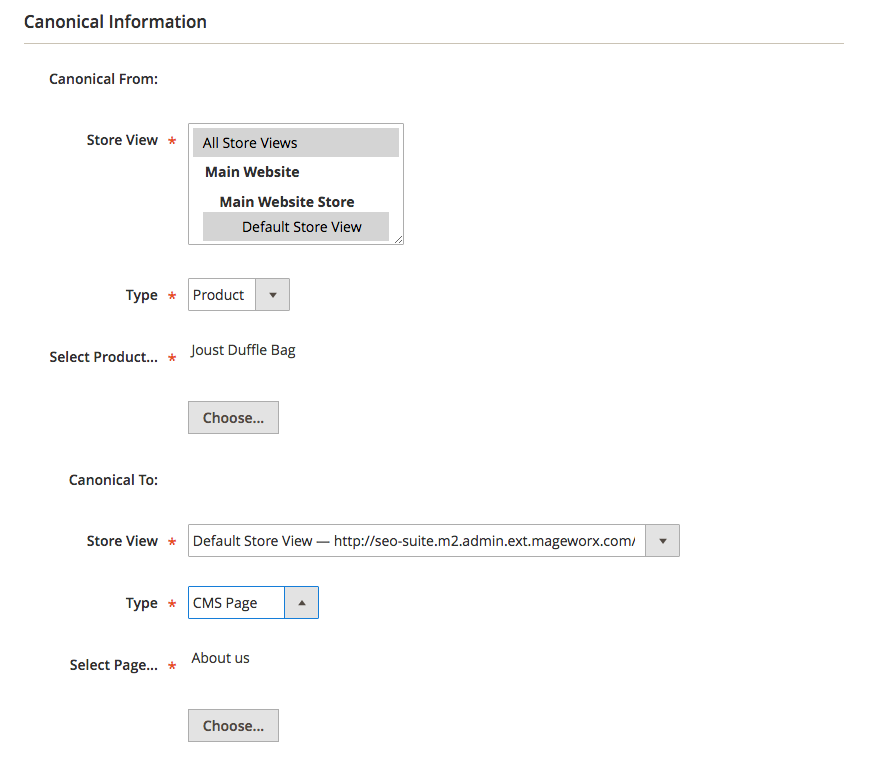
The Canonical From workspace is the initial page that should have the custom canonical. You can create custom canonicals for products, categories and CMS pages. The Canonical To handles the page that should be used as the canonical URL.
First, the store owner should select the Store View.
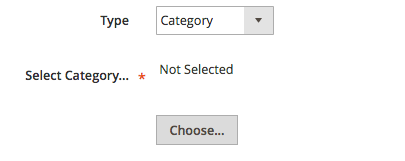
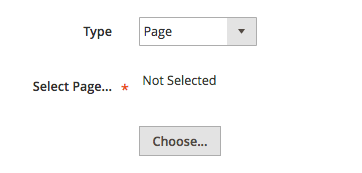
Then, the Type should be specified.
- Custom URL
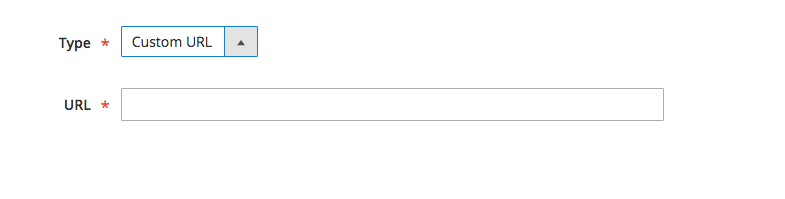
The URL field supports both absolute http://www.site.com/custom/url and relative /custom/url URL values.
- Product
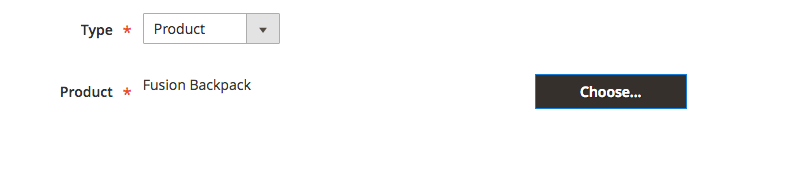
To select the desired product, click the Choose button and select the desired product.
- Category
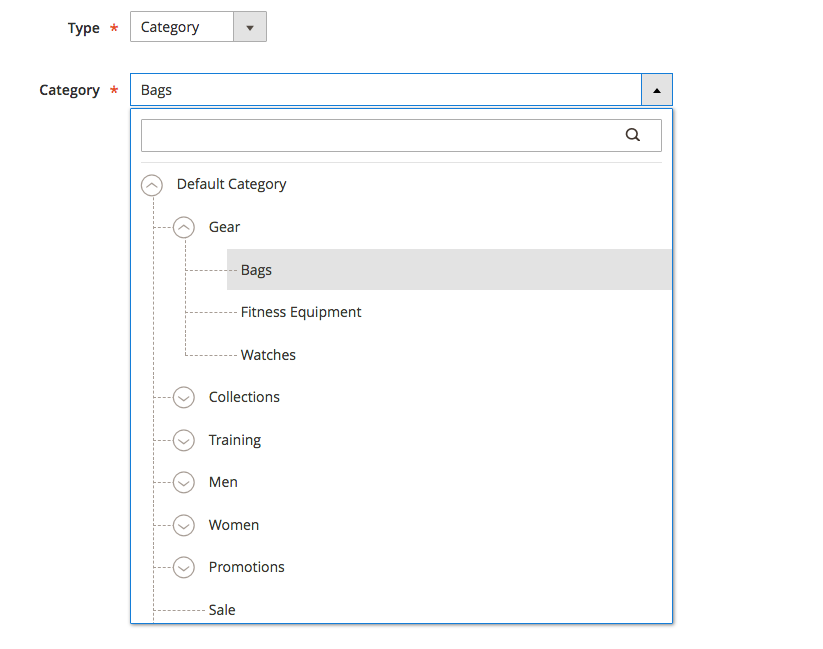
This type shows the category tree. You can filter the products by using the search box.
- CMS
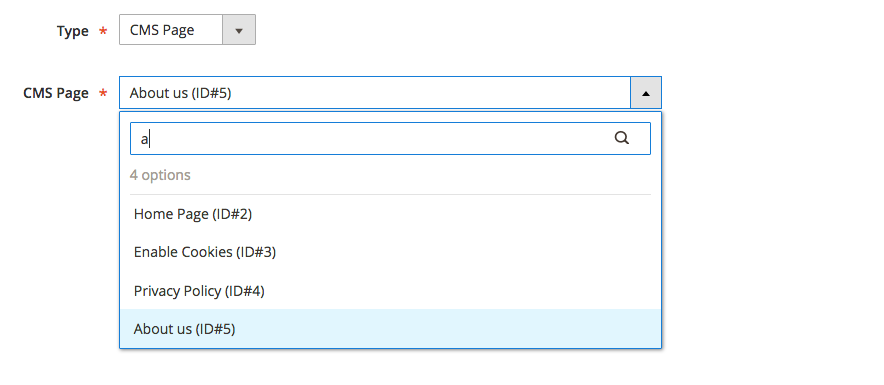
This type shows the list of the CMS pages. You can filter the pages by using the search box.
When the edits are done, click the Save Custom Canonical URL button.
SEO Category Filters
The SEO Suite Ultimate extension allows turning the pages filtered by Layered Navigation into regular store pages with SEO value. That can be beneficial in various ways:
-
If there are no sub-categories in the store, such pages can successfully perform their role.
-
These pages can be fully optimized for any specific search queries; thus, shoppers who are searching for brand new red Ferrari will land on a page with highly relevant results.
-
The optimized pages of this type can extend and strengthen your website architecture.
To check or modify SEO Category Filters, go to MARKETING ⟶ MageWorx SEO Extended ⟶ Manage SEO Category Filters.
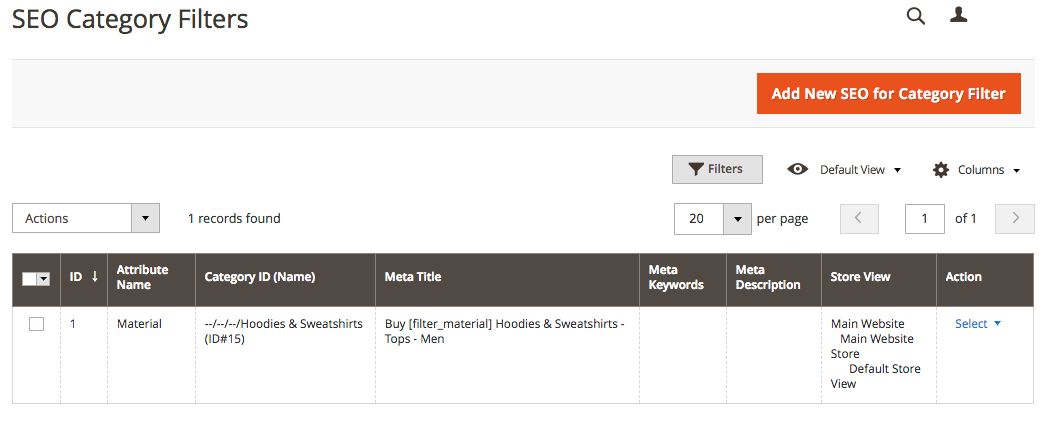
Please note that during the initial setup this grid will be empty.
The columns can be sorted alphabetically by clicking the column title.
To create a new category Filter, click the Add New SEO Category Filter button.
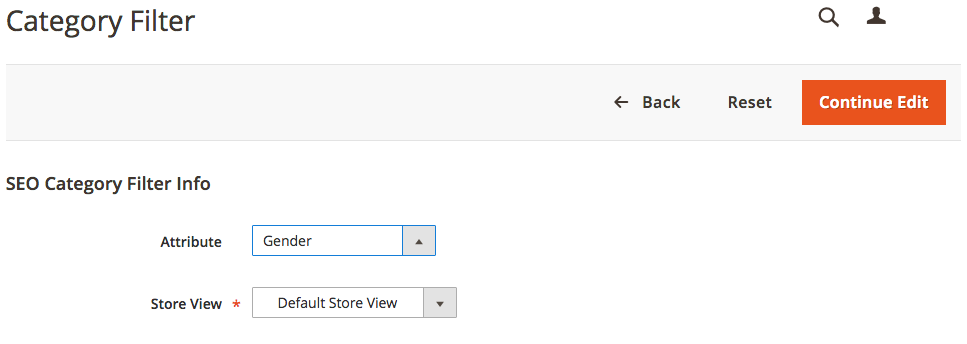
Here, the store owner can select the appropriate Product Attribute and the Store View (so actually, it is possible to make different pages for different store views).
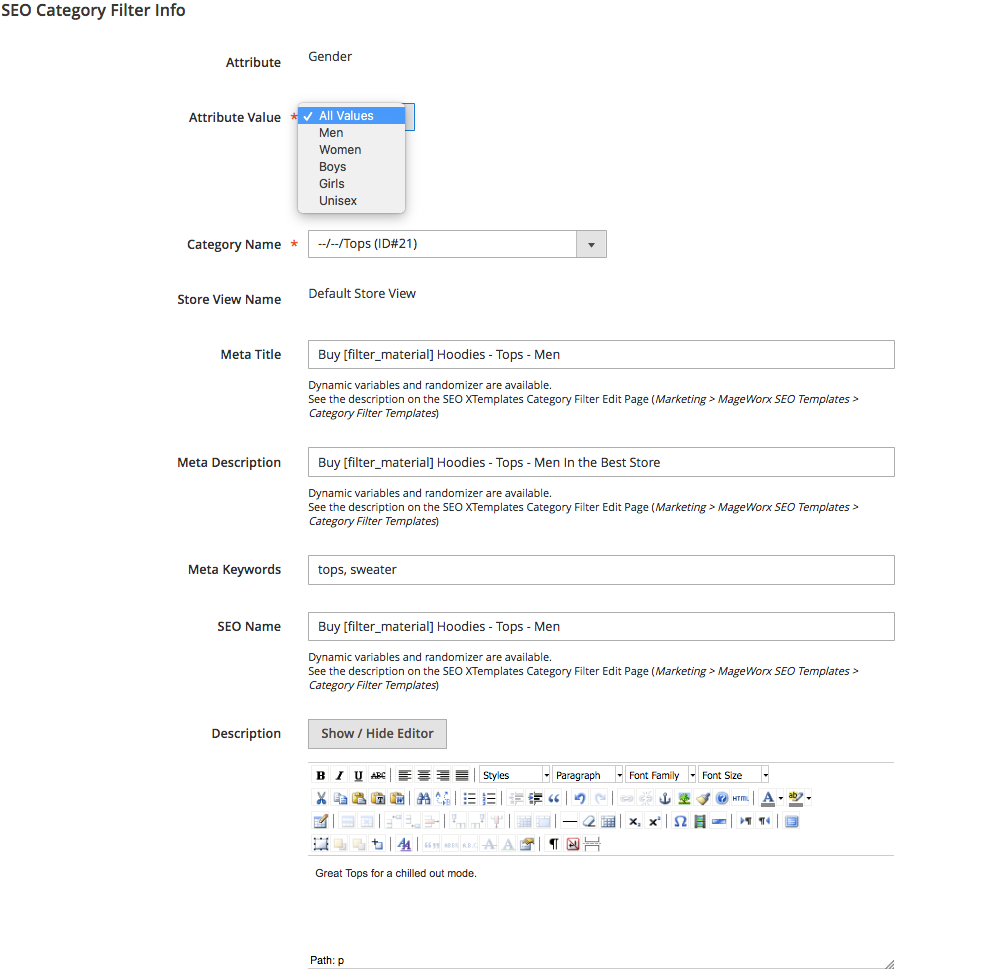
The merchant can choose the desired attribute value and the category where this filter should be applied.
From here, the store owner can specify the Meta Title, Meta Description, Meta Keywords and Description. The Description is the text visible on the frontend.
SEO Name setting, if populated, will be displayed instead of the default name on the frontend.
The dynamic variables and randomizers are supported.
Variables and Randomizers
Here is the list of the variables that can be used
| Variable Code | Description |
|---|---|
| [category] | Outputs a current category name. |
| [categories] | Outputs a current categories chain starting from the first parent category and ending a current category. |
| [parent_category] | Outputs a parent category name only. |
| [parent_category_N] | N is the number such as 1, 2, 3 etc. The orders of the parent categories is as follows: site.com/parent_category_3/parent_category_2/parent_category_1/category.html. |
| [website_name] | Outputs a current website name. |
| [store_name] | Outputs a current store name. |
| [store_view_name] | Outputs a current store view name. |
| [filter_all] | Inserts all the chosen attributes names. The structure is "Label1 Value1, Label2 Value2" like "Color Red, Size M". |
| [filter_attribute_code] | Inserts the attribute value (if exists). E.g., [category] in [filter_color] will be parsed as "Shoes in Color Red". |
| [filter_attribute_code_label] | Inserts the product attribute label. E.g., [category] filtered by [filter_color_label] will be parsed as "Shoes filtered by color". |
| [filter_attribute_code_value] | Inserts the product attribute value. E.g., [filter_color_value] [category] will be parsed as "Red Shoes". |
Randomizer feature allows the store owner to randomly pick the values on every page refresh. The construction like [Buy||Order||Purchase] will use a randomly picked word. Randomizers can be used within other template variables. In this case, variables should be put inside the braces {} not brackets []. Only one variable can be used inside the construction.
Category Grid (Mass Edit)
The grid provides the possibility to apply mass edits for the category pages. All the settings added by our extension for the categories individually, can be assigned in bulk. To observe the category grid and apply the edits, log into the Magento Admin panel and go to MARKETING ⟶ MageWorx SEO Category Grid ⟶ SEO Category Grid.
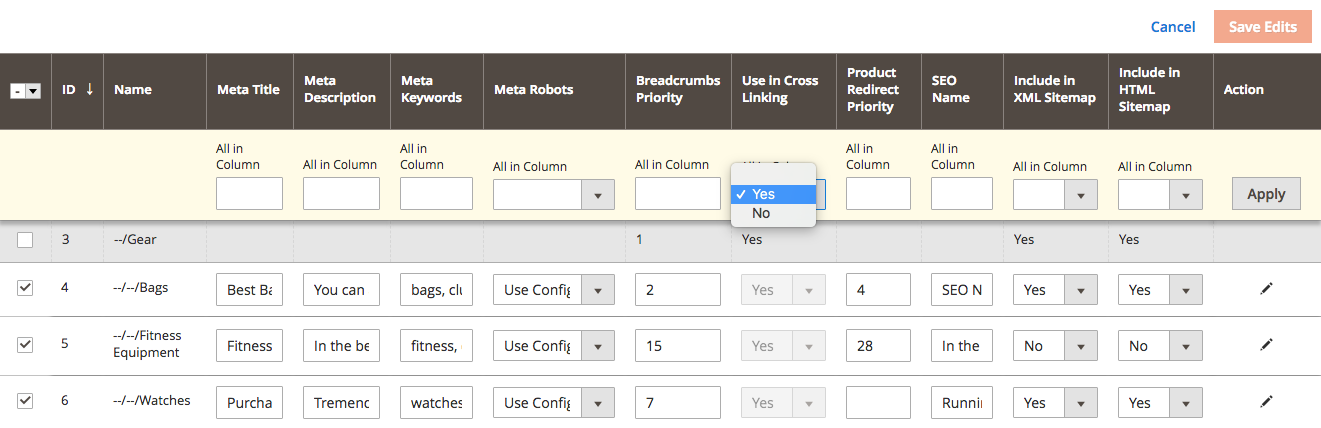
From here, you can select any category and change the corresponding values in the meta sections (meta title, meta description, meta keywords), apply the desired meta robots, handle the breadcrumbs priority, choose whether you should allow the usage of the categories in the crosslinks, specify the redirects priority, add the special SEO Name (it replaces the default Category name), and decide whether you should add the category to the XML and HTML sitemaps.
To select several categories in the grid at the same time, click the checkbox in the first column. To apply the changes, hit the Save Edits button.
You can mass apply some value to all the categories selected by choosing it in the yellow row above the categories. Click the Apply button for such operation.
SEO Breadcrumbs
A breadcrumb is a graphical element that reveals the user’s location in a website. A breadcrumb trail shows each page viewed by a visitor of a website, either in the order the pages were viewed, or in other definitions, displaying a hierarchy of the current page in relation to the website's structure. The breadcrumbs can usually be found in websites that have a large amount of content organized in a hierarchical manner.
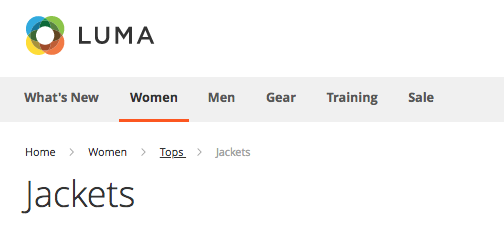
The breadcrumbs shown on the category page in Magento 2.
Magento 2 default breadcrumbs are generated dynamically according to the user path to a targeted page. This is the main disadvantage of Magento 2 native breadcrumbs, because the breadcrumbs are always changed.
Example
If you browse a store and open a product from a category page, the breadcrumbs will have a full path to the product, including all categories of this product you visited before opening the product page:

However, if you open this product by opening a direct URL (for example, click on a product page in Google search results), Magento 2 won't show the product's categories in the breadcrums:

Breadcrumbs Priority
To manage SEO Breadcrumbs priority for categories, go to MARKETING ⟶ MageWorx SEO Breadcrumbs ⟶ Breadcrumbs Priority
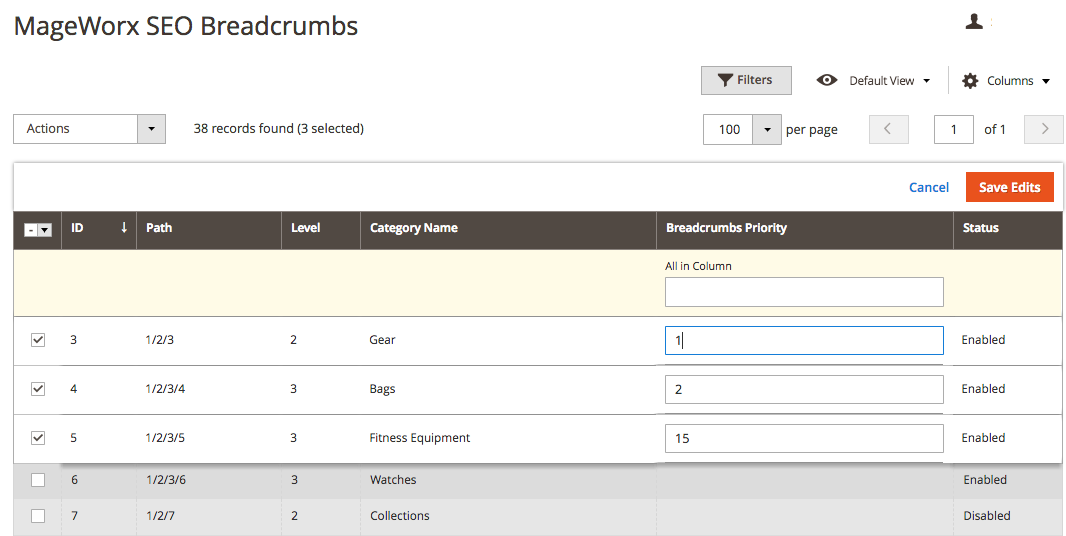
Breadcrumbs priority for categories is used when a product is assigned to multiple categories. The category with a higher priority will be shown in the breadcrumbs hierarchy, while the categories with a lower or not specified priority will be excluded from the breadcrumbs chain. This page allows specifying the priority for each category. The grid support Actions. For this, click the checkboxes near the categories that you wish to modify and click the Edit link on the Actions dropdown. Click the Save Edits button to proceed.
The breadcrumbs' priority of certain category can be set up when editing the Category as well. For this go to PRODUCTS ⟶ Categories, select the desired Category and open the Search Engine Optimization tab. The setting is called Breadcrumbs Priority.
The category with the higher Breadcrumbs Priority number will be used to generate the breadcrumbs.
This can be done on the Category Grid as well.
Layered navigation
SEO URLs functionality provides the possibility to equip layered navigation pages with SEO and user-friendly URLs.
Log into the Magento Admin panel and go to STORES ⟶ Configuration ⟶ MAGEWORX ⟶ SEO. Select "SEO-friendly URLs" tab.

From here, the store owner can optimize URLs of any page filtered by the layered navigation and any category page. URL Structure is very important for the SEO purpose as this creates the links logic for the site. The key solution is the golden mean between being short and neat on one hand yet SEO-friendly and functional on the other. By default, Magento generates URLs for layered navigation pages using the so-called GET-parameters.
Such URLs may have such structure: www.site.com/category.html?color=49&size=56. The numbers here are the options IDs and it is absolutely impossible for the client to correlate the ID with the specific filter option. The pages with GET-parameters can have a lower visibility in search results and a lower CTR. So in order to find and share such links (from the clients side) and be fully presented in the search engine result pages (from the store owner side), LN URLs should be SEO-optimized.
- Enable for LN filters - this setting enables the functionality of our SEO-friendly layered navigation URLs. is set to Yes the aforementioned URL will be changed to
www.site.com/category/women/l/color=black/size=m.html
Here the /l/ is the SEO LN URLs Indentifier. It can be set in to make the layered navigation URLs SEO-friendly by separating the category and the applied filters. You can change it in the "SEO LN URLs Identifier" setting.
- Enable for Pager URLs - this setting enables the functionality to change the pager part in the URL to build more SEO-friendly URL.
The default way to display the pagination in the URLs is using the GET-parameters, e.g., www.site.com/category.html?p=2. Enable for Pager URLs lets you modify the format of the pagination. The Pager Format can be
-
-[pager_var][pager_num] (e.g.,
www.site.com/category-p2.html -
/[pager_var]/[pager_num] (e.g.,
www.site.com/category/p/2.html
The default pager_var is p. You can modify it and change to any other value by editing the field "Pager Var" Parameter.
- Enable Redirects from SEO LN URLs to Default URLs provides the possibility to set up the 301 redirects from SEO friendly Layered Navigation URLs to Magento default URLs. It might be useful if you decide to disable our LN URLs to avoid 404 errors.
Use Cases
Click here to see the practical Use Cases of this functionality.
SEO Rich Snippets
This module comes as a part of SEO Suite Ultimate, as well as a separate extension. For the detailed configuration instructions, check the full Magento 2 Extended Rich Snippets extension manual.
Cross Links
This module comes as a part of SEO Suite Ultimate, as well as a separate extension. For the detailed configuration instructions, check the full Magento 2 Cross Links extension manual.
SEO Redirects
Log into the Magento Admin panel and go to STORES ⟶ Configuration ⟶ MAGEWORX ⟶ SEO. Select the SEO Redirects tab.
Under these settings, you can find the initial setup of the extension configuration. It consists of 2 tabs.
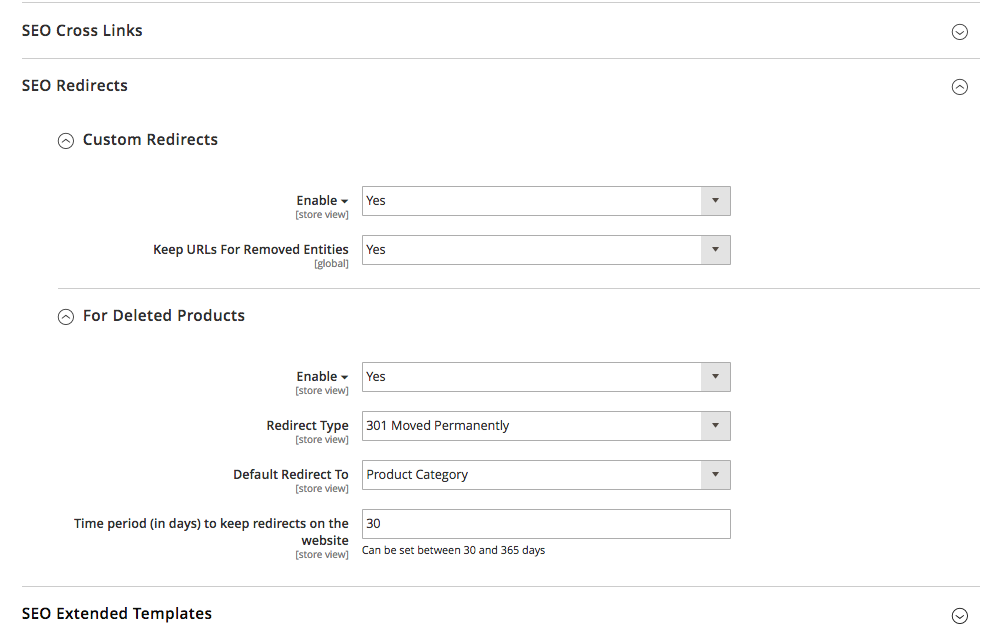
Custom Redirects
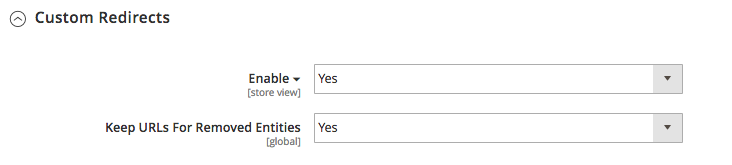
Here, the store owner can enable/disable all custom redirects at once.
Keep URLs For Removed Entities needs some clarification. For instance, you've redirected a category to a product page. If you decide to delete this category, the extension will use the previous category URL to keep this redirect. Thus, the category-product redirect will be transformed into the custom URL-product, where the custom URL is a deleted category URL.
If this setting is off, such redirect will be broken, because the extension won't be able to find the deleted category to build a correct redirect.
Redirects For Deleted Pages
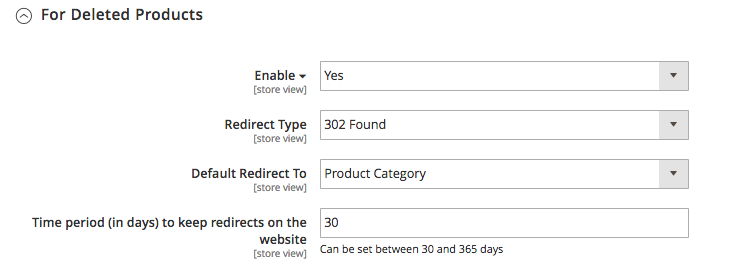
From here, the store owner can enable or disable redirects.
Also, under these settings, the store owner can set:
• Redirect Type — either 301 Moved Permanently or 302 Found pages redirect can be selected here.
• Time period (in days) to keep redirects on the website — the option is used to set a number of days to keep the set redirect(-s) active. You can set it for the period from 30 to 365 days.
• Default Redirect To allows selecting the destination of the redirect: product category or priority category.
The difference between product category and priority category can be explained and best understood through example:
-
If a product was assigned to a single category A - subcategory A1 and the setting is set to redirect to a product category, the redirect will be created to the subcategory A1.
-
If a product was assigned to both category A - subcategory A1 AND to category B - subcategory B1, and the setting is set to redirect to a product category, the redirects will be created to both subcategory A1 AND to the subcategory B1:
• the URL such as www.site.com/categoryA/subcategoryA1/product.html will be redirected to www.site.com/categoryA/subcategoryA1/.
• the URL such as www.site.com/categoryB/subcategoryB1/product.html will be redirected to www.site.com/categoryB/subcategoryB1.
In this case if the setting is set to redirect to the priority category, the redirects will always be set to the one with the higher priority. The priority of the category can be set up in the Category Configuration. For this go to PRODUCTS ⟶ Inventory ⟶ Categories, select the desired Category and open the Search Engine Optimization tab.
The category with the higher Product Redirect Priority number will be used if the priority category setting is selected. This can be done on the Category Grid as well.
Manage Custom Redirects
To observe, edit and add the custom redirects, go to MARKETING ⟶ MageWorx SEO Redirects ⟶ Custom Redirects
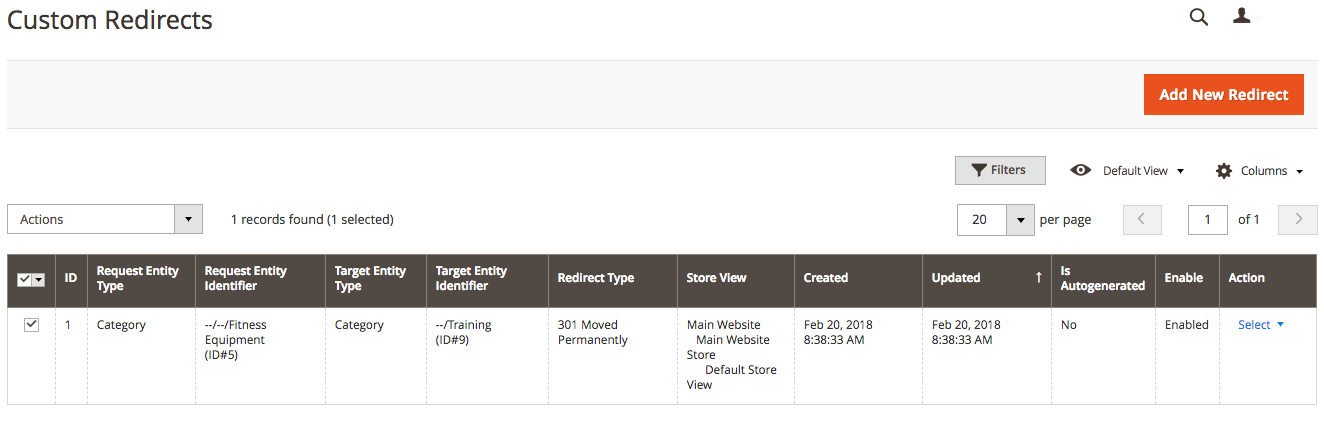
Please note that during the initial setup this grid will be empty.
The columns can be sorted alphabetically by clicking the column title. You can select several redirects and click the Edit button on the Actions dropdown.
To create a new redirect, click the Add New Redirect button.
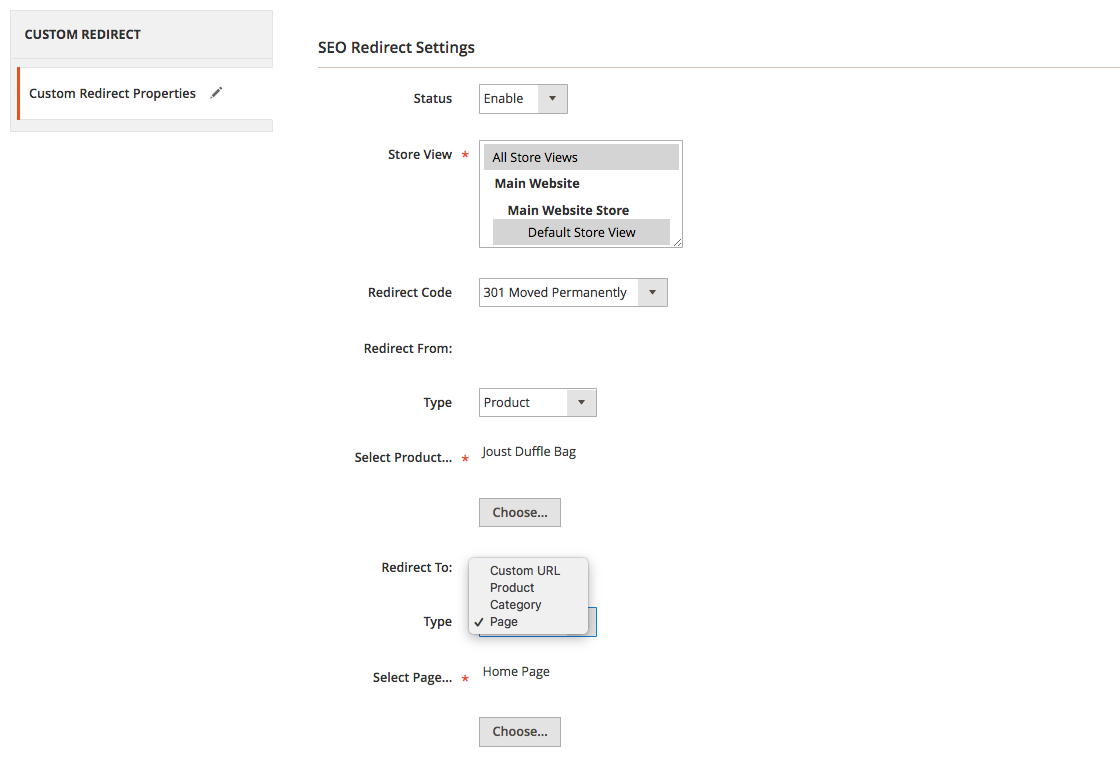
The Status provides the ability to enable the redirects. After that the store owner should select the desired Store View and the Redirect Code (either 301 or 302).
The Redirect From and Redirect To settings provide the similar functionality. It allows selecting the option from the dropdown field. The values can be:
-
Custom URL.
The Redirect From field supports only the relative URLs
/custom/urlwhile the Redirect To field supports both absolutehttps://www.site.com/custom/urland relative/custom/urlURL values. -
Product.
To select the desired product, click the Choose button.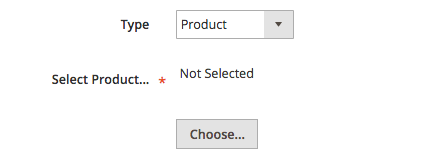
Once the store owner clicks the Choose button, the products grid appears. You can filter the products selecting the category from the category tree and using the search boxes in the column headers.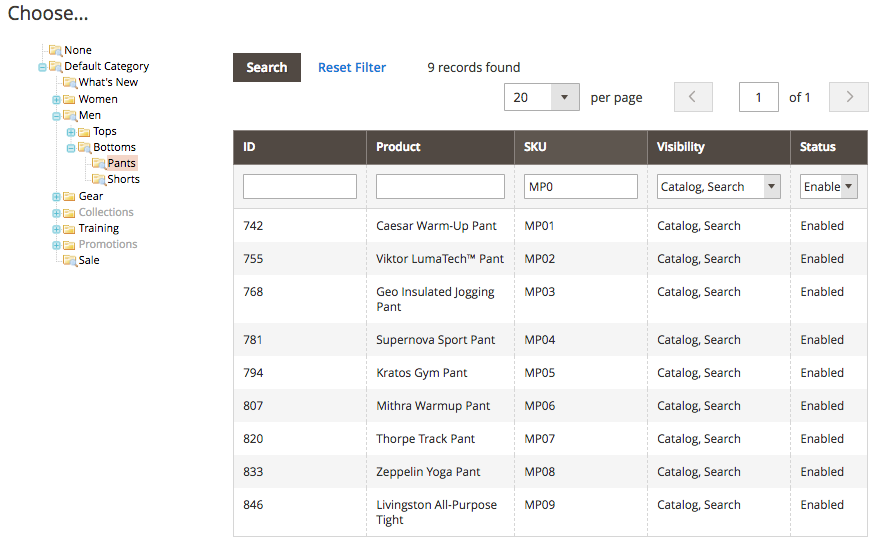
-
Category.
To select the desired category, click the Choose button.
Once the store owner clicks the Choose button, the category tree appears.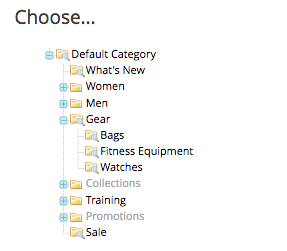
-
CMS Page.
To select the desired page, click the Choose button.
Once the store owner clicks the Choose button, the page grid appears. You can filter the pages using the search boxes in the column headers.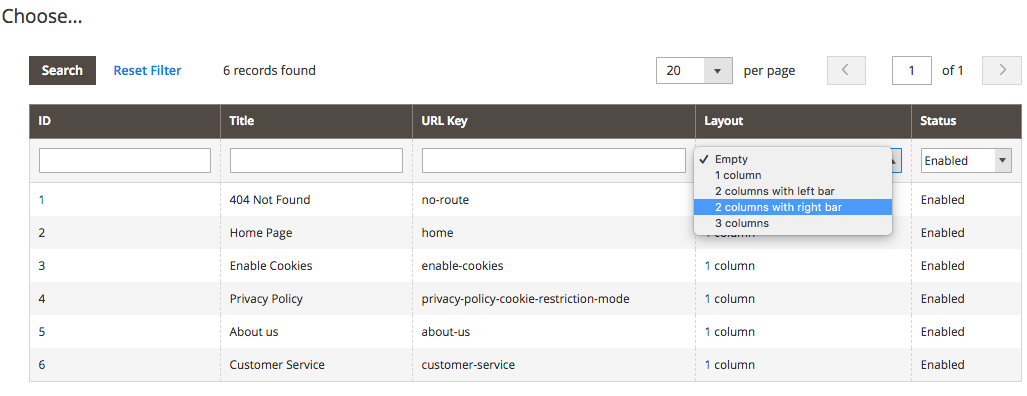
-
MageWorx Landing Pages.
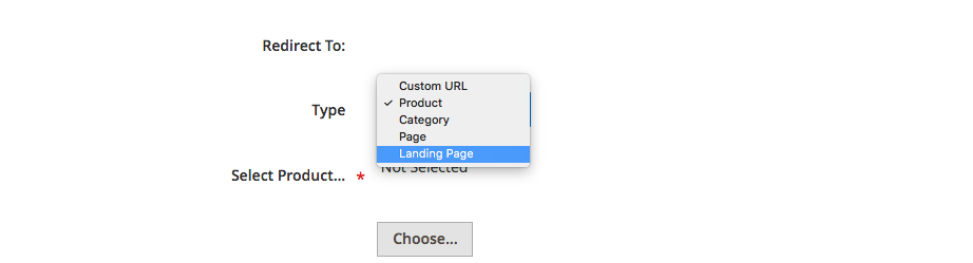
To select the desired page, click the Choose button.
Once the store owner clicks the Choose button, the page grid appears. You can filter the pages using the search boxes in the column headers.
Redirects For Deleted Pages
To view and edit the redirects for deleted pages, go to MARKETING ⟶ MageWorx SEO Redirects ⟶ Redirects For Deleted Pages
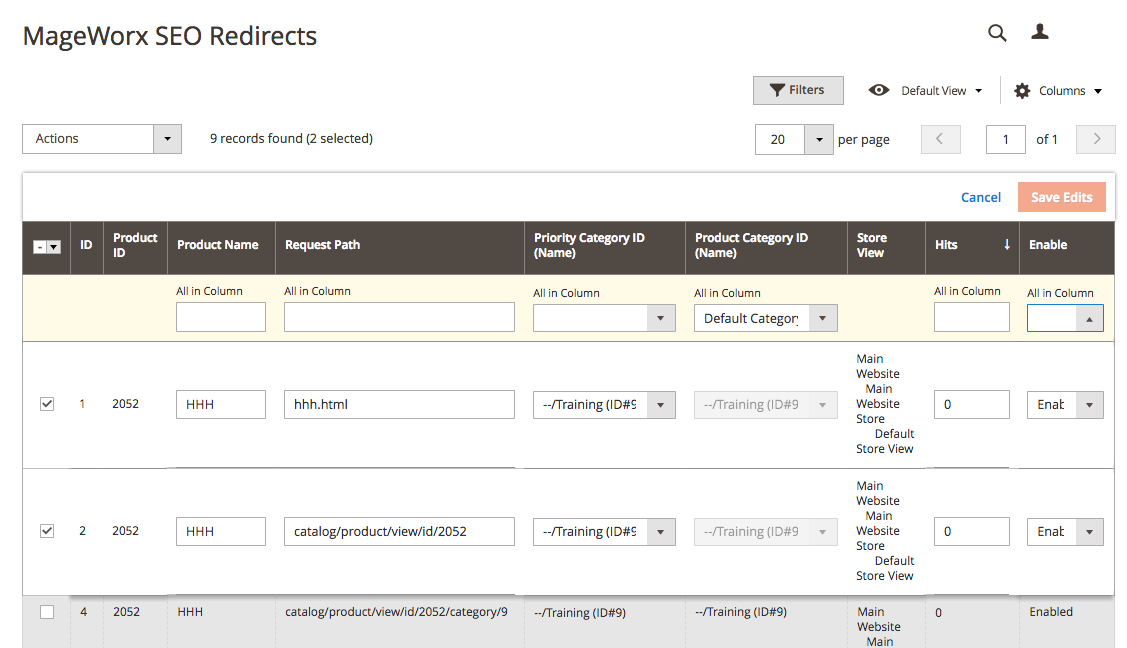
Please note that if the website doesn't have the deleted pages, this grid will be empty.
The columns can be sorted alphabetically by clicking the column title. You can select several redirects and click the Edit button on the Actions dropdown.
Here, you can conveniently manage redirects of this type:
• enable or disable redirects for certain deleted products;
• change the product category or priority category;
• view the number of hits (clicks) for each redirect;
• temporary disable the redirects using the Edit button on the Actions dropdown.
• permanently delete an unneeded product from the ‘Redirects’ grid using the Edit button on the Actions dropdown.
Import/Export SEO Redirects
The extension has the possibility to export the Custom SEO Redirects and to import them. Log into the Magento Admin panel and go to SYSTEM ⟶ Data Transfer ⟶ Import/Export SEO Redirects.
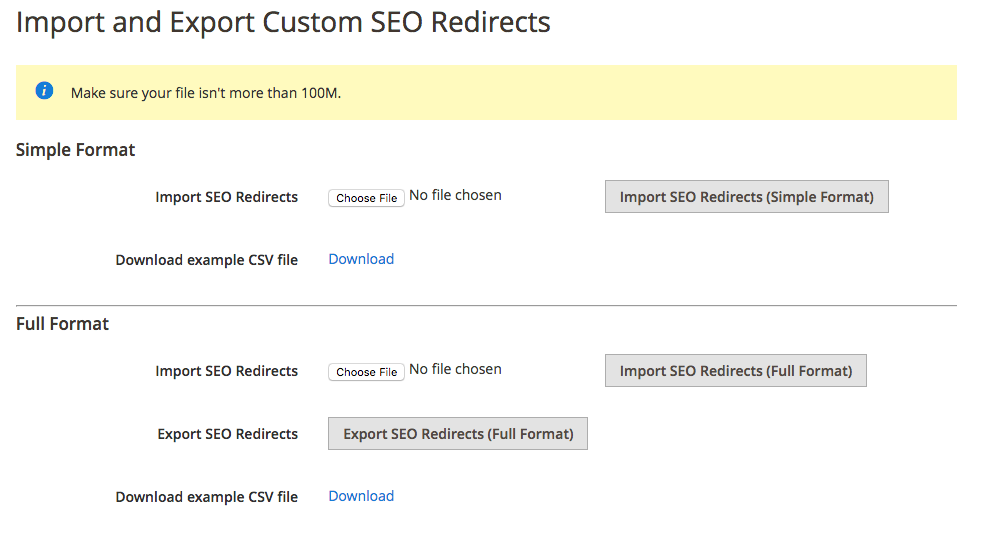
This workspace has 2 separate import/export formats: the simple one and the full format.
Simple Import/Export Format
The simple format supports redirects set from a custom site URL to another URL of the current website or any other one. If added manually without the simple format import, this stands for such configurations combination:
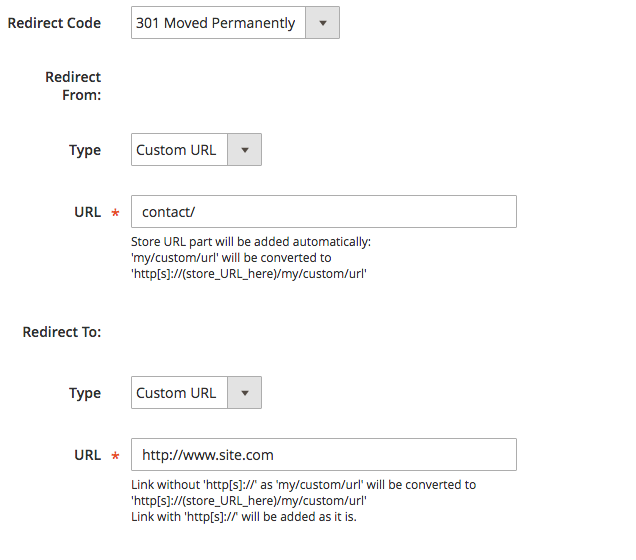
To check the simple format structure of the SEO Redirects CSV file, click the Download example CSV file. The CSV structure is as follows:
"Request Identifier","Target URL","Redirect Code","Store View Code"
"test","http://site.com/test.html","301","default"
"iphone_8","http://site.com/iphone_x","302","second"
"tablets","http://site.com/smartphones","301","all"
I The Request Identifier is the relative URL that is located on the store owner's website that should have the redirect, same as the Redirect From URL field on the previous screenshot.
II The Target URL is the URL that can be located anywhere (it supports absolute URLs) same as the Redirect To URL field on the previous screenshot.
III The Redirect Code supports both 301 and 302 values.
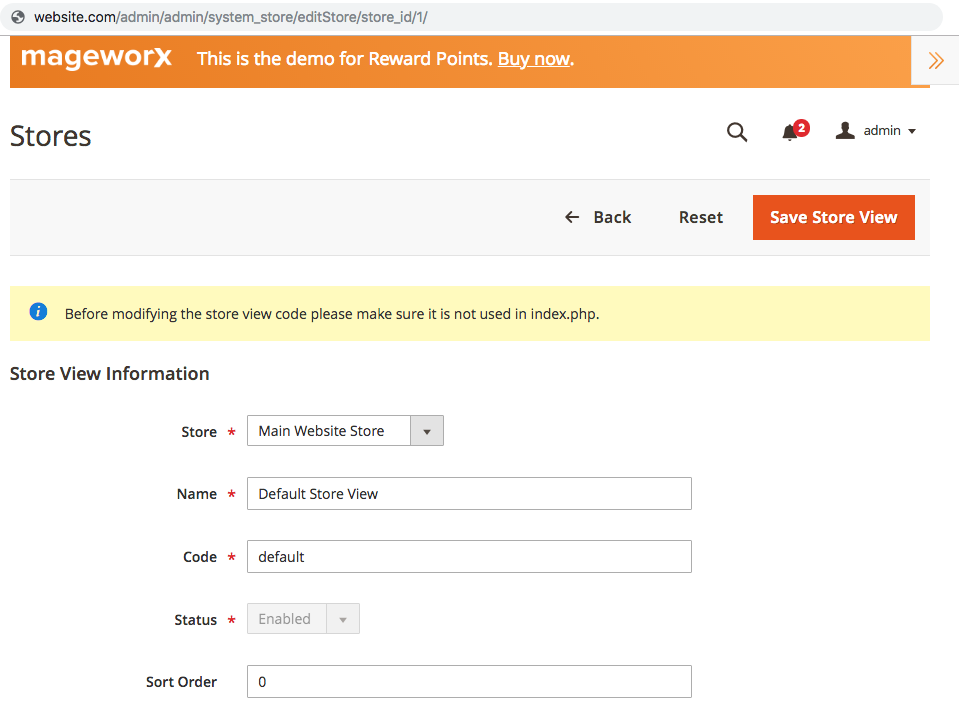
IV The Store View Code can be checked on the Store View Information page. To check this code, go to STORES ⟶ Settings ⟶ All Stores. Select the desired store view and check the Code:
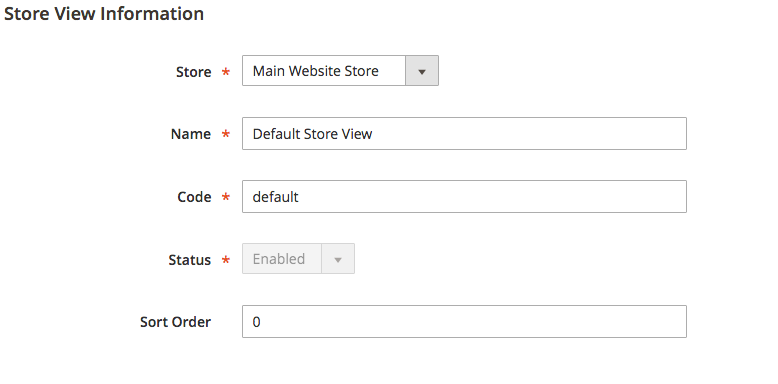
To create the redirects for all store views on your Magento installation, use the "all" store view code.
Full Import/Export Format
The full format supports all the possible Custom Redirect Types formats: Custom URLs, Products, Categories and Pages.
To check the full format structure of the SEO Redirects CSV file, click the Download example CSV file or Export SEO Redirects (Full Format). The CSV structure is as follows:
"Request Entity Type","Request Entity Identifier","Target Entity Type","Target Entity Identifier","Redirect Type","Store ID"
"product_id","1","category_id","5","301","0"
"category_id","2","category_id","6","301","1"
"product_id","3","page_id","6","301","1"
"custom_url",'test.html',"product_id","7","302","2"
"page_id","3","custom_url","http://blog.site.com","301","0"
I The Request Entity Type is the Custom Redirect Type and it can be custom_url, product_id, category_id or page_id.
II The Request Entity Identifier can have the different values depending on the Request Entity Type:
-
For the
custom_urlthis is the the relative URL that is located on the store owner's website that should have the redirect -
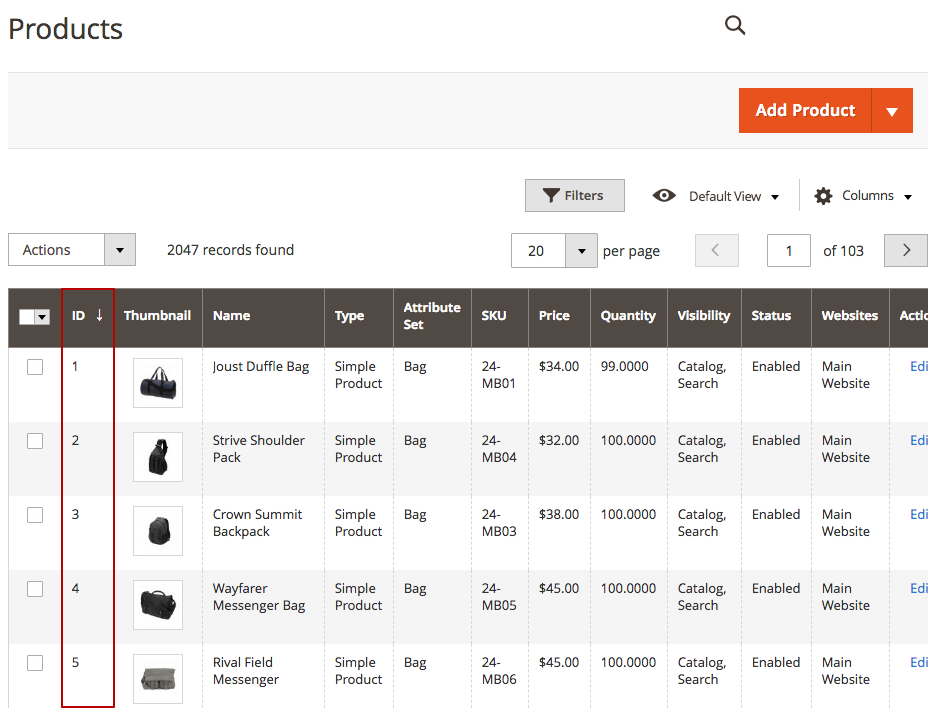
For the
product_idit is the product ID that is visible on the products grid in CATALOG ⟶ Products:
- For the
category_idit is the category ID that is shown near the category name when the category is selected on the category workspace in CATALOG ⟶ Categories:.
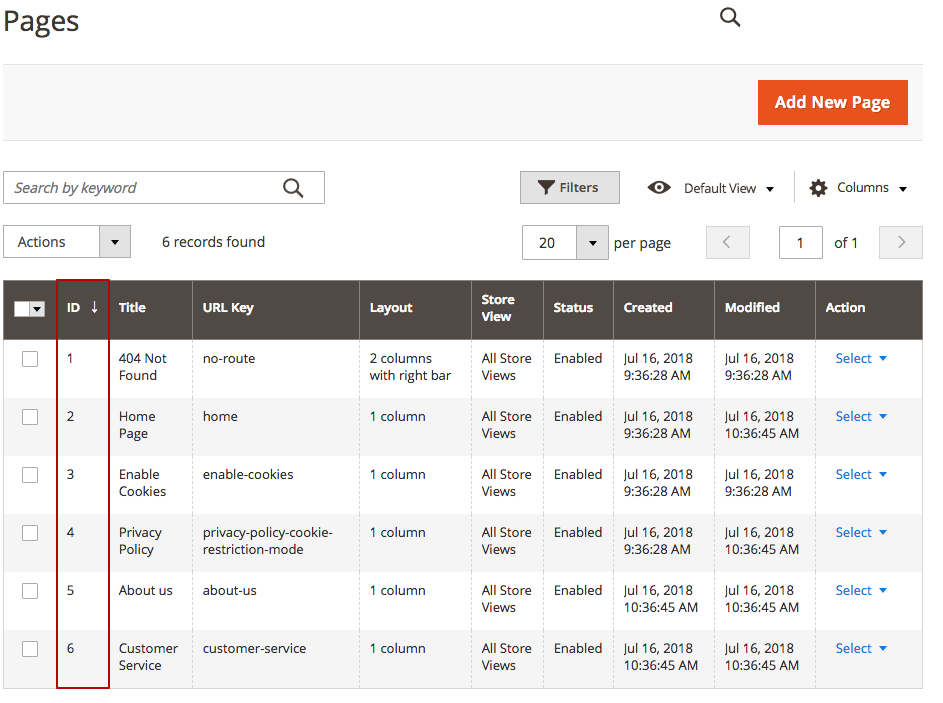
- For the
page_idit is the ID of the page that is visible on the pages grid in CONTENT ⟶ Elements ⟶ Pages:
III The Target Entity Type has the same values as the Request Entity Type (I).
IV The Target Entity Identifier has the same values as the Request Entity Identifier (II).
V The Redirect Code supports both 301 and 302 values.
VI The Store ID can be checked on the Store View Information page. To check this code, go to STORES ⟶ Settings ⟶ All Stores. Select the desired store view and check the URL:
SEO Templates
This module comes as a part of SEO Suite Ultimate, as well as a separate extension. For the detailed configuration instructions, check the full Magento 2 SEO Meta Templates extension manual.
SEO Sitemap
This module comes as a part of SEO Suite Ultimate, as well as a separate extension. For the detailed configuration instructions, check the full Magento 2 Sitemap Suite extension manual.
ChatGPT Integration
OpenAI Integration
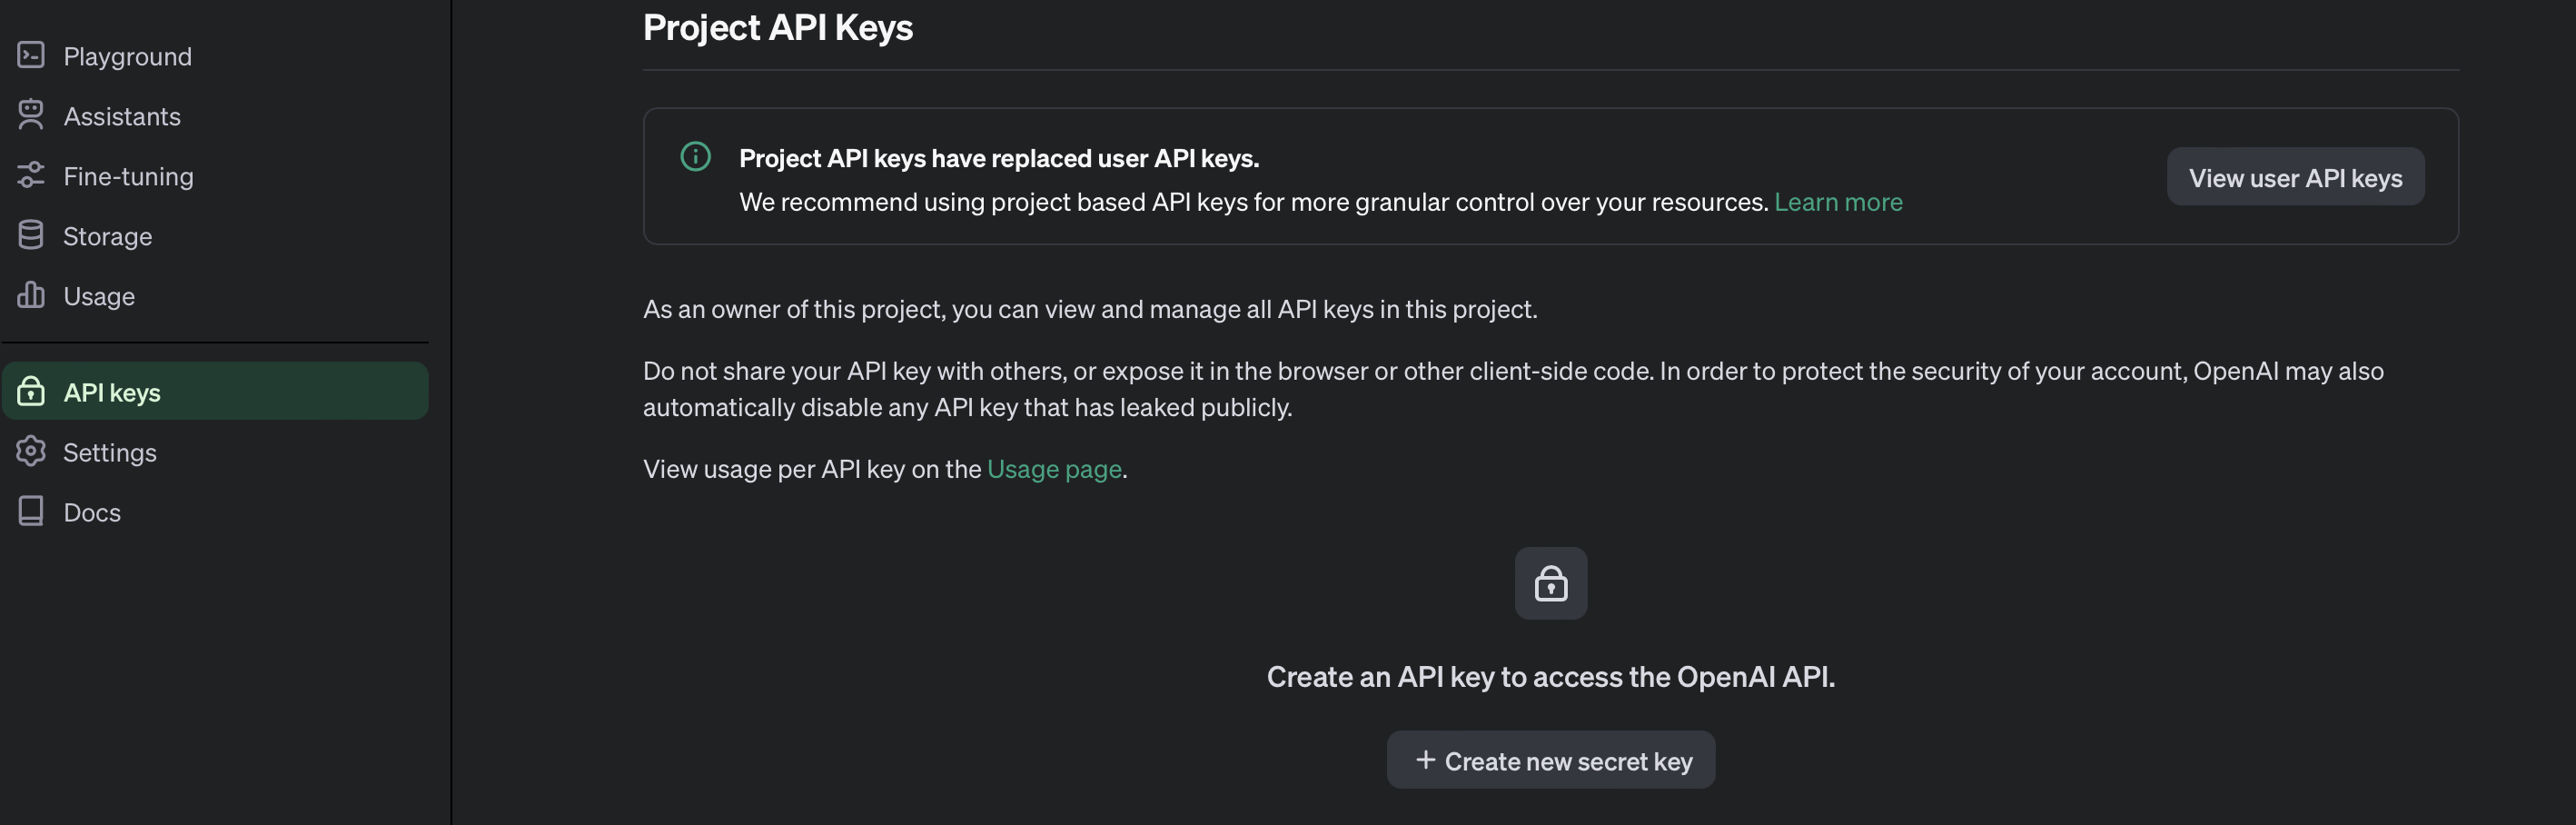
In order to use the AI features in the SEO Suite, first you should enter your API OpenAI key. To generate this key:
- register at platform.openai.com
- go to API keys section
- create API key
- copy the API key
Note
The API key can be copied only right after the creation.
Once the API keys are created, go to Stores -> Configuration -> MAGEWORX - OpenAI Integration -> and enter the created key into the "API KEY" field -> Save the configuration.
SEO AI
To configure the AI features for the SEO Suite go to Stores -> Configuration -> Mageworx -> SEO -> SEO AI. Here you can tune the AI functionality for your needs.
- Enable - it enables the Open AI features for the administrator. When disabled you will no longer see the “Generate using Open AI” buttons in product and category form. All previously generated data will still be available.
- Enable for - you can choose to enable the AI features for products and/or for the categories.
- Open AI Model - choose the preferrable OpenAI model.
Products settings
Here you can tune the AI generation for the products.
- Temperature - it is a configuration setting in ChatGPT that affects the level of randomness in the responses generated by the AI. Adjusting the temperature allows you to control how predictable or creative the model's outputs are.
How it works
- Low temperature (0 to 0.5): At lower settings, ChatGPT produces responses that are more deterministic and consistent. This setting is ideal when you need precise, reliable answers, or when the task requires adherence to well-understood information.
- High temperature (0.6 to 1.0): Increasing the temperature makes the AI's responses more varied and imaginative. Use a higher temperature if you're looking for creativity, such as generating unique content ideas, or when you prefer a broader range of suggestions.
When to adjust temperature
- SEO writing: For tasks like generating metadata or optimizing text for search engines, a lower temperature typically suffices, ensuring that the content remains focused and relevant.
- Creative content: When devising creative headlines or marketing copy, a higher temperature can invoke more original and engaging ideas.
-
Product attributes that will be used for generation - here yoy select attributes that will be used in the generation request. These attributes data will be added instead of the variable to the content request in a title:value format.
-
Number of variants in response per request - defines the number of variants ChatGPT will generate per each request.
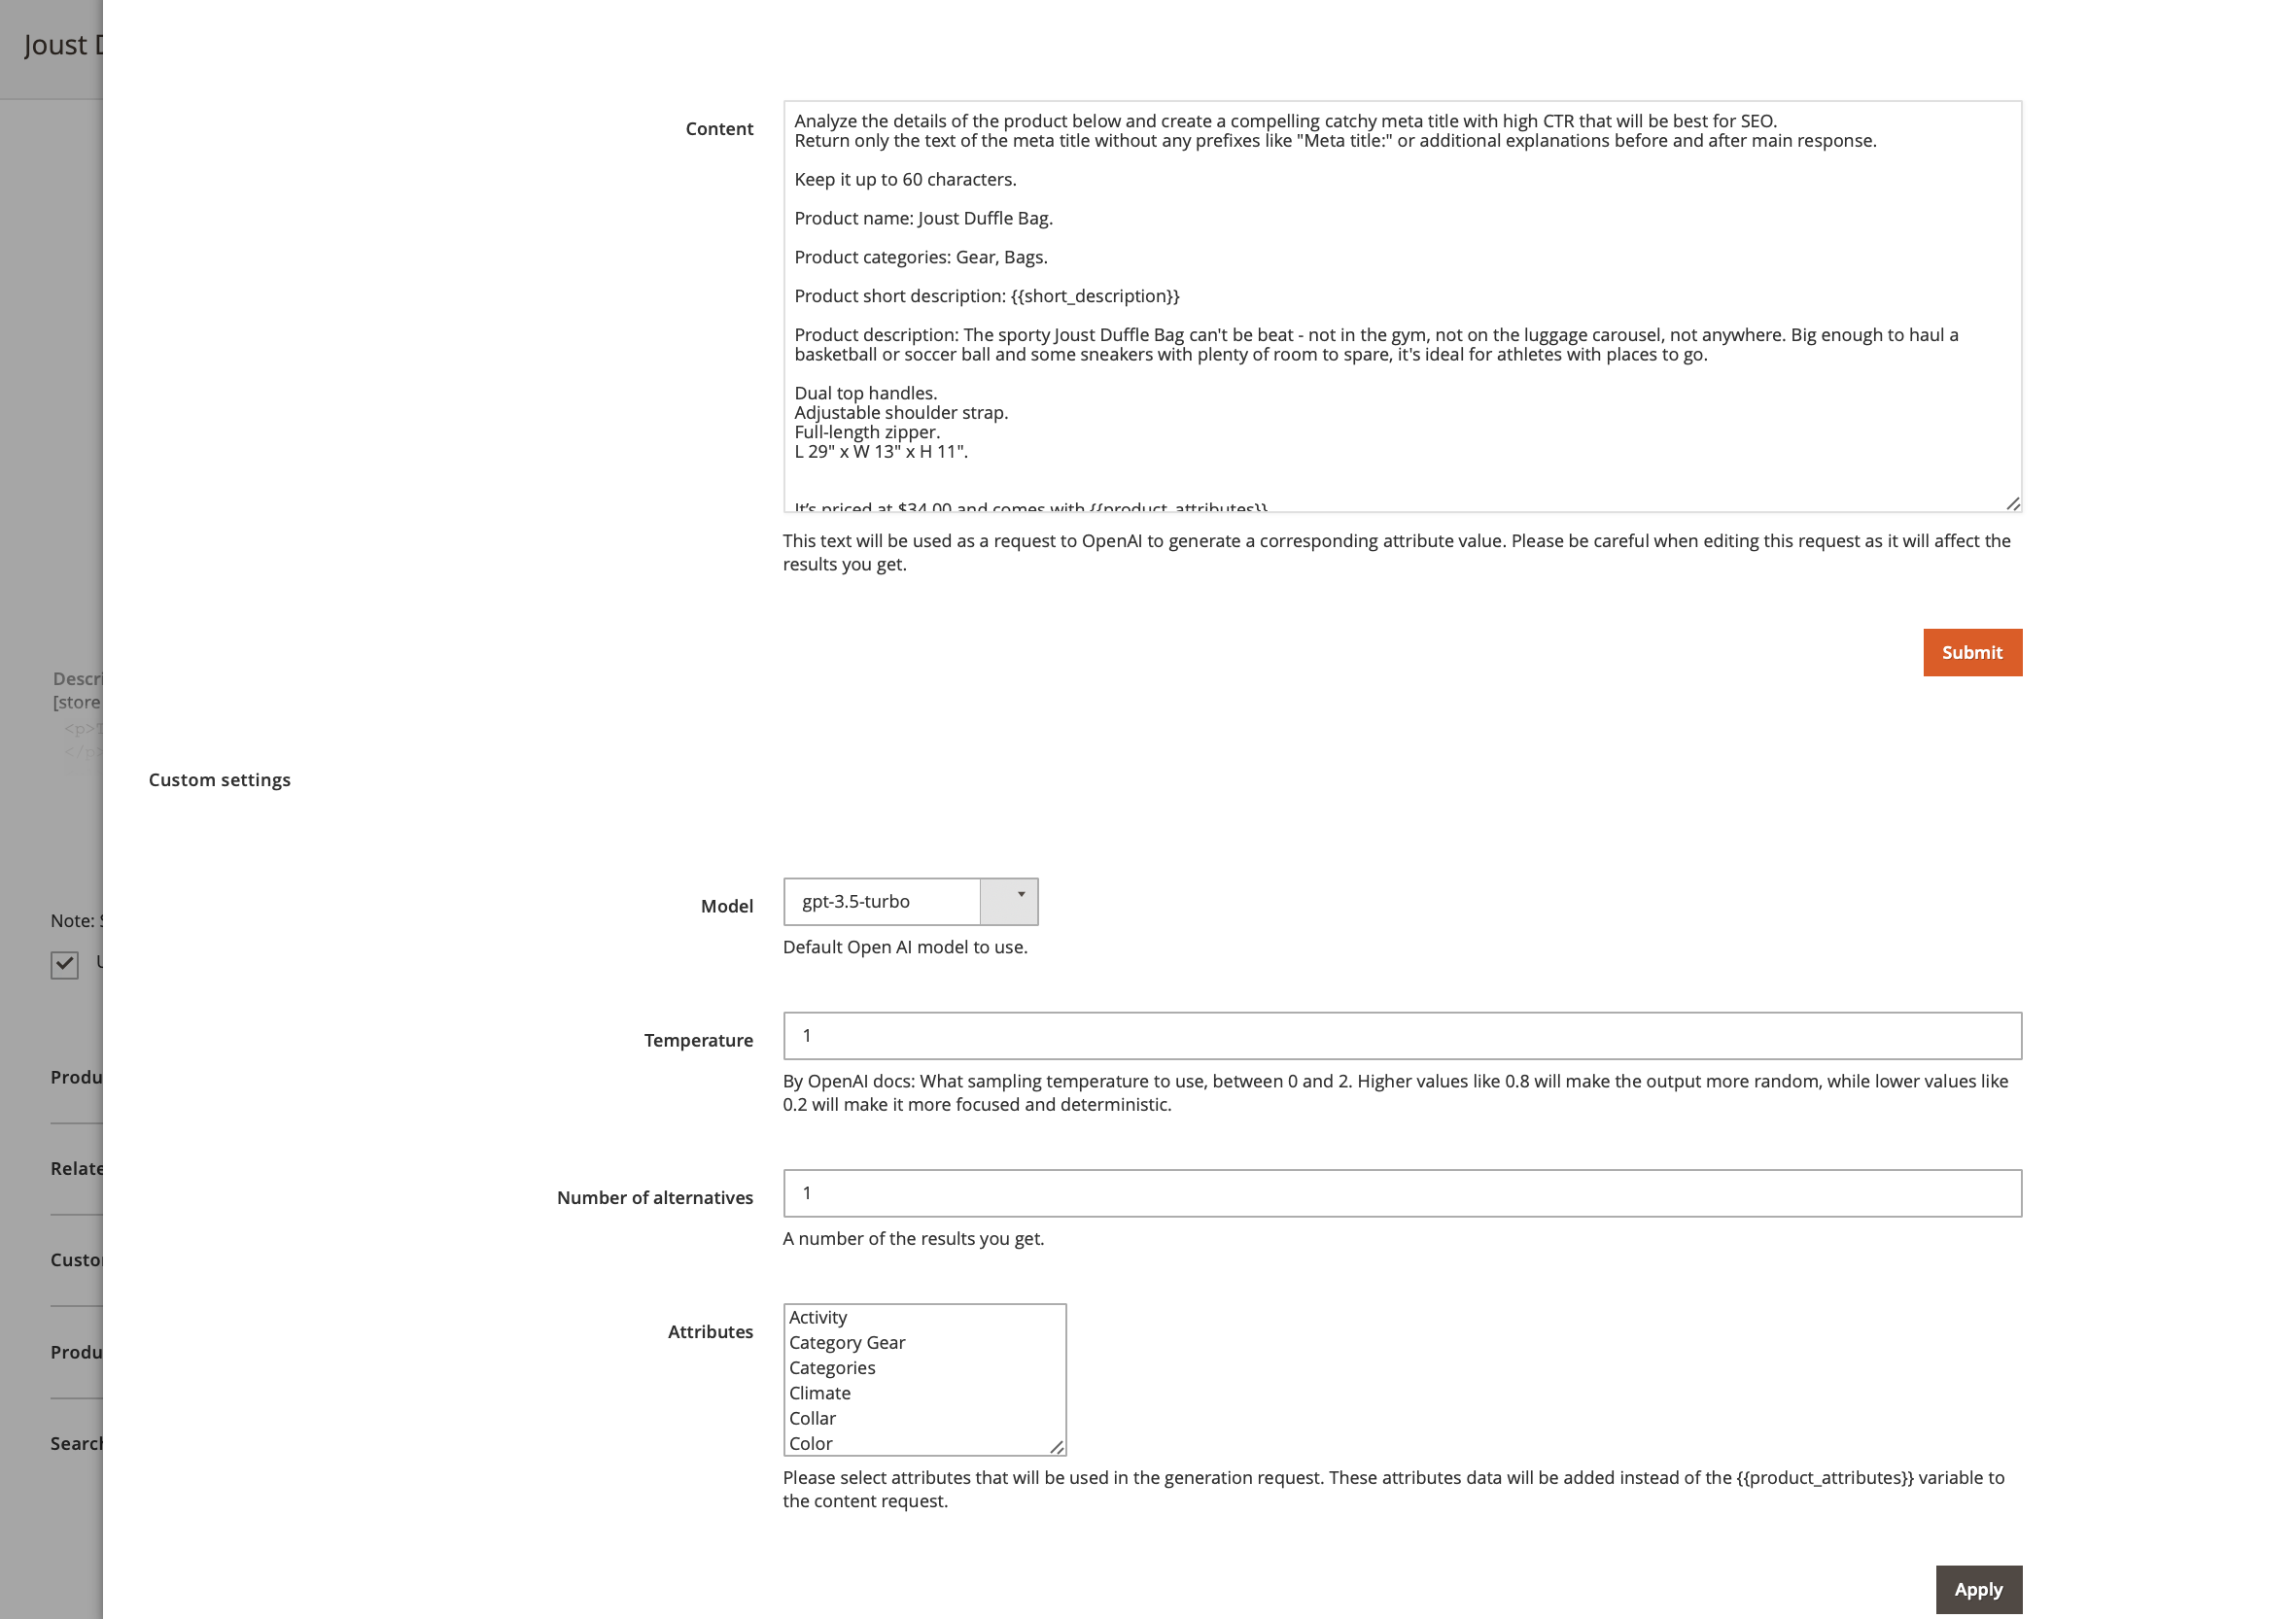
You can also correct the prompt for each available entity. For every entity you can set the max characters limit and correct the prompt itself:

The SEO Suite allows you to generate the following product data:
- Meta title
- Meta description
- SEO name
- Short description
- Description
You can also separately use the Optimize prompts for the following product data:
- Meta title
- Meta description
- SEO name
- Short description
- Description
The category specific settings are quite the same with the product settings.
AI Generations
To generate a product data go to Products -> select a product -> switch to a necessary store view -> scroll down to the necessary fields you want to generate with AI.
There are 3 available options:
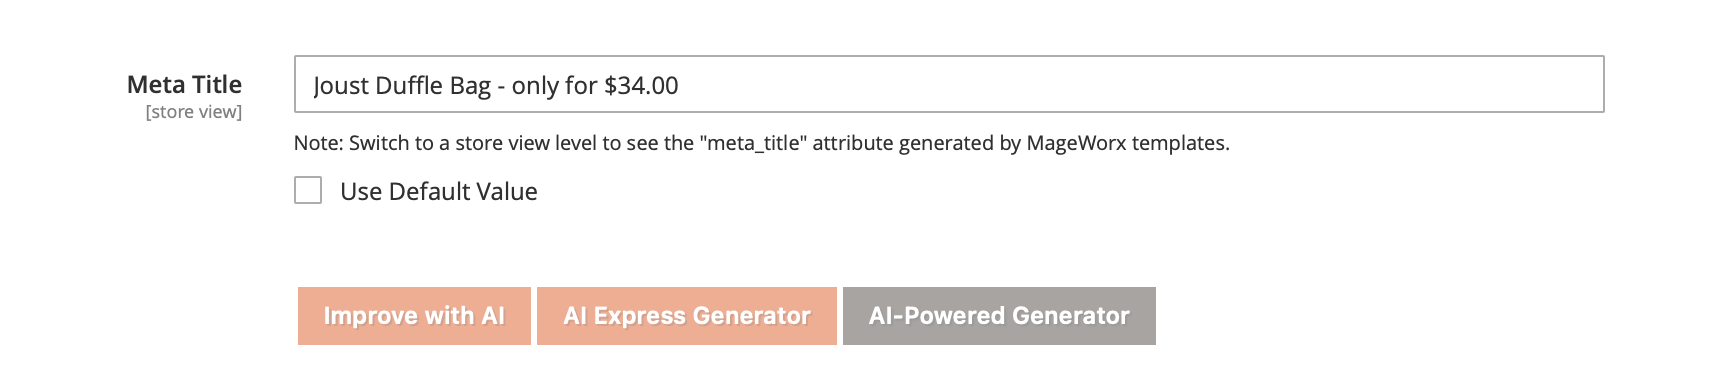
- Improve with AI - this action uses the prompts from Improve sections in the extension's configuration (Mageworx -> SEO -> SEO AI -> Product data). It allows you to optimize the existing data.
- AI express generator - this action generates the result based on the global extension's configuration.
- AI-powered generator - this action allows you to tune the prompt for the current generation not changing the global settings:
To generate a category data go to Categories -> select a category -> scroll down to the necessary fields you want to generate with AI.
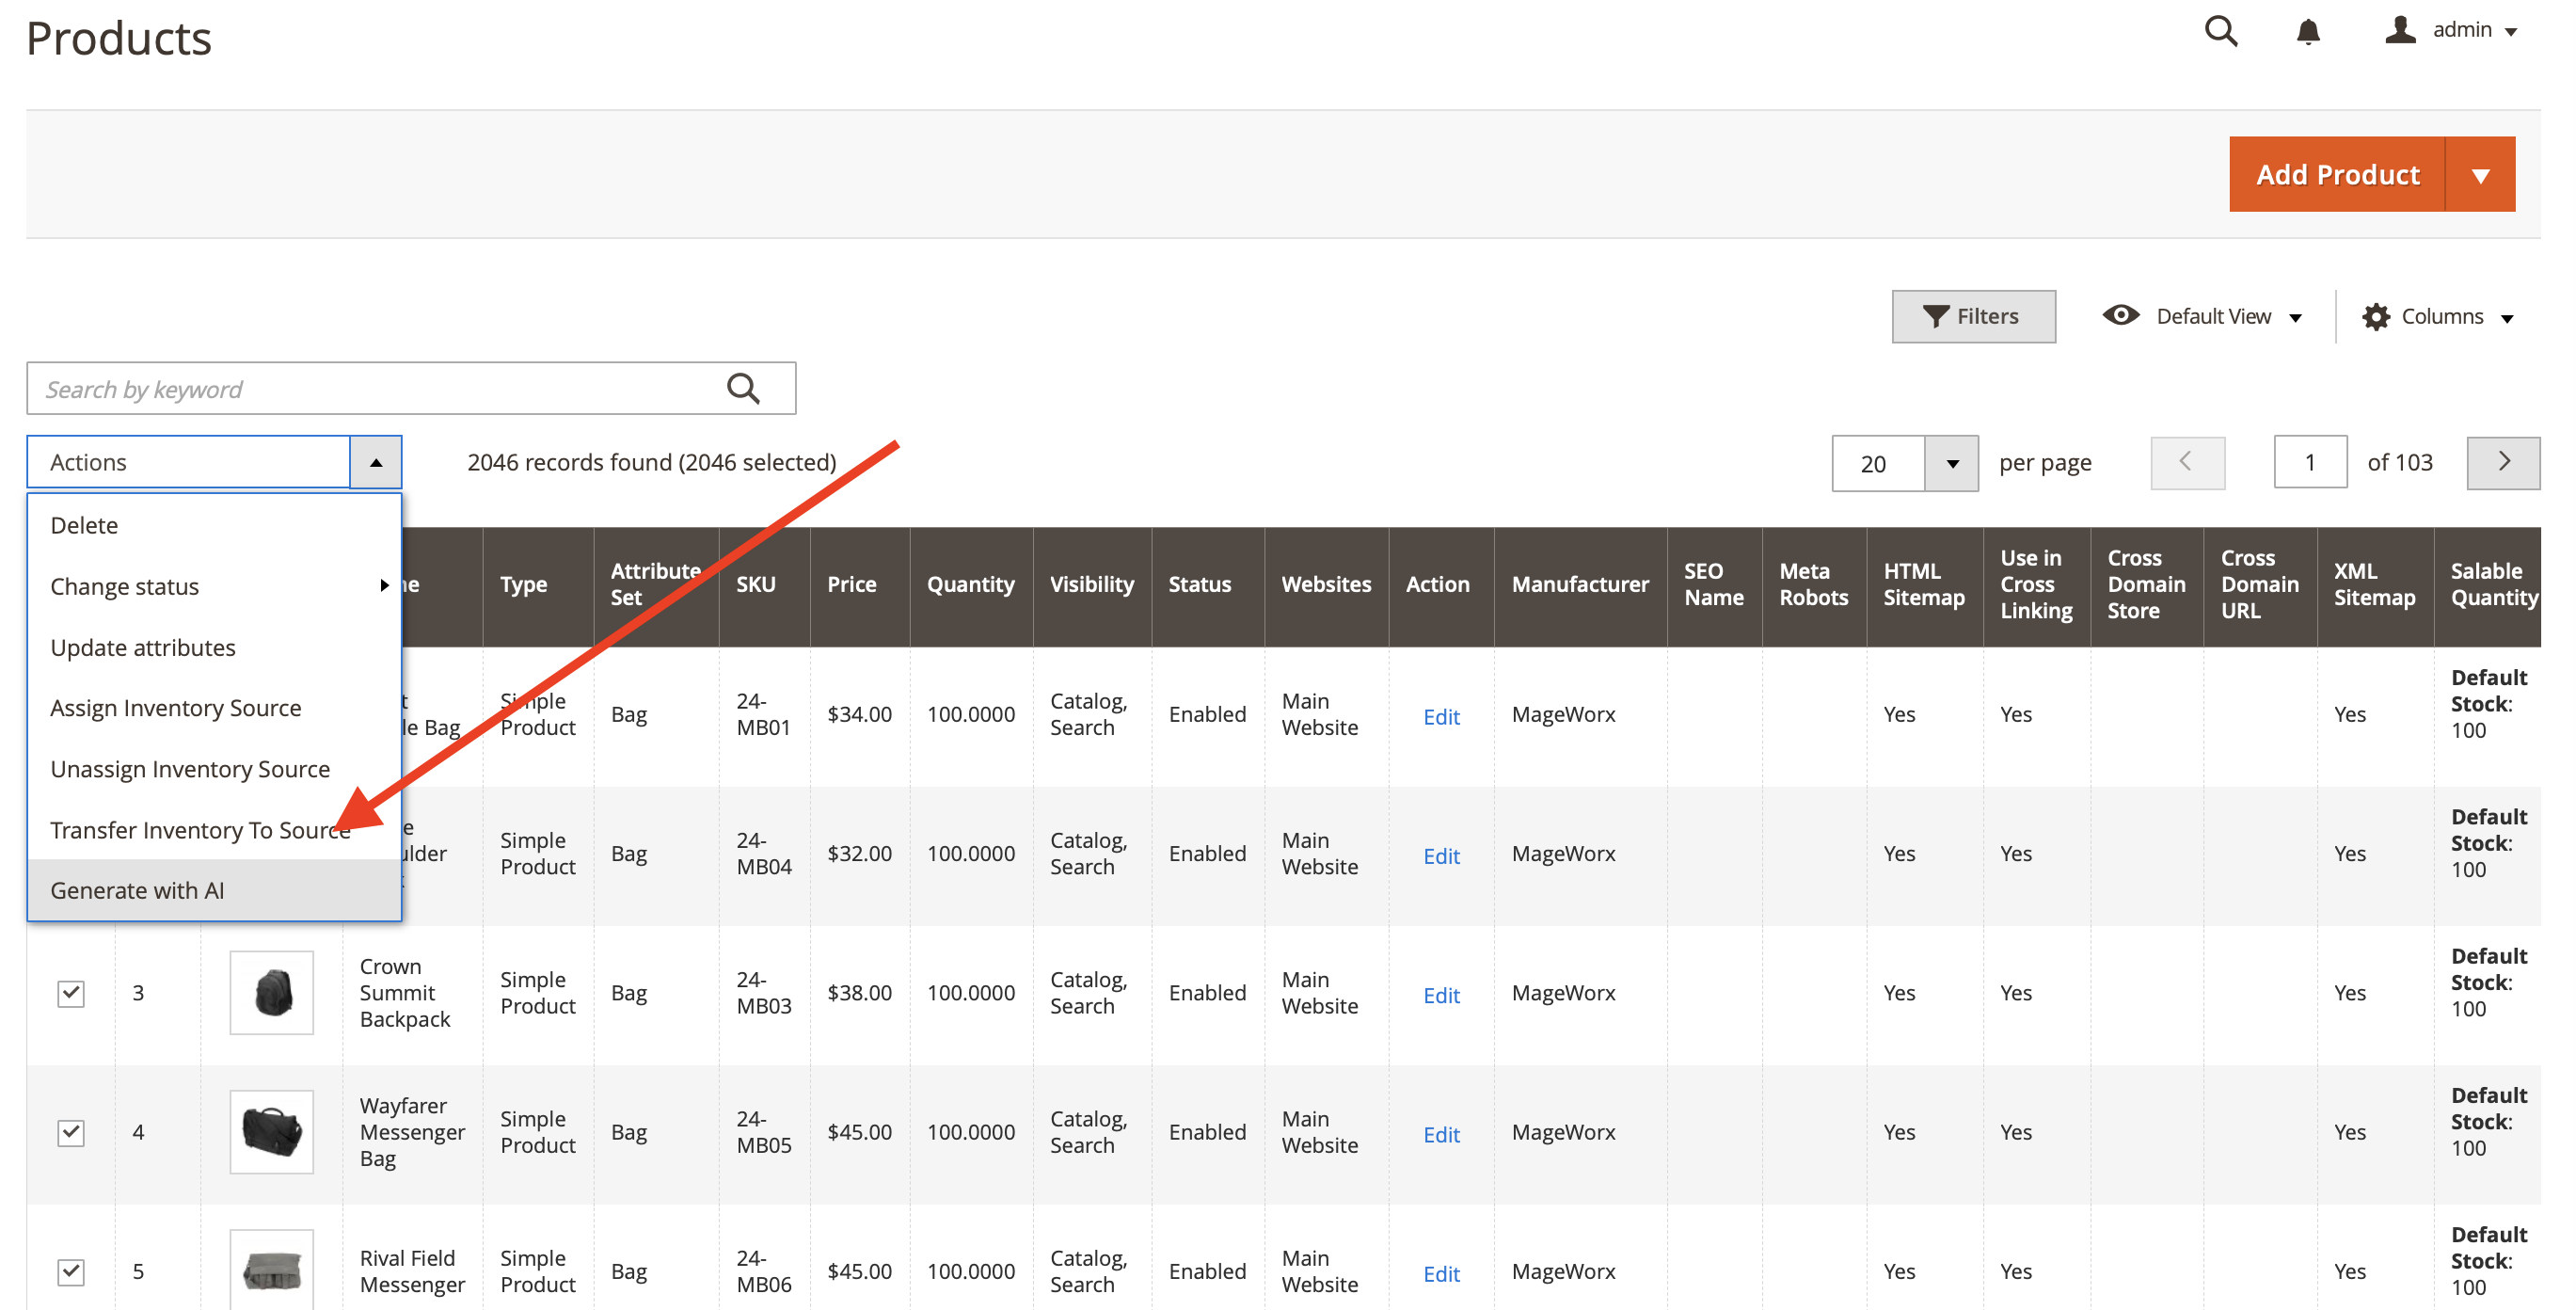
Bulk AI generations
You can also generate the necessary product data in bulk for multiple products. Go to Products -> Select the necessary products - Select "Generate with AI" -> Chooseo the necessary product entity and settings for the generation -> Click on Submit button.
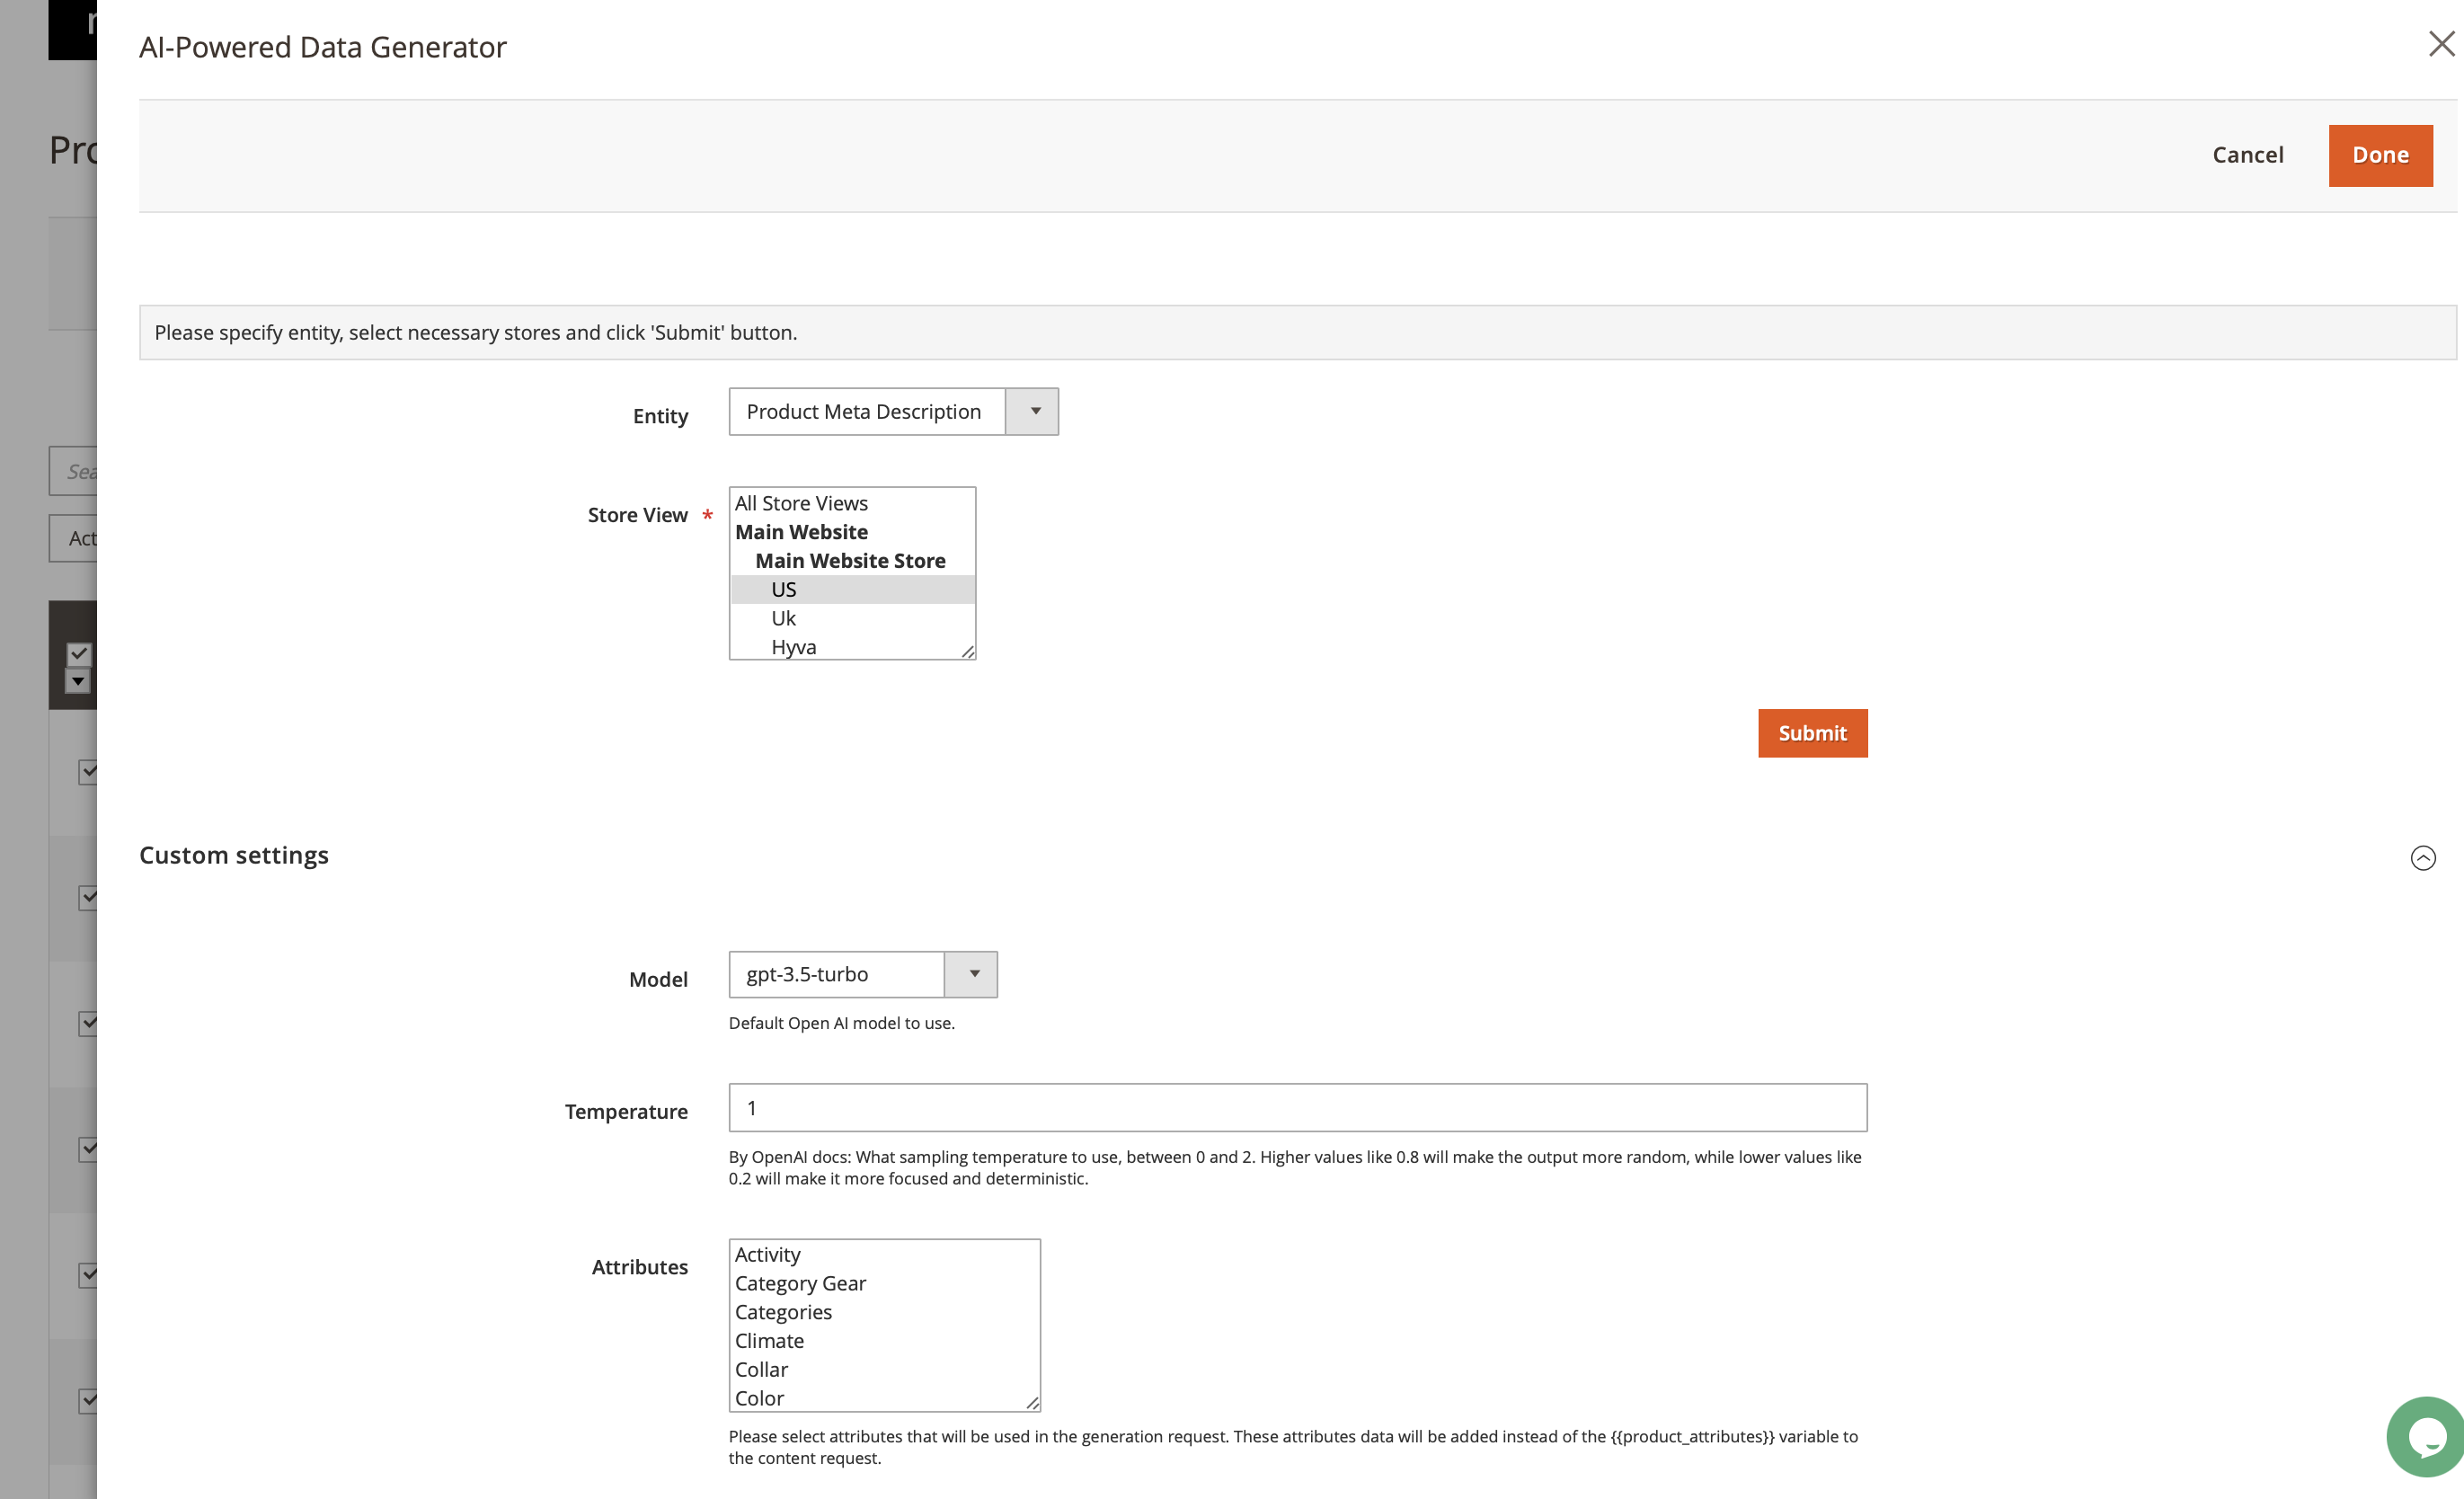
Once you click on the "Submit" button, the extension creates the queue for the generation. You can track the queue with the status in Stores -> Mageworx OpenAI Integration.
AI Logs
The extension logs each AI generatino request for your convience. To see the logs go to Stores -> Mageworx OpenAI Integration -> Product / Category Logs.
PWA themes
The extension out of the box has the integrations with the following PWA themes:
- Magento 2 Venia
Note
The free compatibility addon must be installed from https://github.com/mageworx/mageworx-seo-veniapwa
Hyvä theme
The extension out of the box has the integrations with Hyvä theme:
Note
The free compatibility addons must be installed. See this link for more details.
There are 2 compatibility add-ons for HtmlSitemap and SeoMarkup modules. To install them follow the steps:
Installation via packagist.com
-
Install via composer
composer require hyva-themes/magento2-mageworx-htmlsitemap
and
composer require hyva-themes/magento2-mageworx-seomarkup
-
Enable module
bin/magento setup:upgrade
GraphQL API Support
SeoBaseGraphQL module extends existing Output attributes for Product, Category, CmsPage queries and includes:
- canonical_url
- meta_robots
- mw_hreflangs
- items
- url
- code
Other attribute is defined according to the guide: https://devdocs.magento.com/guides/v2.4/graphql/queries/products.html#productfilterinput-attributes.
Product, Category, CmsPage queries have the syntax similar to the Magento user guide.
For example, product query has the following syntax:
json
products(
  search: String
  filter: ProductAttributeFilterInput
  pageSize: Int
  currentPage: Int
  sort: ProductAttributeSortInput
): Products
Request:
json
{
  products(filter: {sku: {eq: "24-WG02"}}) {
    total_count
    items {
      canonical_url
      meta_robots
      mw_hreflangs {
        items {
          url
          code
        }
      }
      name
      sku
        }
      }
    }
Response:
json
{
  "data": {
    "products": {
      "items": [
        {
          "canonical_url": "https://store_url/default/didi-sport-watch.html",
          "meta_robots": null,
          "mw_hreflangs": {
            "items": null
          },
          "name": "Didi Sport Watch",
          "sku": "24-WG02"
        }
      ]
    }
  }
}
HTMLSitemapGraphQL module allows displaying the HTML sitemap:
Syntax:
json
products(
  search: String
  filter: ProductAttributeFilterInput
  pageSize: Int
  currentPage: Int
  sort: ProductAttributeSortInput
): Products
The query includes the following attributes:
- meta_description
- meta_keywords
- categories
- cms_pages
- additional_links
- custom_links
Request:
json
{mwHtmlSitemap (storeId: 1) {
  categories {
    items {
      title
      url
      level
    }
  }
}
}
Response:
json
{
  "data": {
    "mwHtmlSitemap": {
      "categories": {
        "items": [
          {
            "title": "What's New",
            "url": "https://store_url/default/what-is-new.html",
            "level": 2
          },
          {
            "title": "test",
            "url": "https://store_url/default/test.html",
            "level": 2
          }
        ]
      }
    }
  }
}
The SeoXTemplatesGraphQl and the SeoCrossLinksGraphQl modifies the necessary attributes of the entities of Product, categories and CMS pages, when you call these entities using the standard GraphQL requests.
SeoMarkupGraphQl extends existing Output attributes for Product, Category, CmsPage queries and includes:
- For Product
- mw_seo_markup
- social_markup
- rich_snippets
- website
- seller
- product
- For Category
- mw_seo_markup
- social_markup
- rich_snippets
- website
- seller
- For CMS Page
- mw_seo_markup
- social_markup
- rich_snippets
- website
- seller
- webpage
Other attribute is defined according to the guide: https://devdocs.magento.com/guides/v2.4/graphql/queries/products.html#productfilterinput-attributes.
Product, Category, CmsPage queries have the syntax similar to the Magento user guide.
For example, product query has the following syntax:
json
products(
  search: String
  filter: ProductAttributeFilterInput
  pageSize: Int
  currentPage: Int
  sort: ProductAttributeSortInput
): Products
Request:
json
{
  products(filter: {sku: {eq: "24-WB04"}}) {
    items {
      name
      sku
      mw_seo_markup {
        social_markup
        rich_snippets {
          website
          seller
          product
      }
    }
    }
  }
}
Response:
json
{
  "data": {
    "products": {
      "items": [
        {
          "name": "Overnight Duffle",
          "sku": "24-WB07",
          "mw_seo_markup": {
            "social_markup": "\n<meta property=\"og:type\" content=\"product.item\"/>\n<meta property=\"og:title\" content=\"Overnight Duffle\"/>\n<meta property=\"og:description\" content=\"\"/>\n<meta property=\"og:url\" content=\"https://store_url/default/overnight-duffle.html\"/>\n<meta property=\"product:price:amount\" content=\"45\"/>\n<meta property=\"product:price:currency\" content=\"USD\"/>\n<meta property=\"og:image\" content=\"https://store_url/media/catalog/product/cache/c52db06da6f0de78fc16c7b26d943b31/w/b/wb07-brown-0.jpg\"/>\n<meta property=\"og:image:width\" content=\"265\"/>\n<meta property=\"og:image:height\" content=\"265\"/>\n<meta property=\"product:availability\" content=\"in stock\"/>\n<meta name=\"twitter:site\" content=\"111222333\"/>\n<meta name=\"twitter:creator\" content=\"111222333\"/>\n<meta name=\"twitter:card\" content=\"summary\"/>\n<meta name=\"twitter:title\" content=\"Overnight Duffle\"/>\n<meta name=\"twitter:description\" content=\"\"/>\n<meta name=\"twitter:image\" content=\"https://store_url/media/catalog/product/cache/c52db06da6f0de78fc16c7b26d943b31/w/b/wb07-brown-0.jpg\"/>\n<meta name=\"twitter:url\" content=\"https://store_url/default/overnight-duffle.html\"/>\n<meta name=\"twitter:label1\" content=\"Price\"/>\n<meta name=\"twitter:data1\" content=\"45\"/>\n<meta name=\"twitter:label2\" content=\"Availability\"/>\n<meta name=\"twitter:data2\" content=\"in stock\"/>\n",
            "rich_snippets": {
              "website": "<script type=\"application/ld+json\">{\"@context\":\"http:\\/\\/schema.org\",\"@type\":\"WebSite\",\"url\":\"https:\\/\\/store_url\\/\"}</script>",
              "seller": "<script type=\"application/ld+json\">{\"@context\":\"http:\\/\\/schema.org\",\"@type\":\"LocalBusiness\",\"name\":\"Name For Seller\",\"description\":\"Description For Seller\",\"address\":{\"@type\":\"PostalAddress\",\"addressLocality\":\"\",\"addressRegion\":\"\",\"streetAddress\":\"Street For Seller\",\"postalCode\":\"\"},\"image\":\"https:\\/\\/store_url\\/media\\/seller_image\\/default\\/best-seller-gold-sign-label-template-vector-1356860.jpg\",\"url\":\"https:\\/\\/store_url\\/\"}</script>",
              "product": "<script type=\"application/ld+json\">{\"@context\":\"http:\\/\\/schema.org\",\"@type\":\"Product\",\"name\":\"Overnight Duffle\",\"description\":null,\"image\":\"https:\\/\\/store_url\\/media\\/catalog\\/product\\/cache\\/c52db06da6f0de78fc16c7b26d943b31\\/w\\/b\\/wb07-brown-0.jpg\",\"offers\":{\"@type\":\"http:\\/\\/schema.org\\/Offer\",\"price\":45,\"url\":\"https:\\/\\/store_url\\/default\\/overnight-duffle.html\",\"priceCurrency\":\"USD\",\"availability\":\"http:\\/\\/schema.org\\/InStock\"},\"aggregateRating\":{\"ratingValue\":\"60\",\"reviewCount\":\"3\",\"bestRating\":100,\"worstRating\":0,\"@type\":\"AggregateRating\"}}</script><script type=\"application/ld+json\">{\"@context\":\"http:\\/\\/schema.org\\/\",\"@type\":\"WebPage\",\"speakable\":{\"@type\":\"SpeakableSpecification\",\"cssSelector\":[\".description\"],\"xpath\":[\"\\/html\\/head\\/title\"]}}</script>"
            }
          }
        }
      ]
    }
SeoRedirectsGraphQl module modifies the current values of the existing Output attributes for urlResolver query if there is at least 1 Mageworx redirect for the 'requested URL' entity.
This module is compatible with:
- redirects for deleted products
- custom redirects with Request Entity Type and Target Entity Type equal to Product, Category or CMS Page
For example, urlResolver query has the following syntax:
json
{urlResolver(url: String!): EntityUrl}
Request:
json
{
  urlResolver(url: "savvy-shoulder-tote.html") {
    id
    relative_url
    redirectCode
    type
  }
}
Response:
json
{
  "data": {
    "urlResolver": {
      "id": 2047,
      "relative_url": "erika-running-short.html",
      "redirectCode": 301,
      "type": "PRODUCT"
    }
  }
}
Glossary
Meta Robots
To be visible in the search results, the webpage must be visited by the Web crawler. Generally, when the Web crawler visits some website, it reads all the links on the pages and then analyzes their value, and includes the usefule ones in its index. Meta robots tags are pieces of code that provide crawling instructions for the search engine bots.
If the store owners don’t need some webpage to be crawled by the web spider, they need to put the NOINDEX tag on this page.
NOFOLLOW tag tells the Web crawler not to follow any links it finds on that page, thus hiding them from indexation. Note that if one of the mentioned pages is also linked from somewhere else (e.g. from another page), the crawler can still find and index it via that other link.
Thus, using NOFOLLOW is not the best practice to ensure that the content won’t get into the search results, NOINDEX is the best way to hide such pages. The eCommerce websites have some peculiarities over the ordinary website. Content may dynamically change, products get out-of-stock, prices go up and down, new products appear in some categories, etc. The website caching may provide some irrelevant information over time.
To avoid displaying the cached version of the page, the store owners can use the NOARCHIVE tag. This tag only removes the Cached link for the page. Google will continue to index the page and display its snippet.
Canonical
If the store owners have some particular page that is accessible from multiple URLs or different pages with similar content, they need to explicitly indicate which URL is the most reliable one (canonical). Otherwise, the Web crawler will have to choose it on its own or consider both addresses as equivalent, and this can lead to undesirable consequences when the irrelevent page appears in the search results. You can specify canonical tags for various types of pages (product, category, layered navigation, reviews pages) separately.
Hreflang
If the store owner is running a multi-language store with exactly the same content localized for different languages that may lead to duplicate content issues. To avoid it, the store owner should inform the Web crawler that all these pages are just the alternate versions of the original one.
The hreflang tag helps the Web crawler understand which version of your website should be shown in certain locations. Thus, the search engine will deliver the correct language version of the site to the targeted foreign audience. Also, if the hreflangs are used, the Web crawler won’t treat these localized pages as duplicates.
Meta Information
Metadata can help the crawler understand what the content on the page is about and give visitors valuable insight into what the content is on any given page on the website. Meta elements are part of a webpage's <head> section. Multiple Meta elements with different attributes can be used on the same page. Meta elements can be used to specify page title or description, they are visible in the search results.
Meta Title
Meta title serves as the title of any given webpage. Search engines display them prominently on the search engine results pages. Actually, meta title is the main way users can find out the name of the page they've found on the results page. So, actually, besides being a quite important parameter for Web crawlers, the store owner can also use it to influence users. Title tags should be no longer than 70 characters (with spaces).
Meta Description
Meta descriptions describe the content on the webpage in greater detail. The content of the meta description is not a ranking factor. But it is vital to encourage users to click on the website URL. The meta description tags should be no longer than 280-320 characters with spaces. If no description is set up, the search engine will automatically pull any snippet of text instead, which may lead to misunderstanding with searchers and worsen the page click through rate (CTR) index.
The meta title and meta description shown on the search engine results page.
Redirects
A redirect is a way to quickly and discreetly send both users and search engines to a different URL from the one they originally requested. The two most commonly used redirects are 301 and 302. Redirects tell the search engine robots that there has been a change in the URLs page and that they have to go somewhere else, permanently (301 redirect) or temporarily (302 redirect). Redirects are highly imporatant for the eCommerce websites because their structure is constantly changing: the products may get fully sold out, the supply may be completely stopped, the categories can be deleted and so on. So the correct setup of the redirects is very important and helps to avoid the possible sales loss.
301 redirect
By using the 301 redirect, the store owner tells the search engine robots that this page is no longer available in this location and that it should no longer be indexed. A 301 redirect is a permanent redirect which passes almost all the ranking power of some specific page to the redirected page. In most instances, the 301 redirect is the best method for implementing redirects on a website. Since a 301 permanently leads visitors from the old URL to a new one, in should be used only if the store owner is sure that the old URL will never be used again. If we need to use the URL again, a temporary redirect should be created.
302 redirect
A 302 status code is commonly referred as “temporarily moved.” This redirect doesn’t carry or pass the ranking power to the new destination. What it does do is getting the user to another location so that the client won't see the error pages/404 etc. The 302 can be useful in case the product becomes out of stock. For instance, you have a product that you no longer have on sale – e.g.: seasonal or out-of-stock products. In this case, you might want to use a 302 redirect to send the user to the category page. When using the 302 redirect you are telling the search engine crawlers that your content is just offline temporarily, and they should keep the value of that page intact and not pass it to another URL.
Redirects for deleted products and custom redirects
When you delete a product, customers who use the direct link may get onto the 404 page and leave your website. To avoid this, you need to create a temporary or permanent redirect for such product pages. Also, with the extension, you can set custom redirects for any category or CMS page.
FAQ
Why we have 2 canonicals on one page?
It might happen if the native Magento 2 canonical tags are enabled. To disable the standard canonical go to STORES ⟶ Configuration ⟶ CATALOG ⟶ Catalog ⟶ Search Engine Optimization:
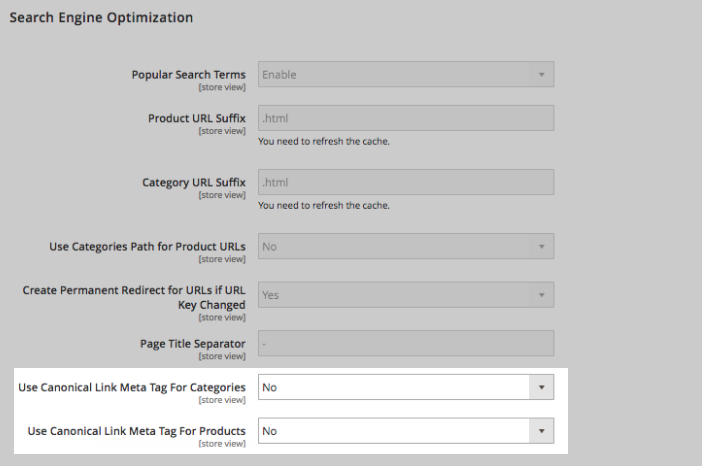
Disabling these 2 settings will disable the second canonical that is created by Magento.
Can we import/export SEO templates?
Currently, this feature is not available in our extension.
Why our sitemap is not generated by CRON?
CRON is a time-based job scheduler. Several Magento features require its correct setup in order to schedule activities that occur in the future.
Our extension has the ability to generate the sitemaps automatically. It uses the default Magento mechanism for creating the sitemap cronjobs.
If the website successfully generates scheduled sitemaps with out-of-the-box Magento functionality, then it should work with our extension enabled as well. If you face some difficulties only after you enable our software, please contact our support.
Otherwise, please follow these steps:
- First of all, check that the CRON is running correctly on your website. Follow this guide to check.
- If you have a lot of pages and the CRON operates simultaneously with some resource-intensive tasks, it may lead to the sitemap generation issues. In this case, the error will be added to the cron_schedule table in your database.
Can we set the canonical URL for individual products?
Yes, you can set a custom canonical tag for each product separately if required. See this section for more details.
How could we check that XML sitemap generation is working properly?
The XML sitemap can be generated either automatically by CRON or manually. To observe the sitemaps generated by means of our extension, go to MARKETING ⟶ SEO & Search ⟶ Sitemap by Mageworx.
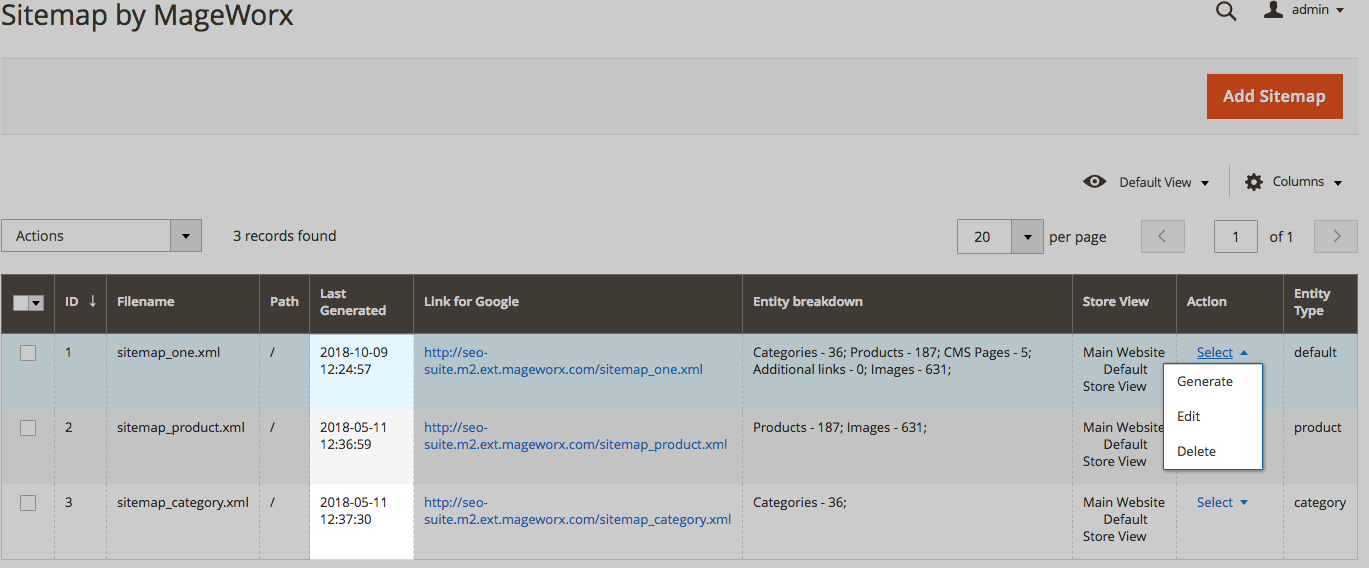
Each template has the Select action link that allows you to regenerate the sitemap. The sitemap generation time can be found in the Last Generated table.
If you set the CRON to generate the sitemaps on a daily basis, yet the last generated timestamp is reasonably old, you may have some problems with the sitemaps generation.
Please check this question in our FAQ section for the CRON-related issues.
What information should be included in robots.txt file or should it be empty?
The robots.txt file is used for communicating with the search engines. This file defines how to inform the bots about the pages of your site that should be excluded (or, vice versa, opened) for crawling.
By default, Magento 2 allows the store owner to generate and configure robots.txt files. You can prefer to use the default indexation settings or specify custom instructions for different search engines.
To configure the robots.txt file, go to CONTENT ⟶ Design ⟶ Configuration. Select the desired website or store view and open the Search Engine Robots tab.
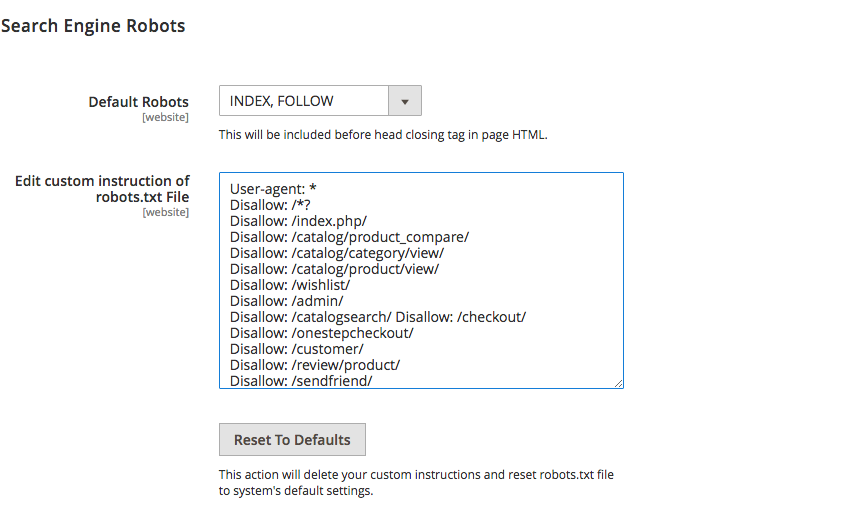
The Edit custom instruction of robots.txt file section gives the possibility to add the desired rules. We recommend using the following custom robots.txt for your Magento 2 store:
User-agent: *
Disallow: /*?
Disallow: /index.php/
Disallow: /catalog/product_compare/
Disallow: /catalog/category/view/
Disallow: /catalog/product/view/
Disallow: /wishlist/
Disallow: /admin/
Disallow: /catalogsearch/
Disallow: /checkout/
Disallow: /onestepcheckout/
Disallow: /customer/
Disallow: /review/product/
Disallow: /sendfriend/
Disallow: /enable-cookies/
Disallow: /LICENSE.txt
Disallow: /LICENSE.html
Disallow: /skin/
Disallow: /js/
Disallow: /directory/
Sitemap.xml when docroot is set to /pub
When using /pub as docroot, the full path to your XML sitemap without SEO Suite will be yourstore/pub/sitemap.xml. There are several ways to resolve this:
1) 'Server path' field
Our extension manages to handle this case correctly and generate the URL without the "pub". For this, we added the "Server path" field for each XML sitemap. If your Magento is installed in the "pub" folder, you should enter "pub" into the "Server path" field:
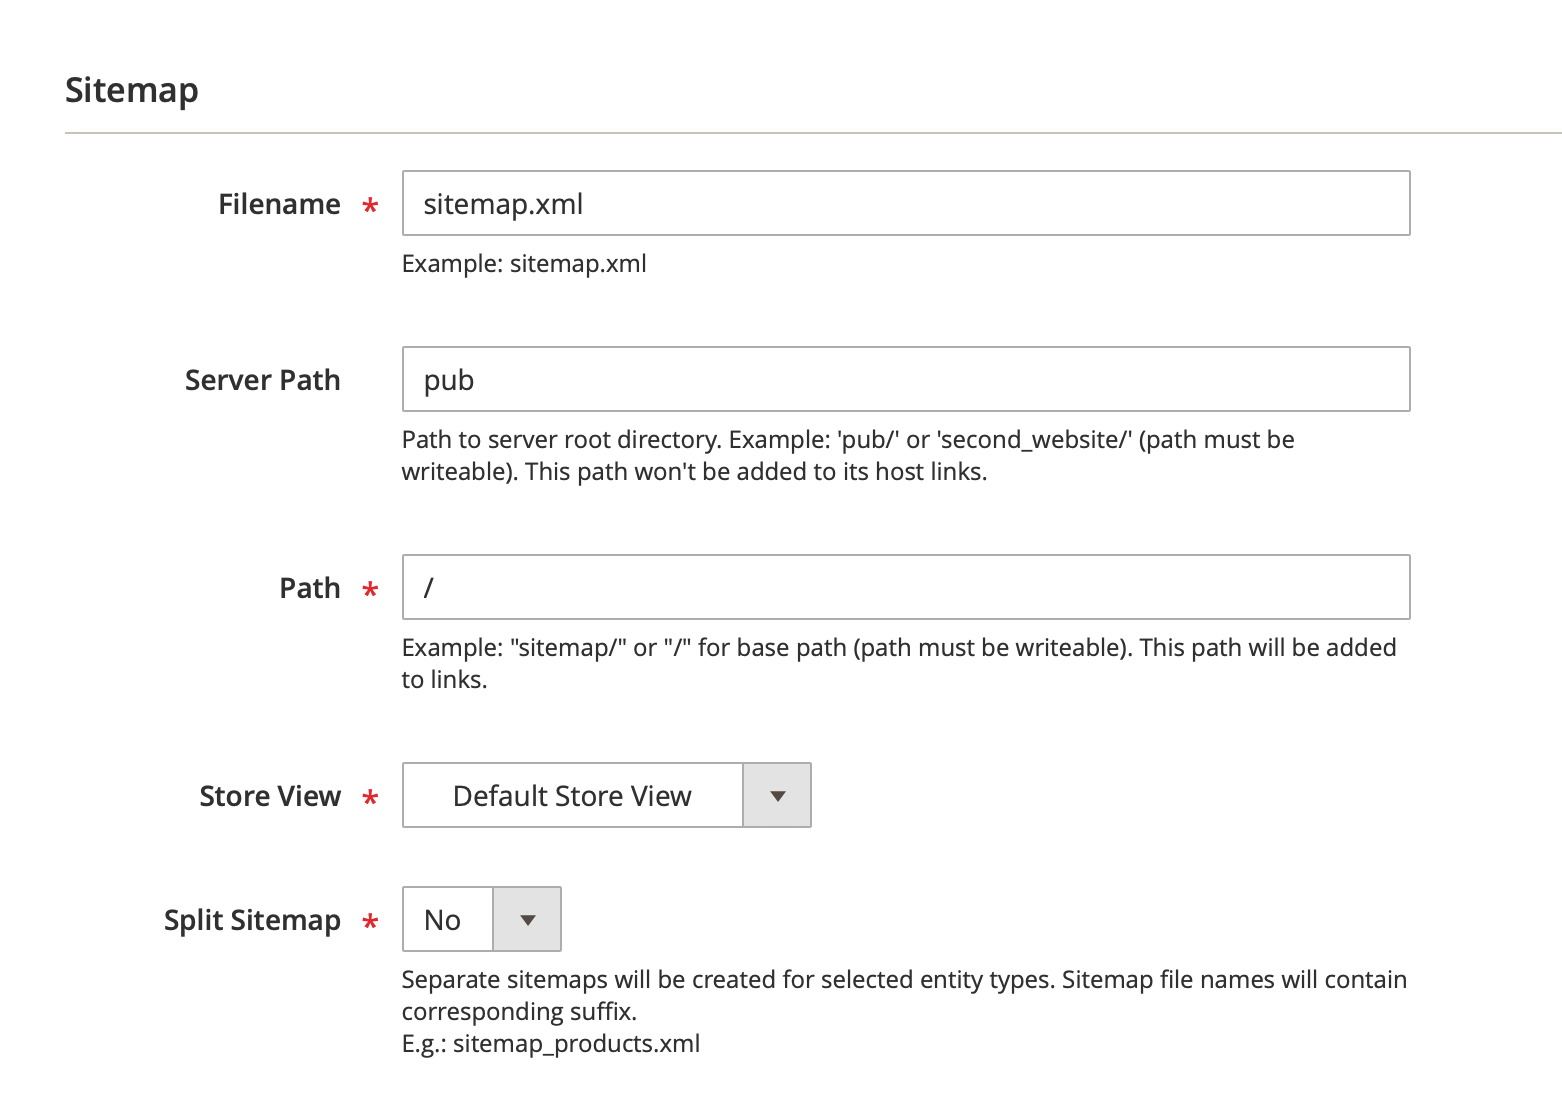
In this case, our extension will check the availability of this sitemap.xml file on your server and if the sitemap.xml is accessible by this path, the extension will generate the sitemap URL without the "pub" folder.
Note
If your store is http-protected, our extension won't be able to validate the availability of such sitemap files and it will generate the URL with the "pub" folder. In this case, you should simply re-generate the XML sitemap, when the http-authorization is removed.
2) Use Nginx Configuration
Add the following code lines to nginx config for your website:
php
location ~ ^/(sitemap.*\.xml)$ {
        alias <your Magento install dir>/$1;
}
3) Use Symlinks
This will fail if a symlink already exists.
1) To create a new symlink, complete the following actions:
sh
ln -s <your Magento install dir>/sitemap.xml <your Magento install dir>/pub/sitemap.xml
2) To create or update a symlink, complete the following actions:
sh
ln -sf <your Magento install dir>/sitemap.xml <your Magento install dir>/pub/sitemap.xml
When using clauses number 1 and 2, the symlink ownership will remain the same as in the source file.
You can use chown to change the symlink’s ownership manually. To change the ownership of a symlink, complete the following actions:
sh
cd <your Magento install dir>/pub
chown -h <Magento file system owner>:<owner group> sitemap.xml
Robots.txt when docroot is set to /pub
When using /pub as docroot, the robots.txt file might be unavailable. There are several ways to resolve this:
1) Use Nginx Configuration
Add the following code lines to nginx config for your website:
php
location ~ ^/(robots\.txt)$ {
        alias <your Magento install dir>/$1;
}
2) Use Symlinks
This will fail if a symlink already exists.
1) To create a new symlink, complete the following actions:
sh
ln -s <your Magento install dir>/robots.txt <your Magento install dir>/pub/robots.txt
2) To create or update a symlink, complete the following actions:
sh
ln -sf <your Magento install dir>/robots.txt <your Magento install dir>/pub/robots.txt
When using clauses number 1 and 2, the symlink ownership will remain the same as in the source file.
You can use chown to change the symlink’s ownership manually. To change the ownership of a symlink, complete the following actions:
sh
cd <your Magento install dir>/pub
chown -h <Magento file system owner>:<owner group> robots.txt
Does Mageworx XML sitemap include the pages added by 3rd party modules?
Our XML sitemap is developed the way to include all 3rd party pages, which are added correctly to Magento 2 XML sitemap. I.e. if a 3rd party module adds its own custom pages to the native Magento 2 XML sitemap, these pages will be automatically added to our XML sitemap. Moreover, we have the extended compatibility with Mirasvit Blog, Mageplaza Blog and Aheadworks Blog modules.
Is SEO Suite compatible with Amasty Improved Navigation?
All our features work with Amasty module except the Mageworx SEO Navigation URLs (STORES ⟶ Configuration ⟶ Mageworx - SEO - SEO-friendly URLs - Categoty pages - Enable SEO LN URLs). This setting should be disabled.
Got Questions?
Need help with the extensions? Feel free submit a ticket from https://www.mageworx.com/support/
Mageworx offers outstanding services developing custom-tailored solutions for Magento platform to attain your eCommerce objectives. Our professional impassioned team provides profound and custom oriented development of your project in a short timeframe.